

Manage who can see your landing pages
Give contacts access to custom pages one at a time or in bulk, add new contacts, and send them an invitation email.
Control which contacts can see each of your landing pages. From one screen you can check who has access, change it for one contact or many at once, add people who aren't contacts yet, and send them an invitation email.
Where to find it: go to your IDM firm → Portal → Access → Page access.
Before you start: you need at least one published page.
1 · Understand who can see what
Your landing pages come in two types:
- Custom pages are the pages your team creates, including your Home page. You decide which contacts can see each one.
- System pages are created for your firm automatically: Resources, Documents, Inbox and Profile. Every contact always has access to them, so you don't need to manage them.
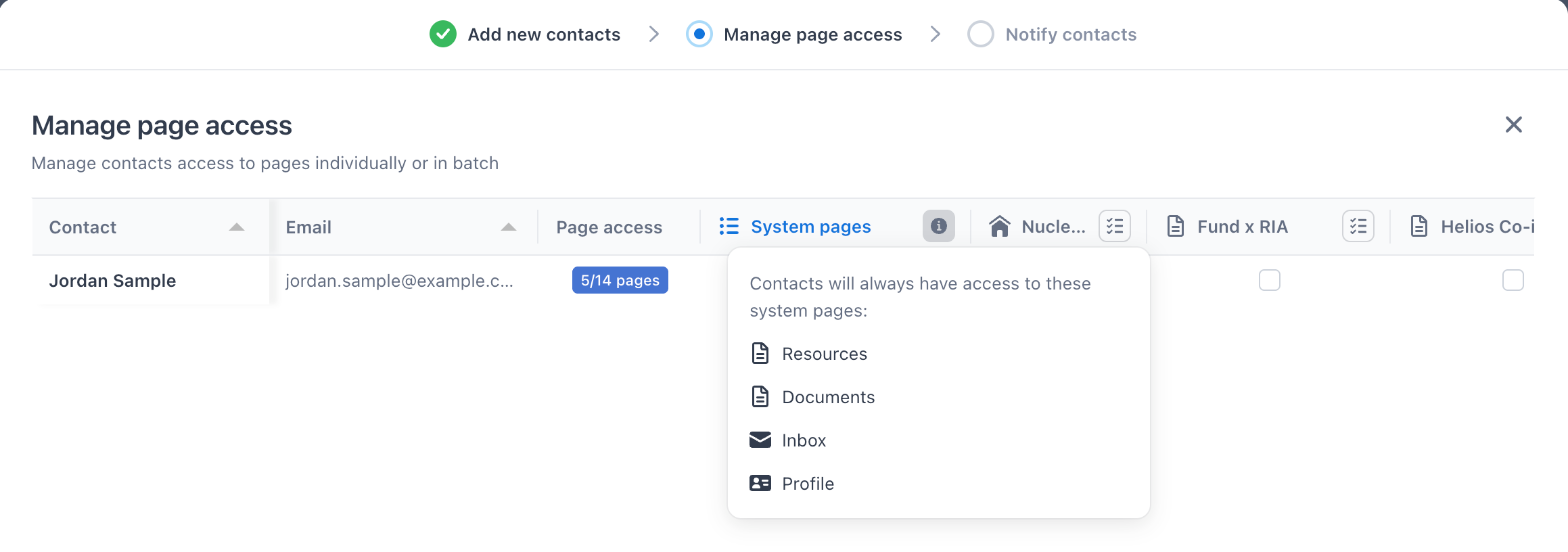
A contact can get access to a custom page in two ways:
- Direct access: you give it to them here, on the Page access screen.
- Auto-access: the page grants access automatically to contacts with financial data permission on the investments linked to it. You set this up on the page itself, under Landing pages.
2 · Check who has access
The Page access table lists your contacts, one row each.
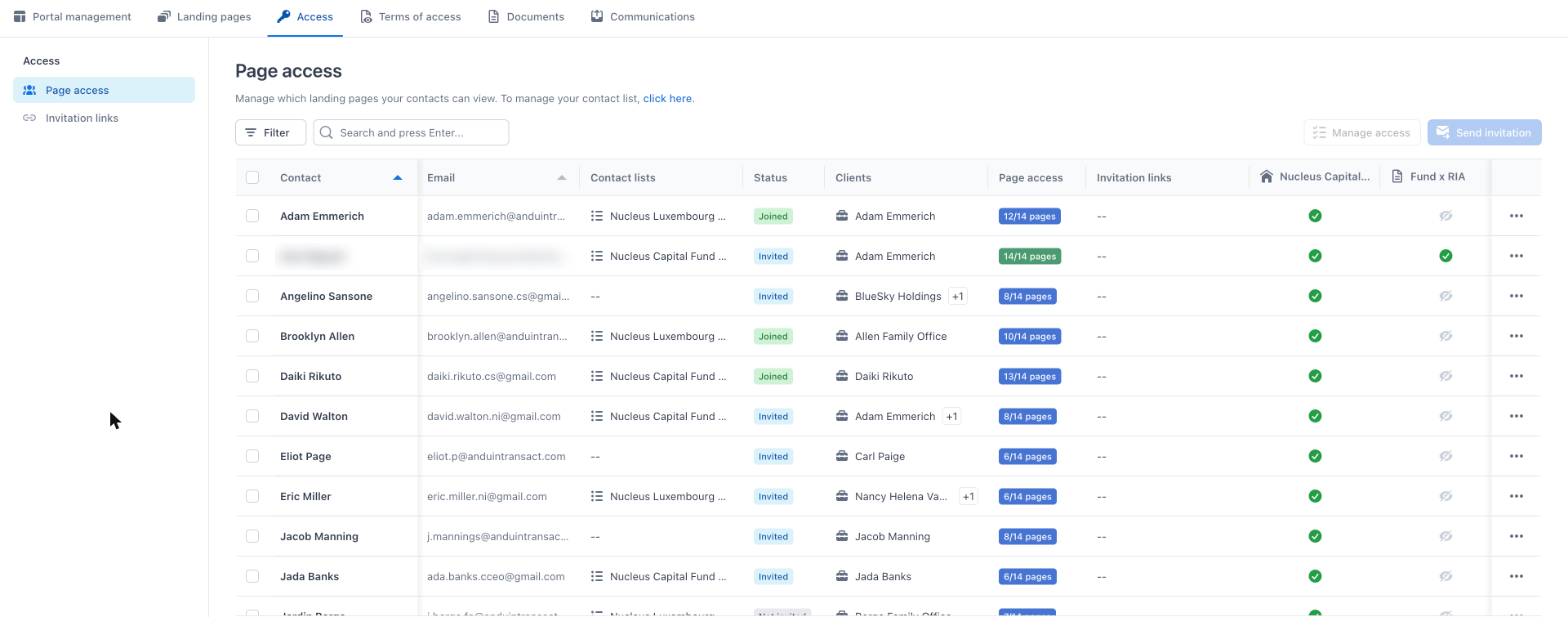
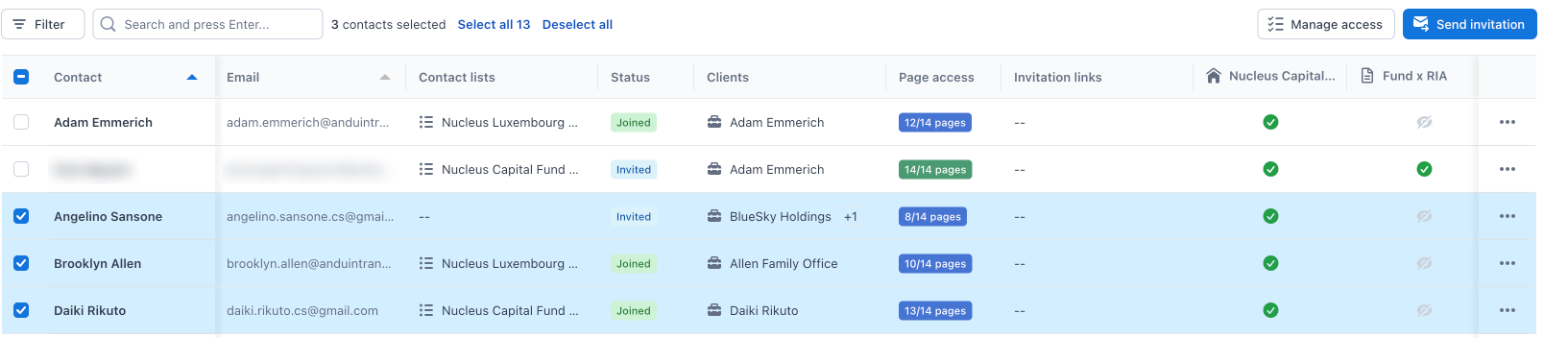
- Page access shows how many pages each contact can see, for example 12/14 pages.
- The columns on the right show one page each. A green tick means the contact can see that page; a crossed-out eye means they can't.
- Status shows where each contact is with their invitation:
| Status | What it means |
|---|---|
| Not invited | Added without an invitation email. |
| Invited | Has been sent an invitation. Hover over the label to see when. |
| Joined | Has joined your portal. |
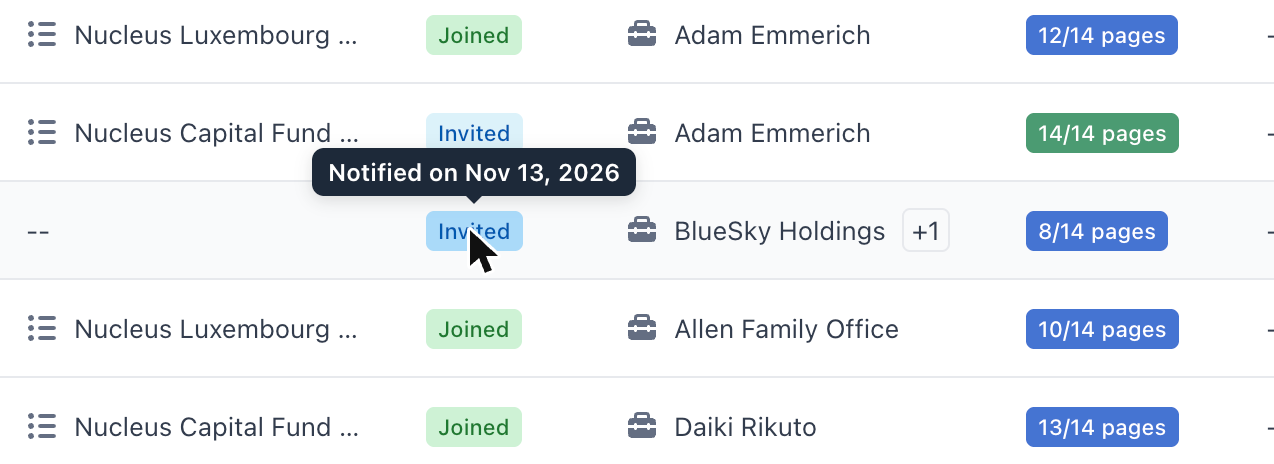
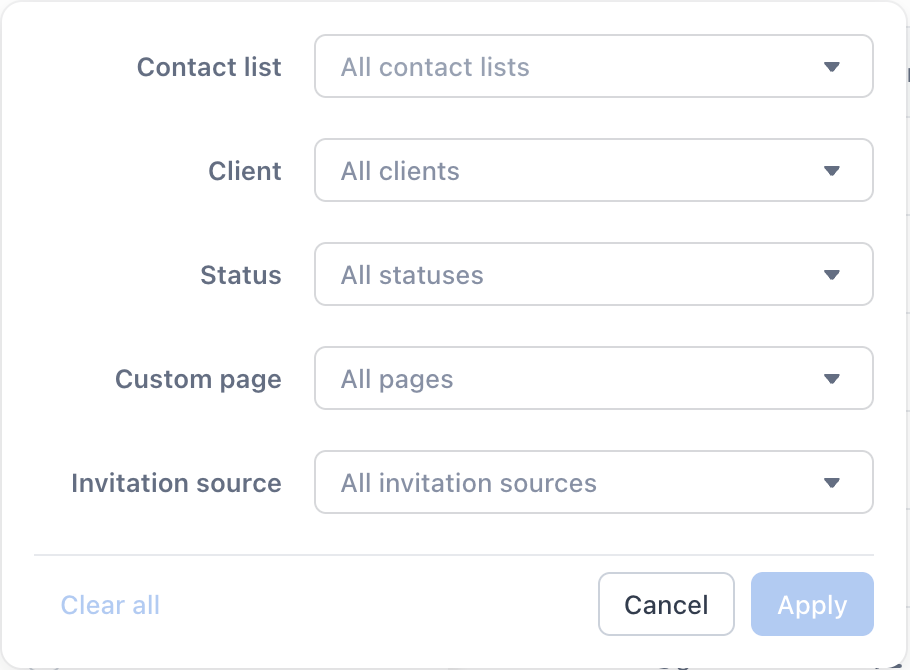
To find contacts, type in the search box and press Enter, or click Filter to narrow the list by Contact list, Client, Status, Custom page or Invitation source.
Tip: To edit contact details, use the click here link at the top of the screen. It opens your firm's contact list.
3 · Change one contact's access
1. Open their access settings
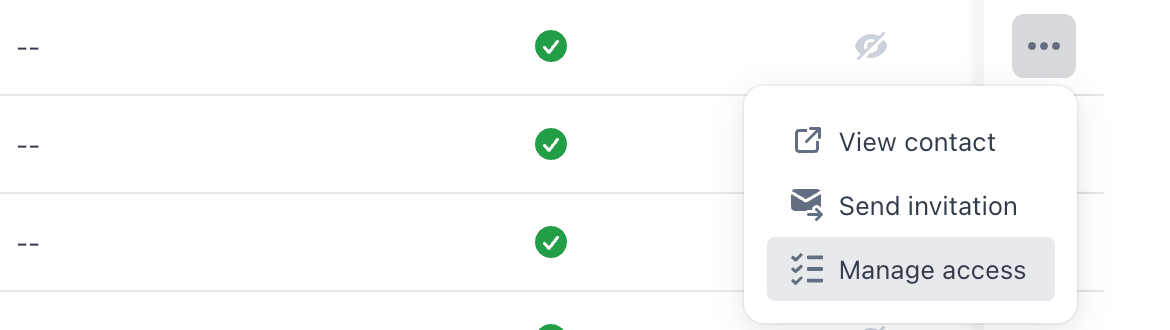
Click ⋯ at the end of the contact's row and choose Manage access.
2. Tick or untick pages, then update
The window lists every custom page. Tick Direct access for each page the contact should see, and untick the ones they shouldn't. The Auto-access column shows pages they can already see through their investments, such as Via 6 investments. Click Update access.
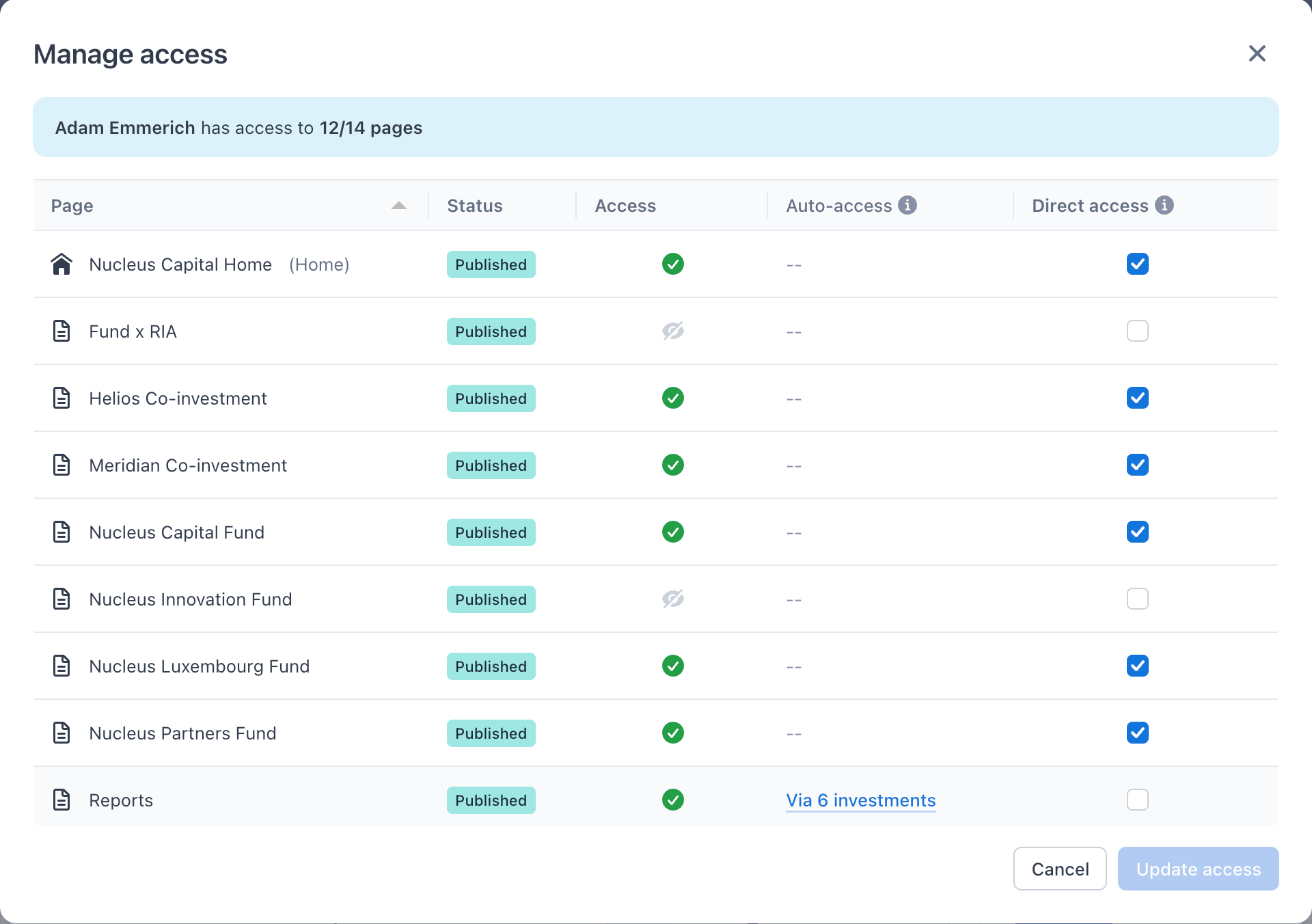
Tip: Unticking Direct access doesn't remove auto-access. If a page still shows a tick under Access, the contact can still see it through their investments.
4 · Change access for many contacts at once
1. Select the contacts
Tick the box next to each contact. Use Select all to pick everyone in the list, or Deselect all to start over.
2. Choose what happens on each page
Click Manage access in the toolbar. For each page, choose one option:
- Keep existing: leave each contact's access as it is.
- Remove access: take away direct access from all selected contacts.
- Grant access: give all selected contacts access.
To apply one option to every page, use the tick button next to that column's name. Click View selected contacts to double-check who you're updating, then click Update access.
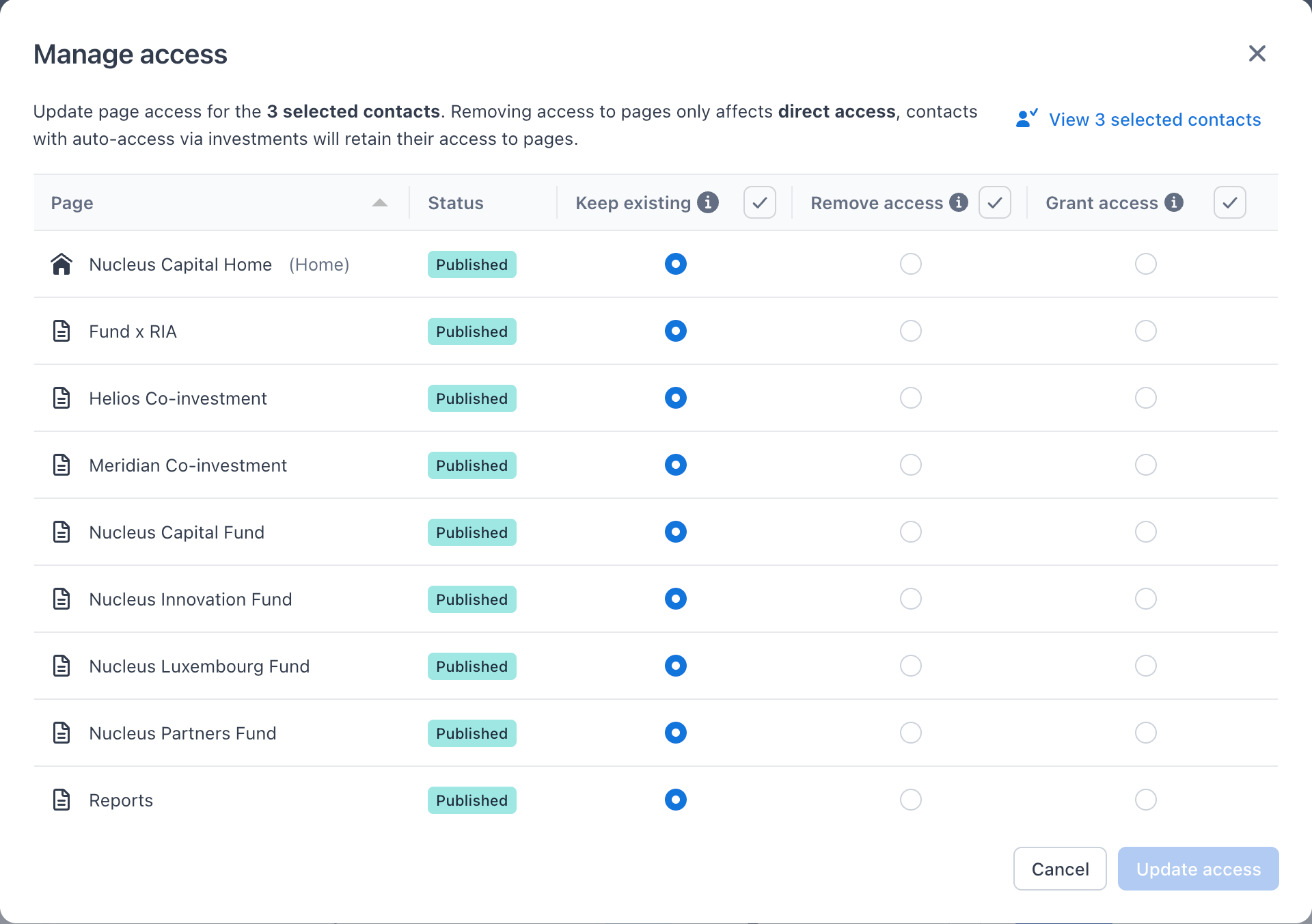
Tip: Remove access only removes direct access. Contacts with auto-access through their investments keep seeing those pages.
After you update access, you're asked whether to notify these contacts about the change. You can send the email now or skip it and send it later with Send invitation (see section 6).
5 · Add someone who isn't a contact yet
1. Search first
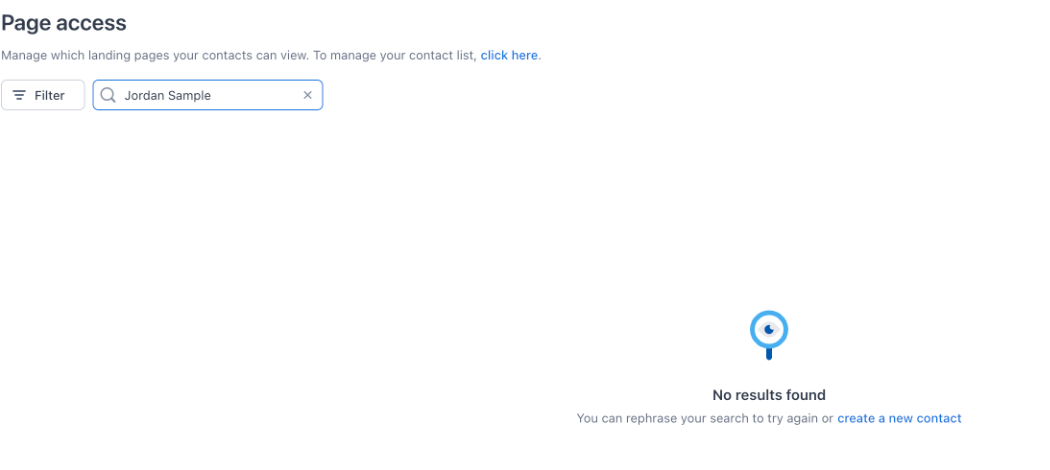
Search for the person by name or email. If they're already a contact, manage their access as in sections 3 and 4. If no one matches, click create a new contact.
2. Enter their details
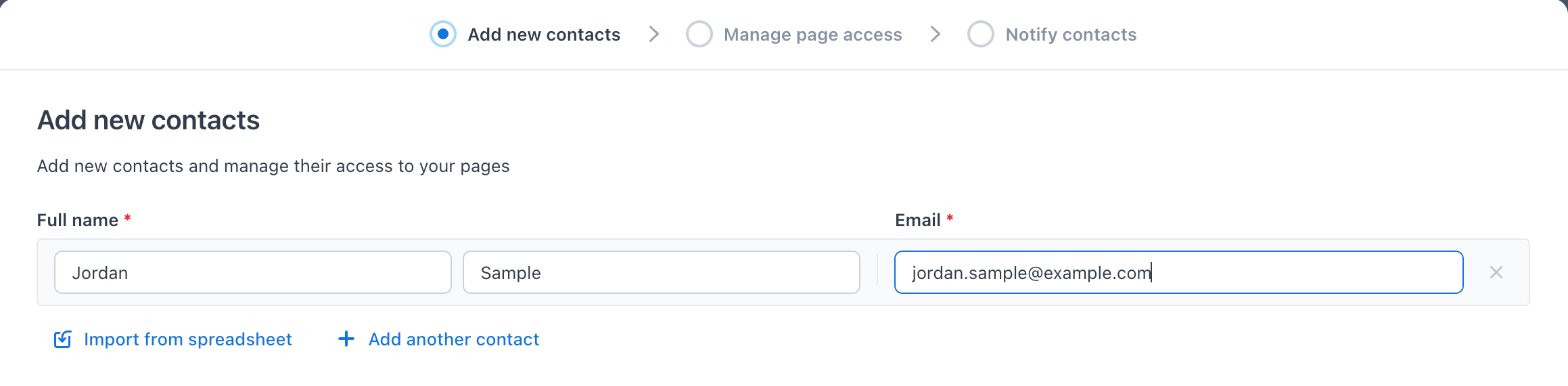
Type their first name, last name and email. Click Add another contact to add more people, or Import from spreadsheet to add many at once. Click Next.
3. Choose their pages
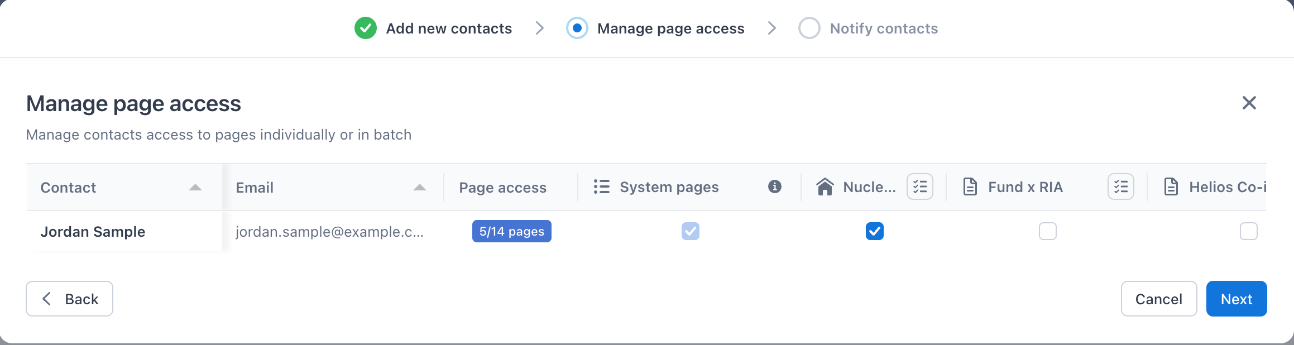
Tick the custom pages each new contact should see. System pages are always included. Click Next.
4. Decide whether to email them now
Choose Notify contacts to send an invitation email right away (click Edit message to change it first), or Don't notify contacts to send it later. Click Add contact.
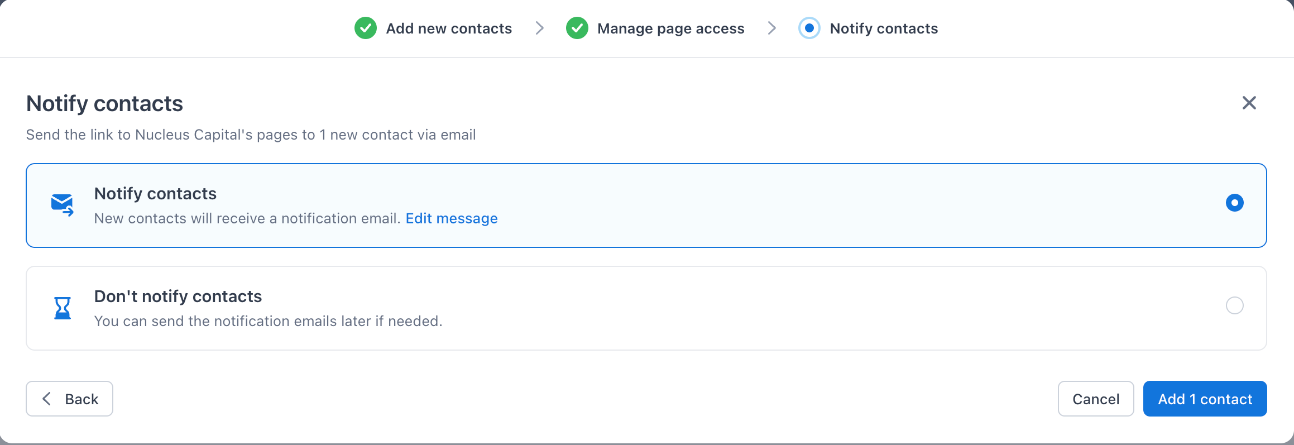
The new contacts are added to your firm's contacts with the access you chose.
Tip: If an email you enter already belongs to a contact in your firm, that person isn't added again. Find them in the table and manage their access instead.
6 · Invite or re-invite contacts
1. Select who to email
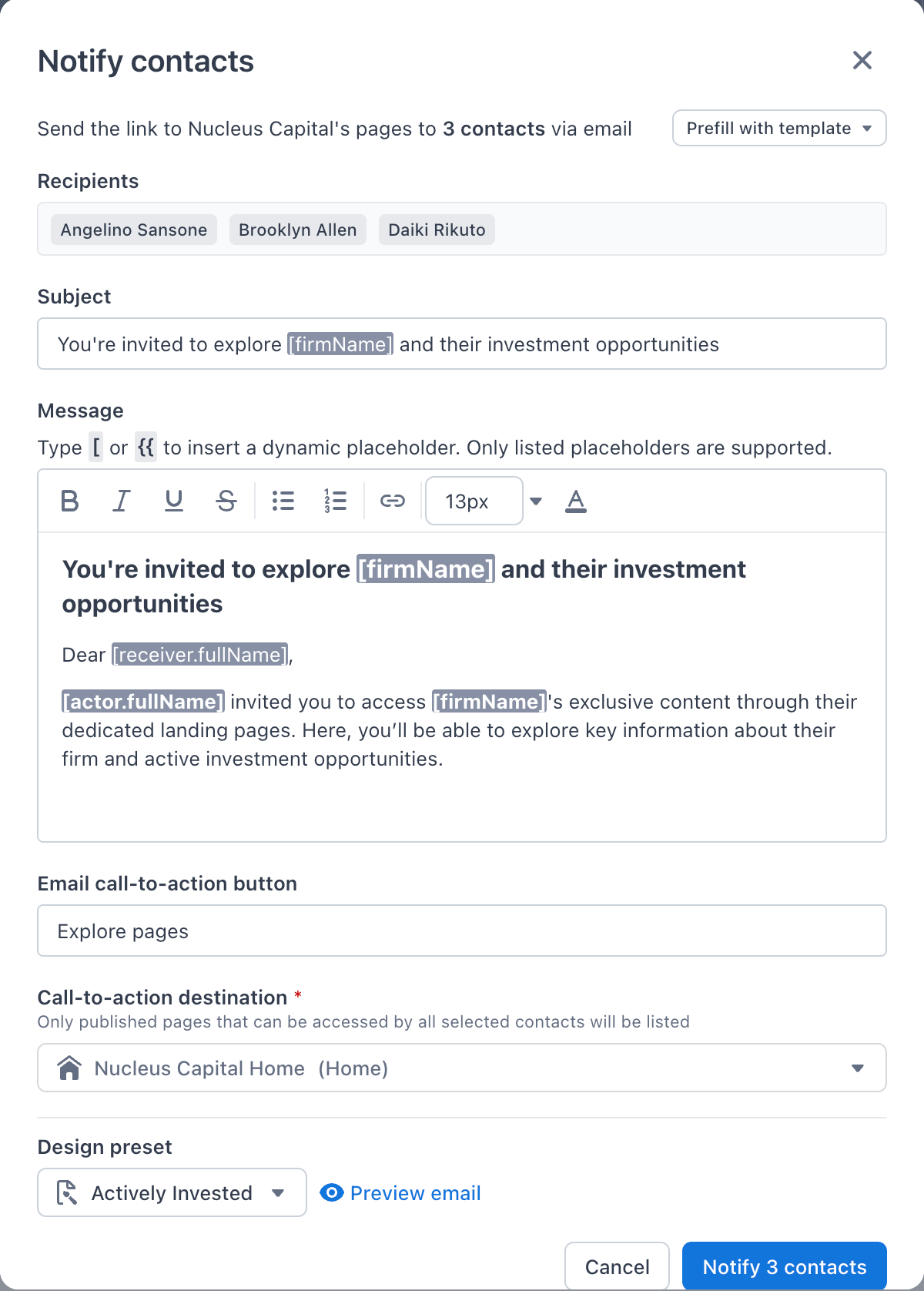
Select one or more contacts and click Send invitation in the toolbar. For a single contact, you can also click ⋯ → Send invitation.
2. Write the email and pick where it leads
- Start from a saved message with Prefill with template, or edit the Subject and Message. To add personal details like the contact's name, type [ or {{ and pick a placeholder.
- Change the Email call-to-action button text if you like.
- Pick a Call-to-action destination: the page the email's button opens. Only published pages that every selected contact can see are listed.
- Choose a Design preset and click Preview email to check how it looks.
Click Notify to send. Each contact's status changes to Invited.
7 · Share pages with a group through a link
To give a group of people access without adding each one by hand, create an invitation link. See Landing Page Invitation Links.
Good to know
- Contacts only see pages that are published and shared with them. An unpublished page stays hidden, even for contacts with access.
- Keep destination pages published. If the page an invitation email points to is unpublished later, the email's button stops working.
- Removing access only affects direct access. Auto-access through investments stays until you change it on the page.
- There's a limit on how many contacts you can email at once. If you go over it, you'll be asked to select fewer contacts.