

Page group widget
Show contacts the opportunity pages they can access, as a grid or carousel of cards.
Showcase several opportunity pages in one place, such as your open funds or co-investments. Each contact sees a card only for the pages they have access to, and clicks through to open the page.
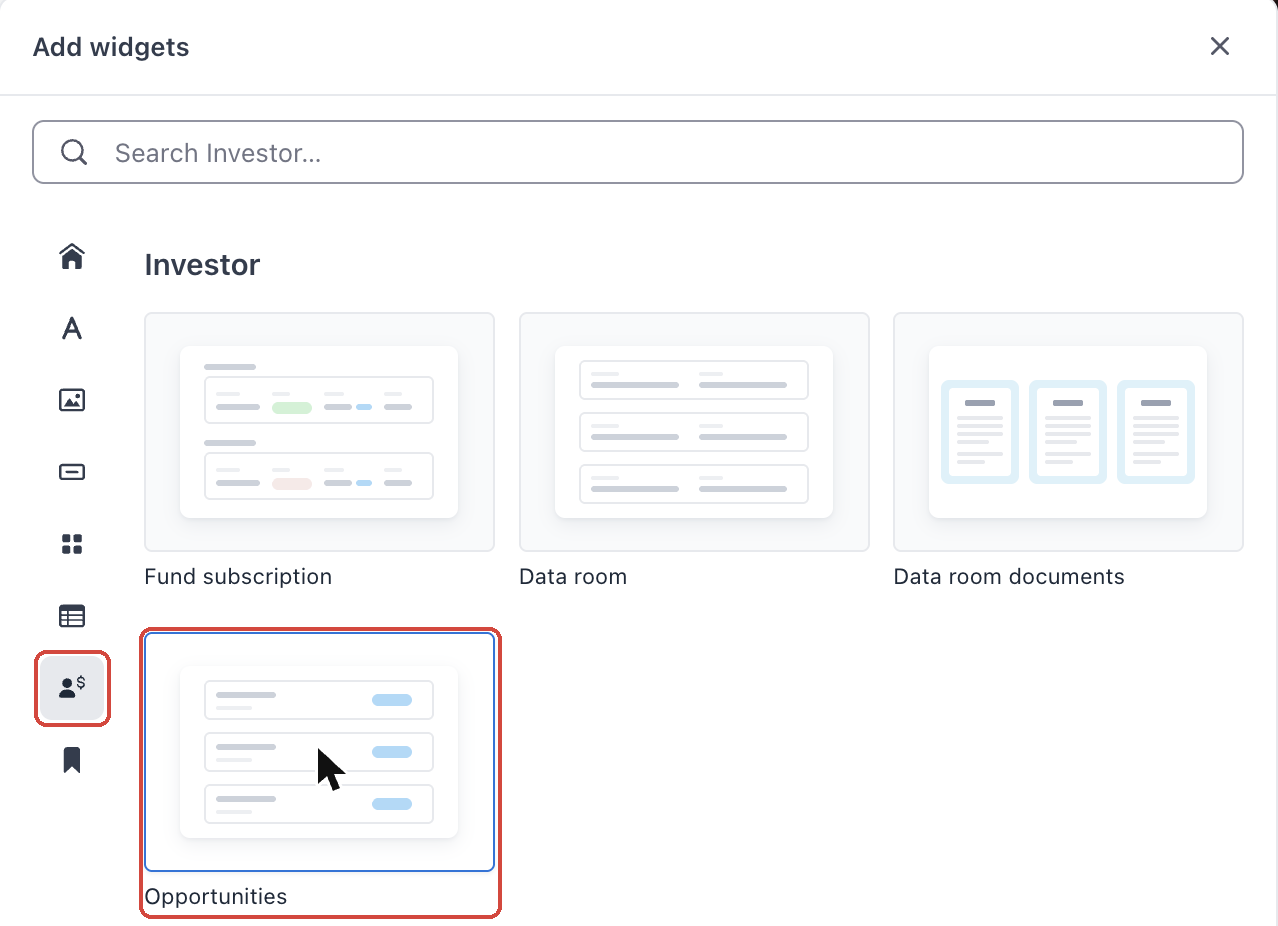
Where to find it: in the landing page builder, the widget is listed as Opportunities under the Investor widgets and the Opportunities section templates. When you select it, its settings panel is titled Page Group.
1 · Add the widget to your page
1. Start from a ready-made section
Click the section that should sit above the new one, then click Add Section → Template section. In the Choose a section dialog, select the Opportunities category and pick a layout. Each template comes with a heading, a short description and the widget.
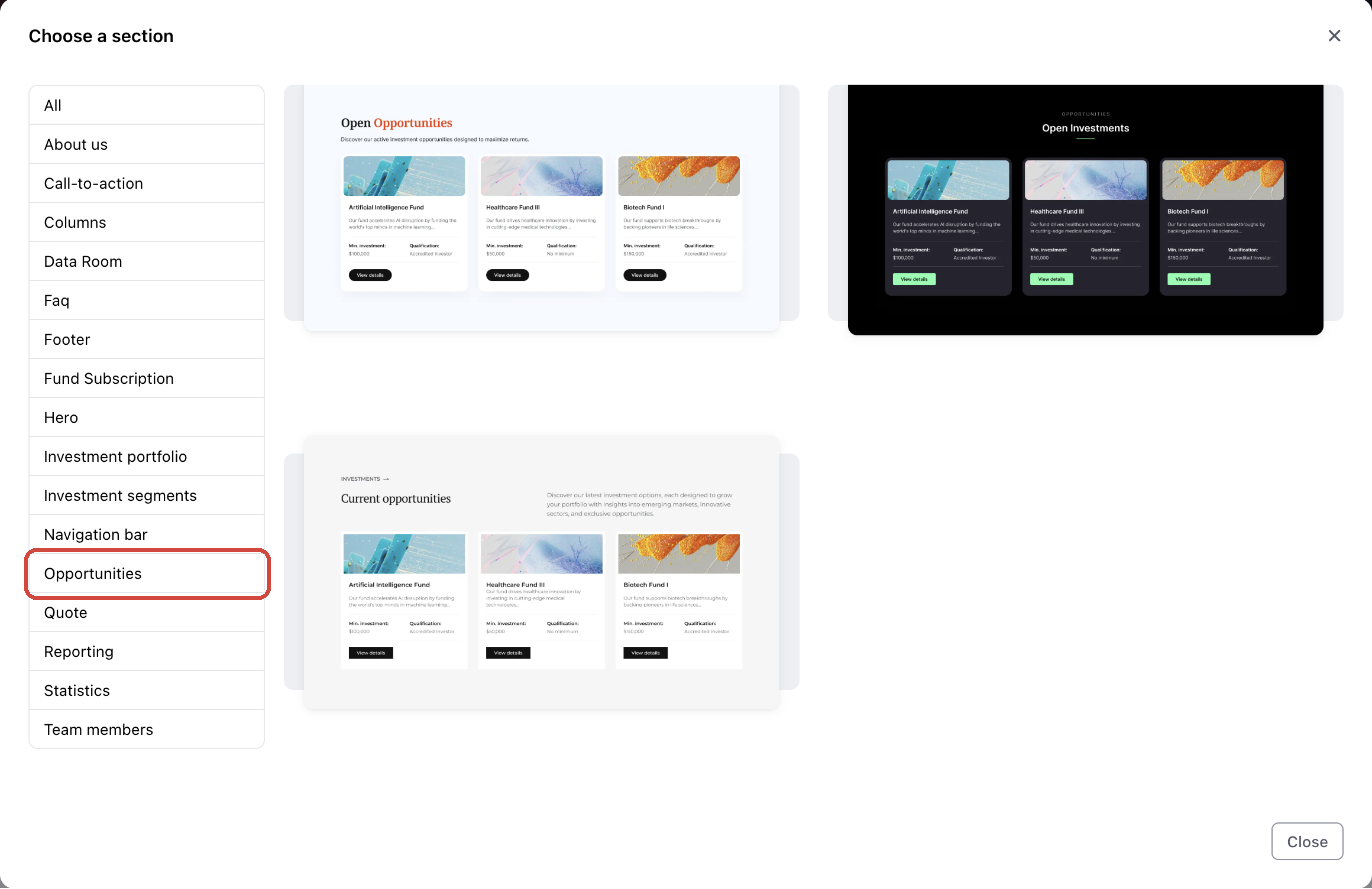
2. Or add just the widget
Open the Add widgets panel (the + icon in the left toolbar), go to the Investor category and add Opportunities.
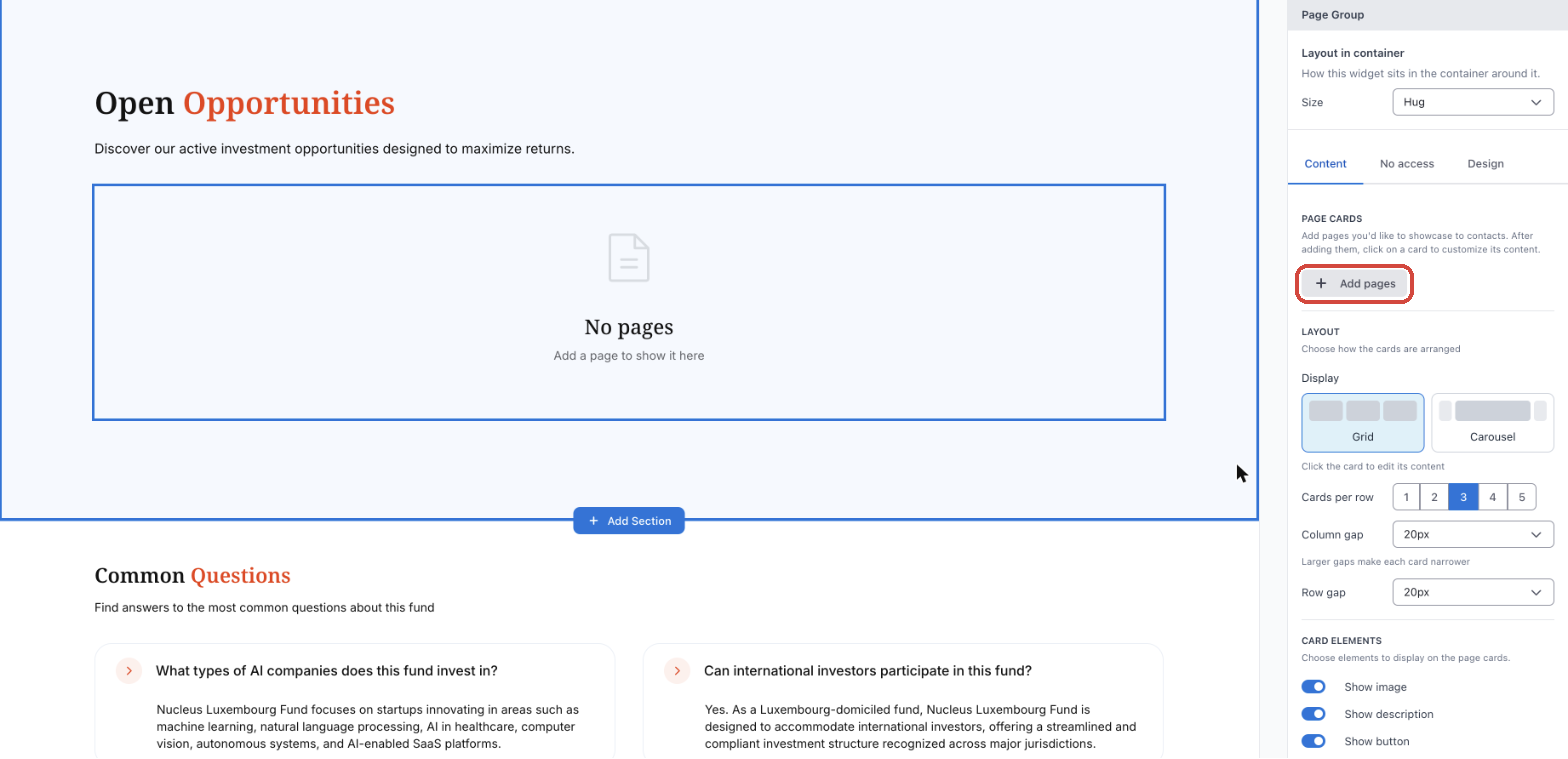
Tip: Until you add a page, the widget shows No pages on the canvas.
2 · Choose which pages to show
1. Add your pages
Select the widget. On the Content tab, under PAGE CARDS, click Add pages.
In the Add pages dialog, tick the opportunity pages to show and click Add pages. Each page shows whether it's Published. Every page you add becomes a card.
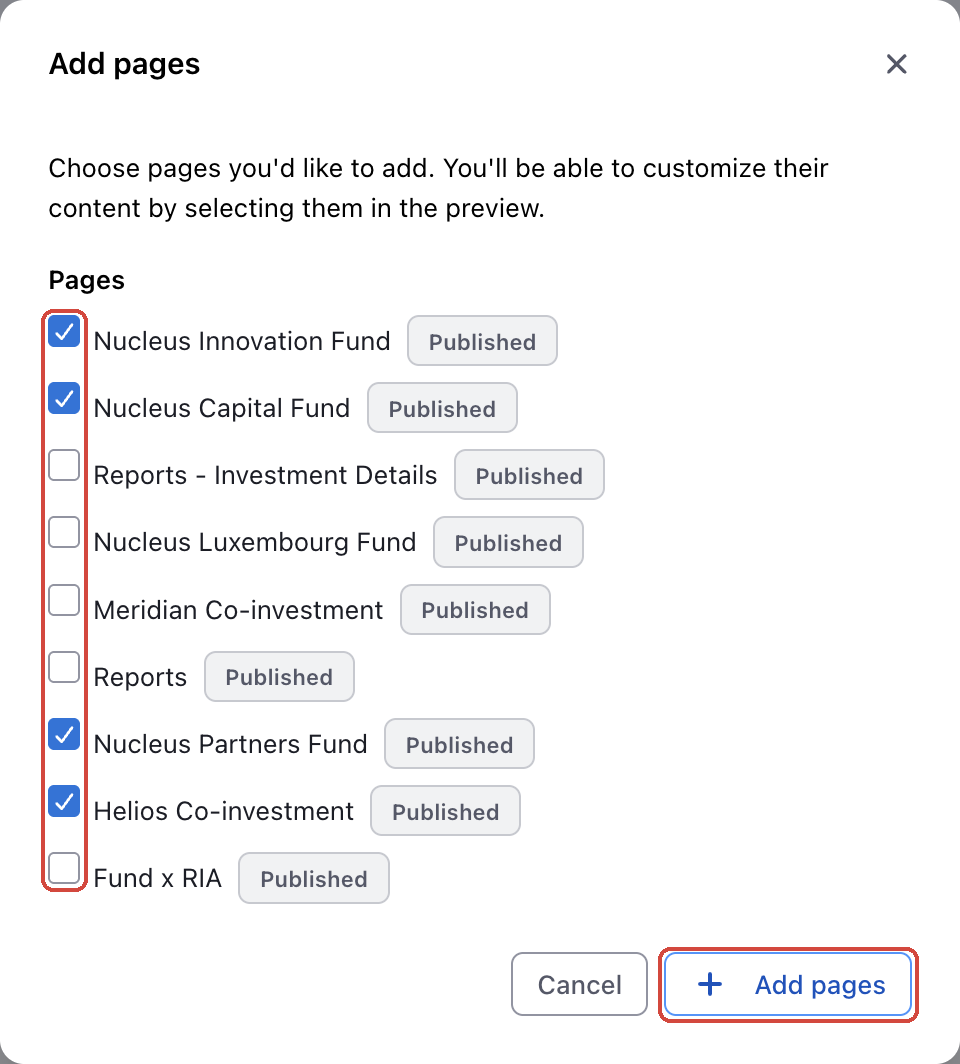
Tip: You need at least one opportunity page in your firm before you can add it here. Archived pages, and pages already in the widget, don't appear in the list.
2. Reorder or remove pages
Drag a page by its handle to change the order of the cards, or click the × next to it to remove its card. Removing a card doesn't change the page itself or who can access it.
Note: If a page is unpublished or archived, the builder marks its card with This page is unpublished. Contacts won't be able to see it. or This page is archived. Contacts won't be able to see it. Publish the page to show its card to contacts.
3 · Pick a layout
Under LAYOUT, choose how the cards are arranged.
| Display | What contacts see | Settings |
|---|---|---|
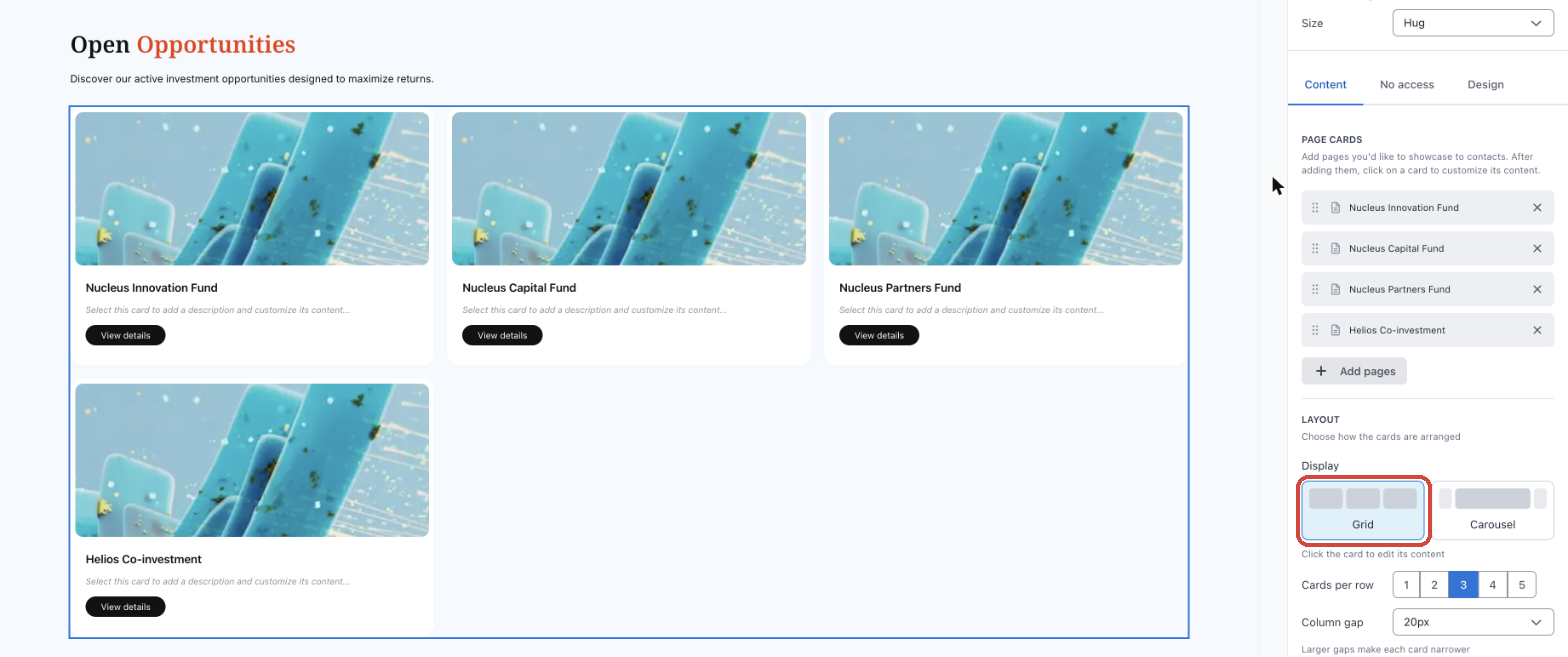
| Grid | Cards laid out in rows and columns | Cards per row (1–5), Column gap, Row gap |
| Carousel | Cards in a single row that contacts page through with arrows and dots, plus a count such as "Showing 1–3 of 4" | Allow switching to grid view, Cards per row (1–5), Column gap |
Grid
Carousel
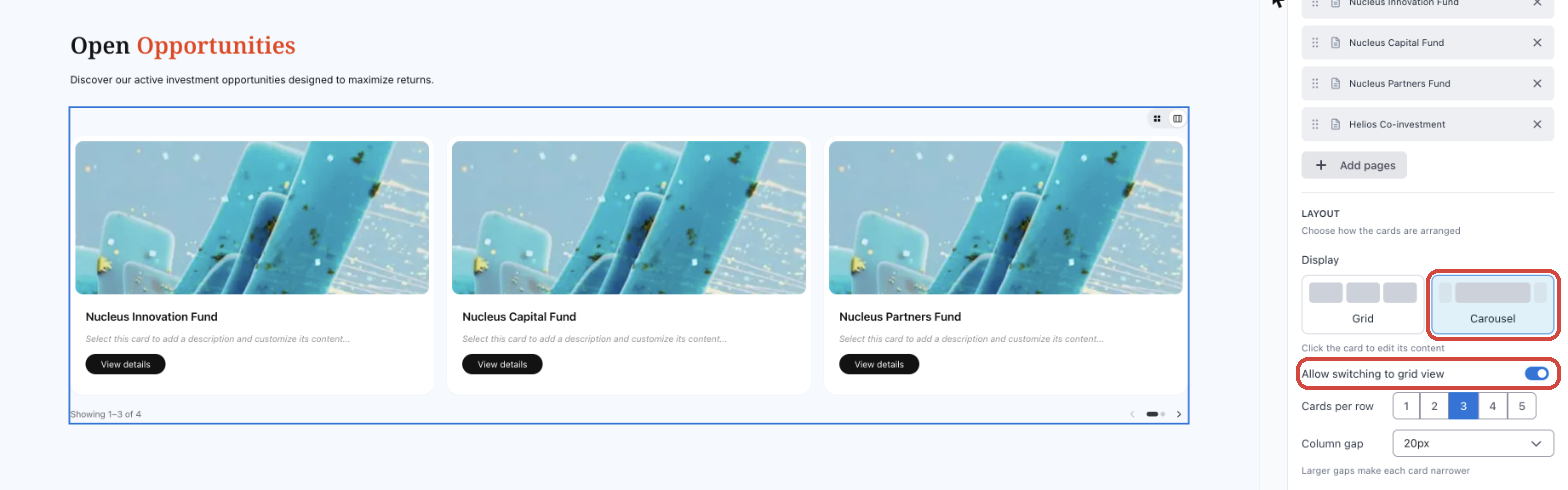
Tip: Larger gaps make each card narrower. In Carousel, leave Allow switching to grid view on to give contacts a small switcher so they can see all the cards at once.
Choose what each card shows
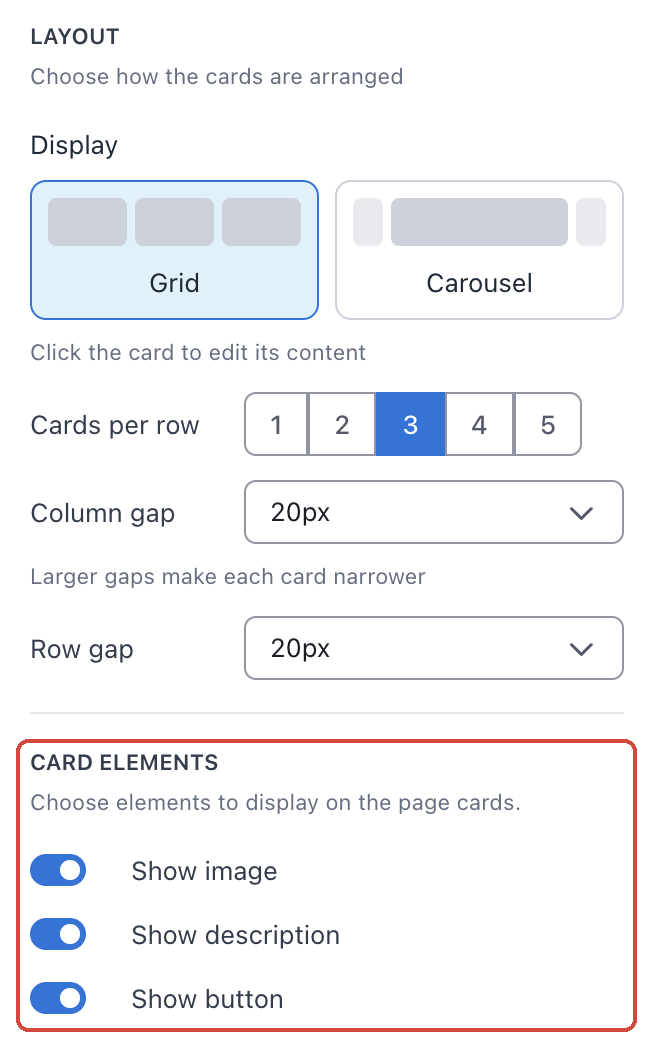
Under CARD ELEMENTS, turn Show image, Show description and Show button on or off. The card title always shows.
4 · Edit each card
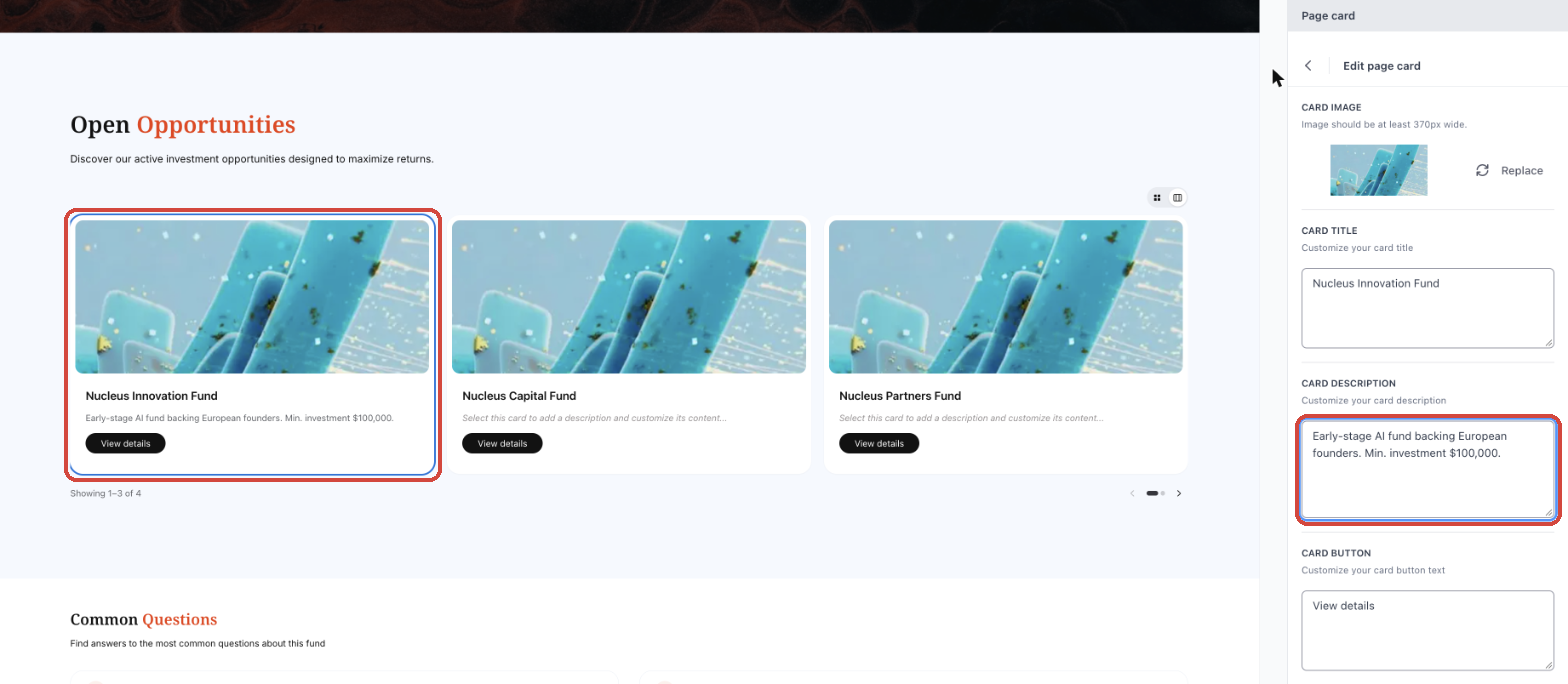
Click a card on the canvas to open Edit page card. Changes apply to that card only.
| Setting | What you can do |
|---|---|
| Card image | Click Replace to upload your own image. Use an image at least 370px wide. |
| Card title | Starts as the page name. Change it to whatever contacts should see on the card. |
| Card description | Add a short summary, for example the strategy or minimum investment. |
| Card button | Change the button text (default: View details). |
Click the back arrow at the top of the panel to return to the widget settings.
5 · Set what contacts without access see
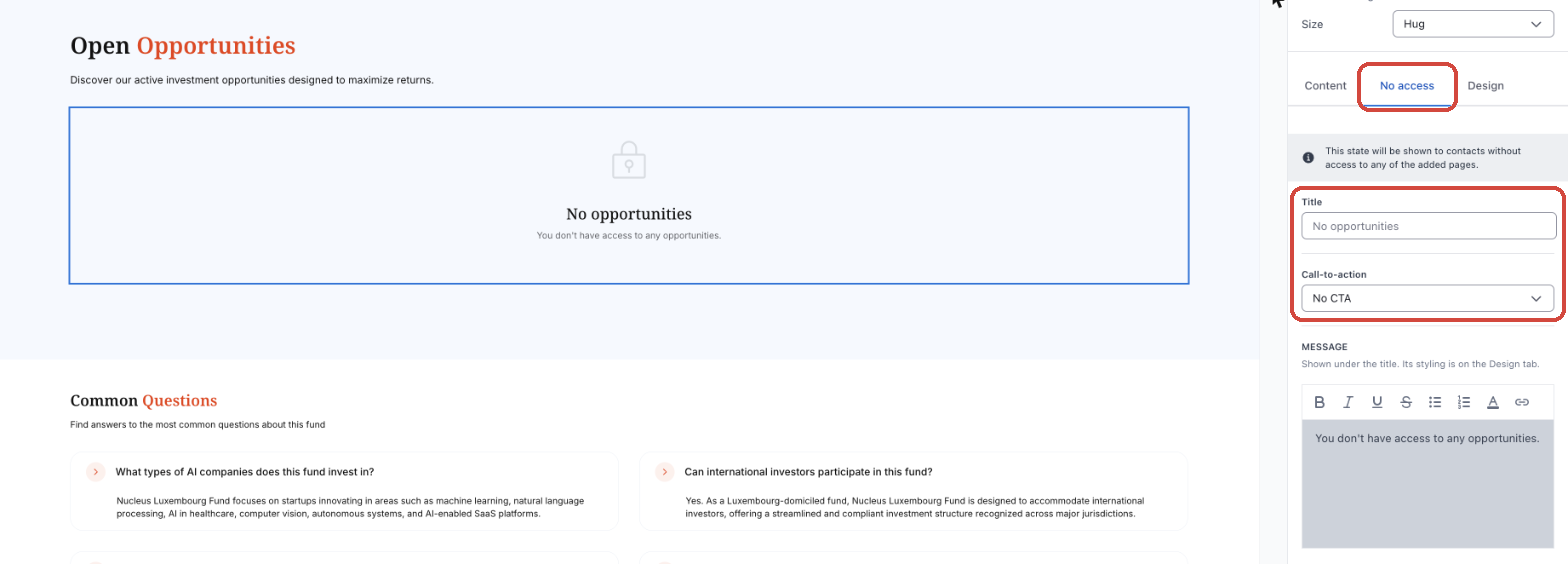
Contacts who don't have access to any of the added pages see a placeholder instead of an empty space. Open the No access tab to set it up. While this tab is open, the canvas shows the placeholder so you can see what you're writing.
| Setting | What it does |
|---|---|
| Title | The heading of the placeholder. Leave it empty to use No opportunities. |
| Call-to-action | No CTA shows no button. Custom URL adds a button: enter its label and the link it opens. |
| Message | Text shown under the title, for example who to contact for access. Default: You don't have access to any opportunities. |
Tip: To control who can see each opportunity page, see Manage who can see your landing pages.
6 · Style the widget
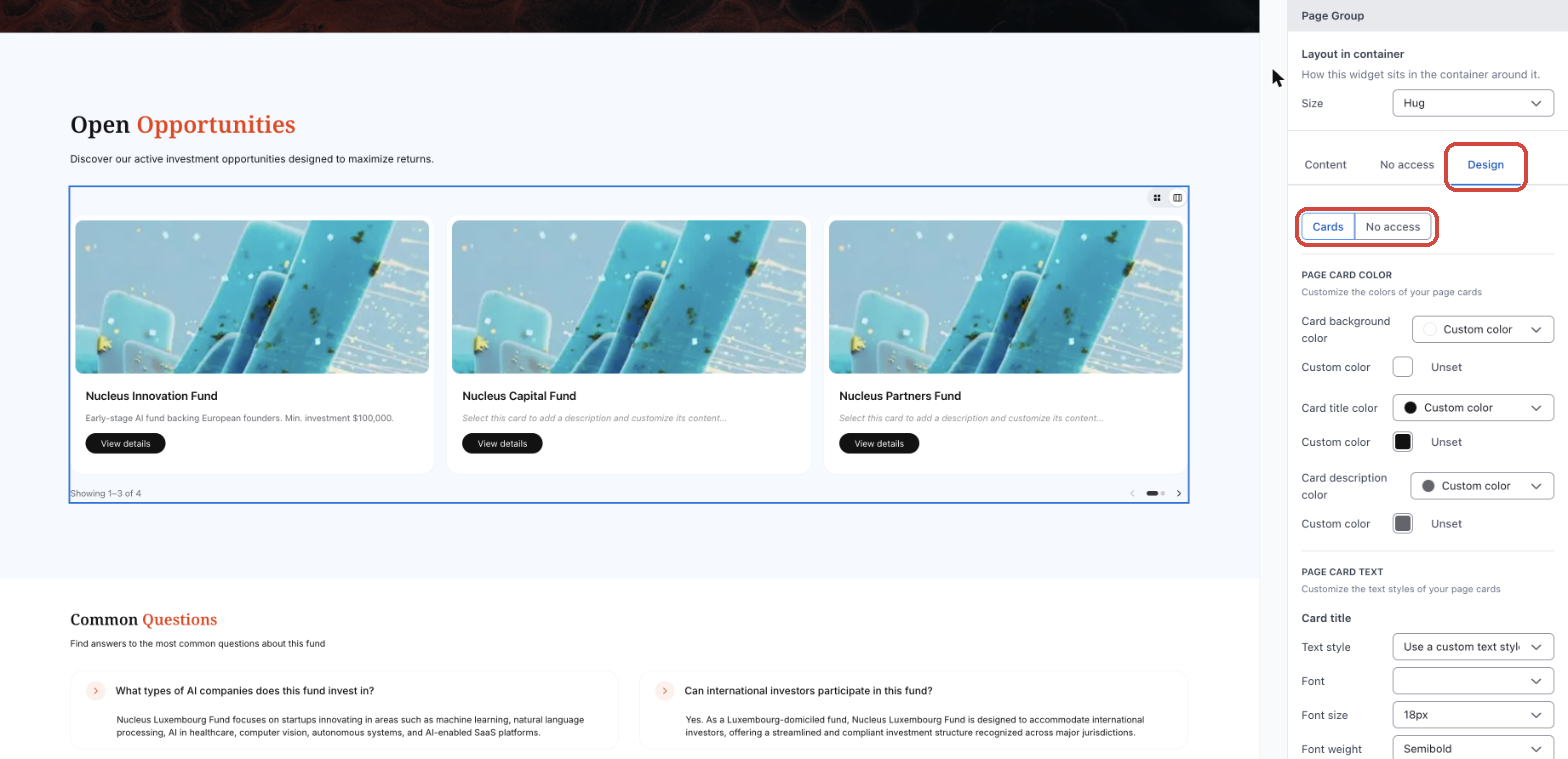
Open the Design tab. Use the Cards / No access switch at the top to choose which state you're styling. All cards share the same style.
| Group | What you can style |
|---|---|
| PAGE CARD COLOR | Card background, title and description colors |
| PAGE CARD TEXT | Font, size, weight and line height for the card title and description |
| CARD | Card corner radius, image corner radius and shadow |
| CARD BUTTON | Button text, colors, hover colors, border, radius, shadow and alignment |
| CAROUSEL CONTROLS | Count text and color, arrow color, dot colors and the grid/carousel switcher colors (Carousel only) |
| No access | Placeholder background, radius, icon color, and title and message text |
7 · What contacts see
- Each contact sees cards only for the added pages they have access to, in the order you set.
- Unpublished and archived pages are never shown to contacts.
- Clicking a card or its button opens that opportunity page.
- Contacts without access to any of the added pages see the No access placeholder.
- Remember to Save changes and Publish the page so contacts see your updates.