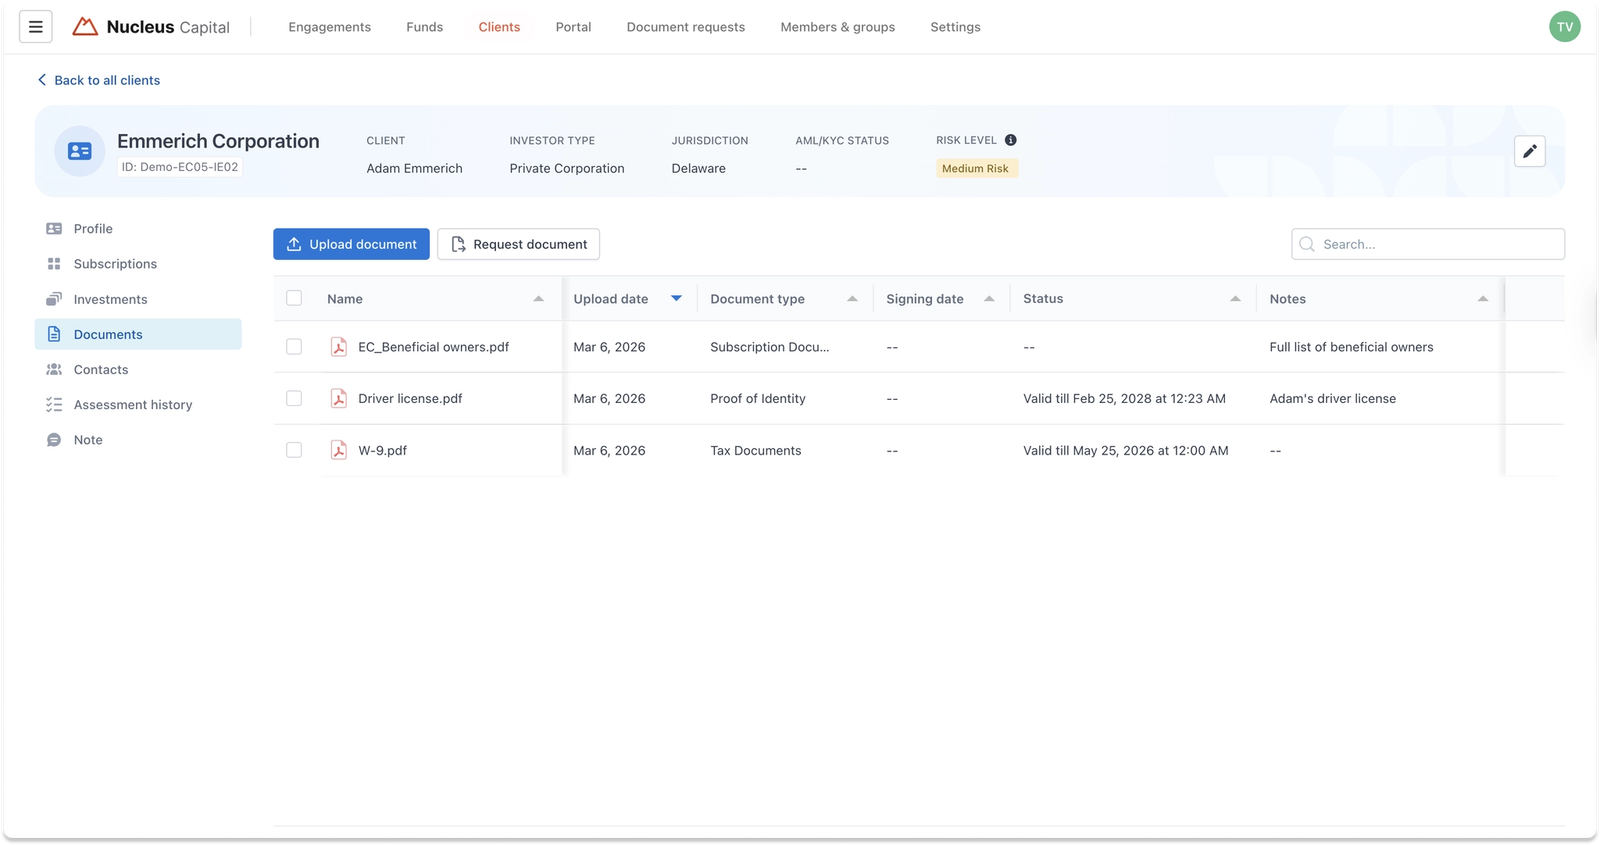

Batch import AML/KYC documents for Investment entities
Introduction Whether you're setting up your investor database for the first time or uploading a fresh batch of AML/KYC documents collected offline, this fe
Introduction
Whether you're setting up your investor database for the first time or uploading a fresh batch of AML/KYC documents collected offline, this feature lets you import documents across multiple Investment Entities in large batch, keeping IDM as your single source of truth for investor compliance documents.
Where to find this feature?
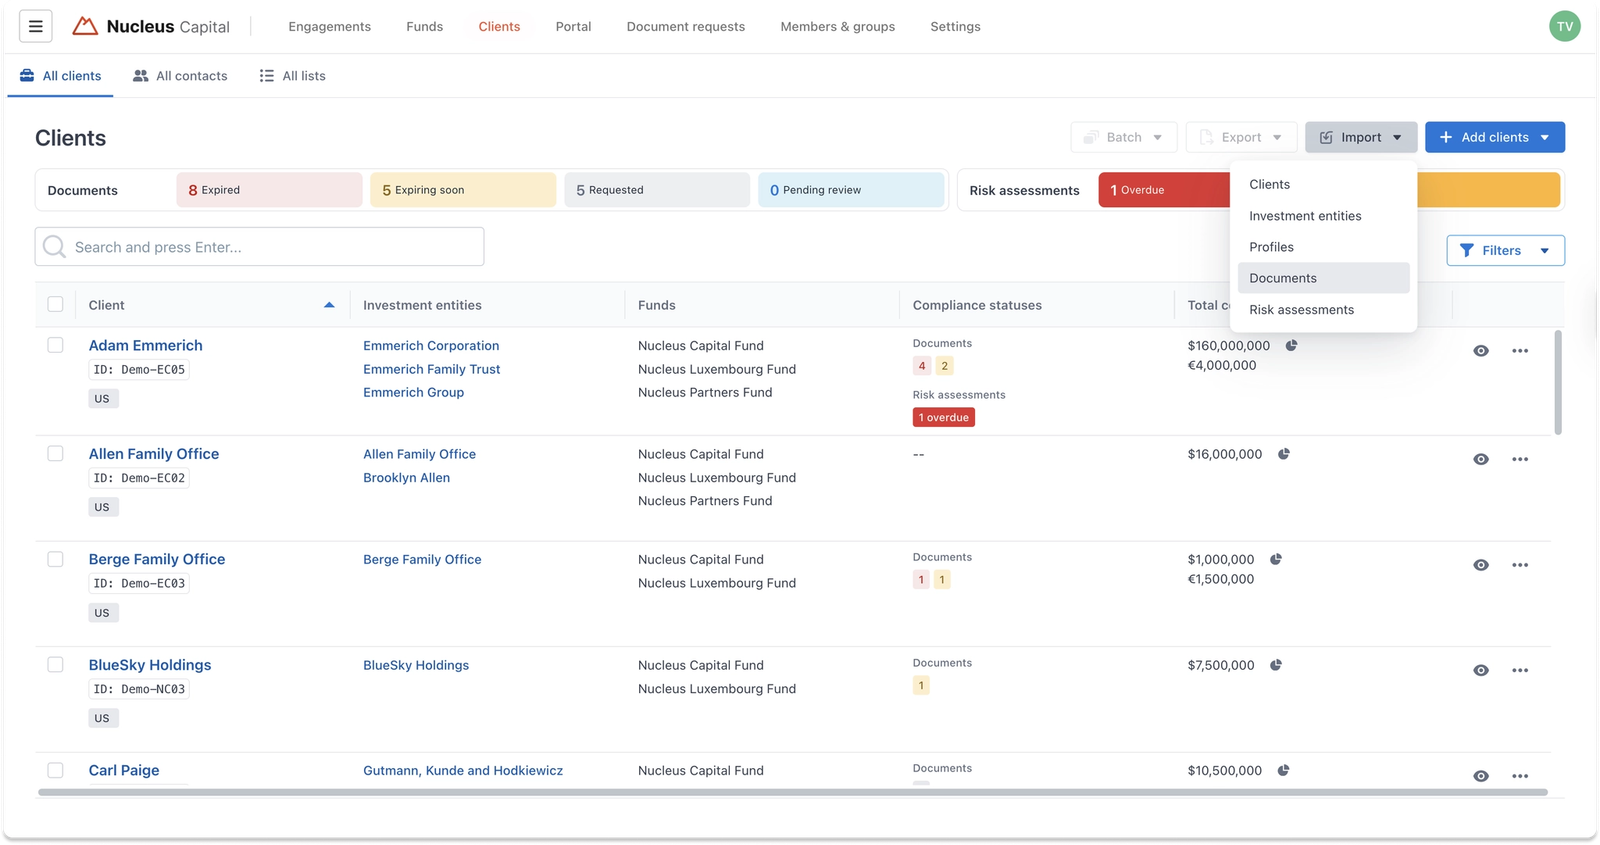
In the IDM app, navigate to the Clients tab and click the Import button in the top right corner. From the dropdown, select Documents to start the workflow.
Guideline
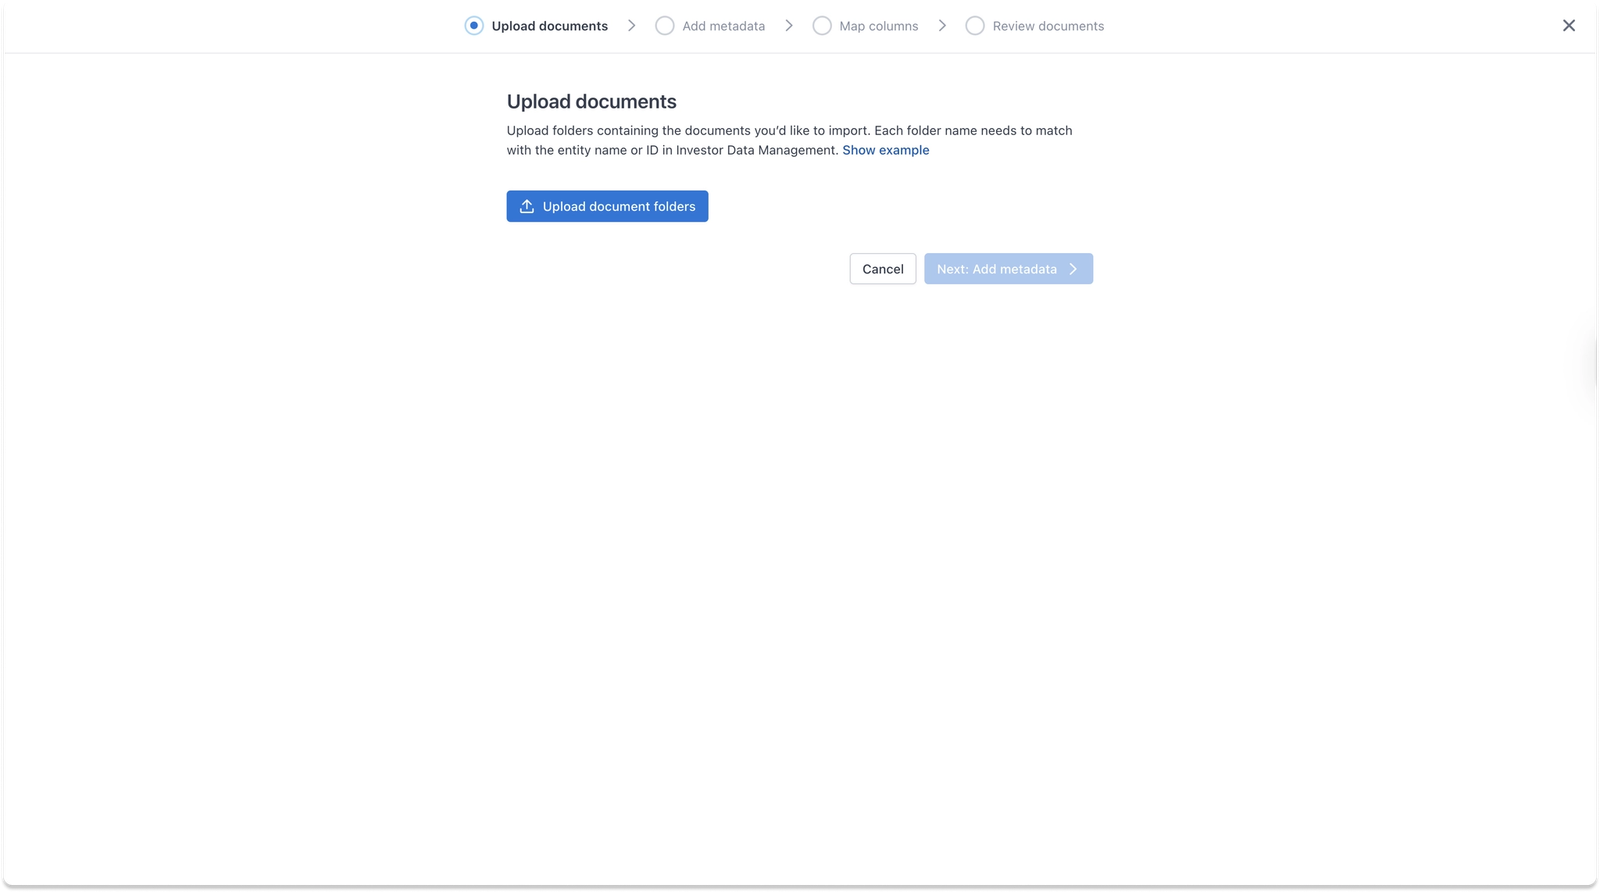
Step 1: Upload documents
Click Upload document folders to select the folders from your computer that contain the documents you'd like to import.
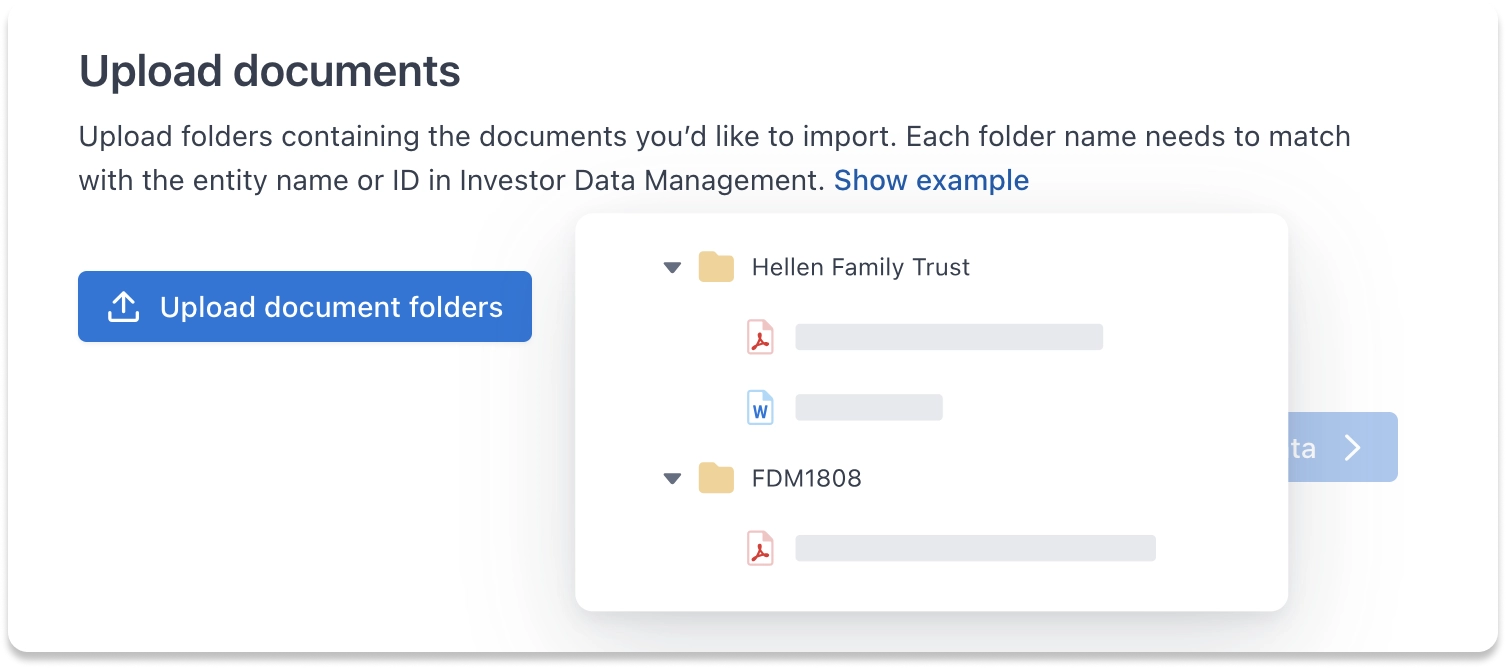
Note: Each folder name must match either the name or the Anduin ID/custom tracking ID of an existing Investment Entity in IDM - this is how the system knows which IE to assign the documents to. You can click
Show examplefor a reference on how to structure your folders before uploading.
Folders are uploaded one at a time. Once uploaded, you'll see a summary list and the number of documents detected inside each folder. To add another one, click Upload more folders and repeat until all are included.
When you're ready, click Next: Add metadata to continue.
Step 2: Add metadata (optional)
This step lets you include more context attached to your documents. This is optional; you can click Skip if you'd like to proceed now and add metadata anytime later. In the near future, we're working on an AI-powered mechanism that will automatically detect document types, expiration dates, and more, making this step even faster in the future.
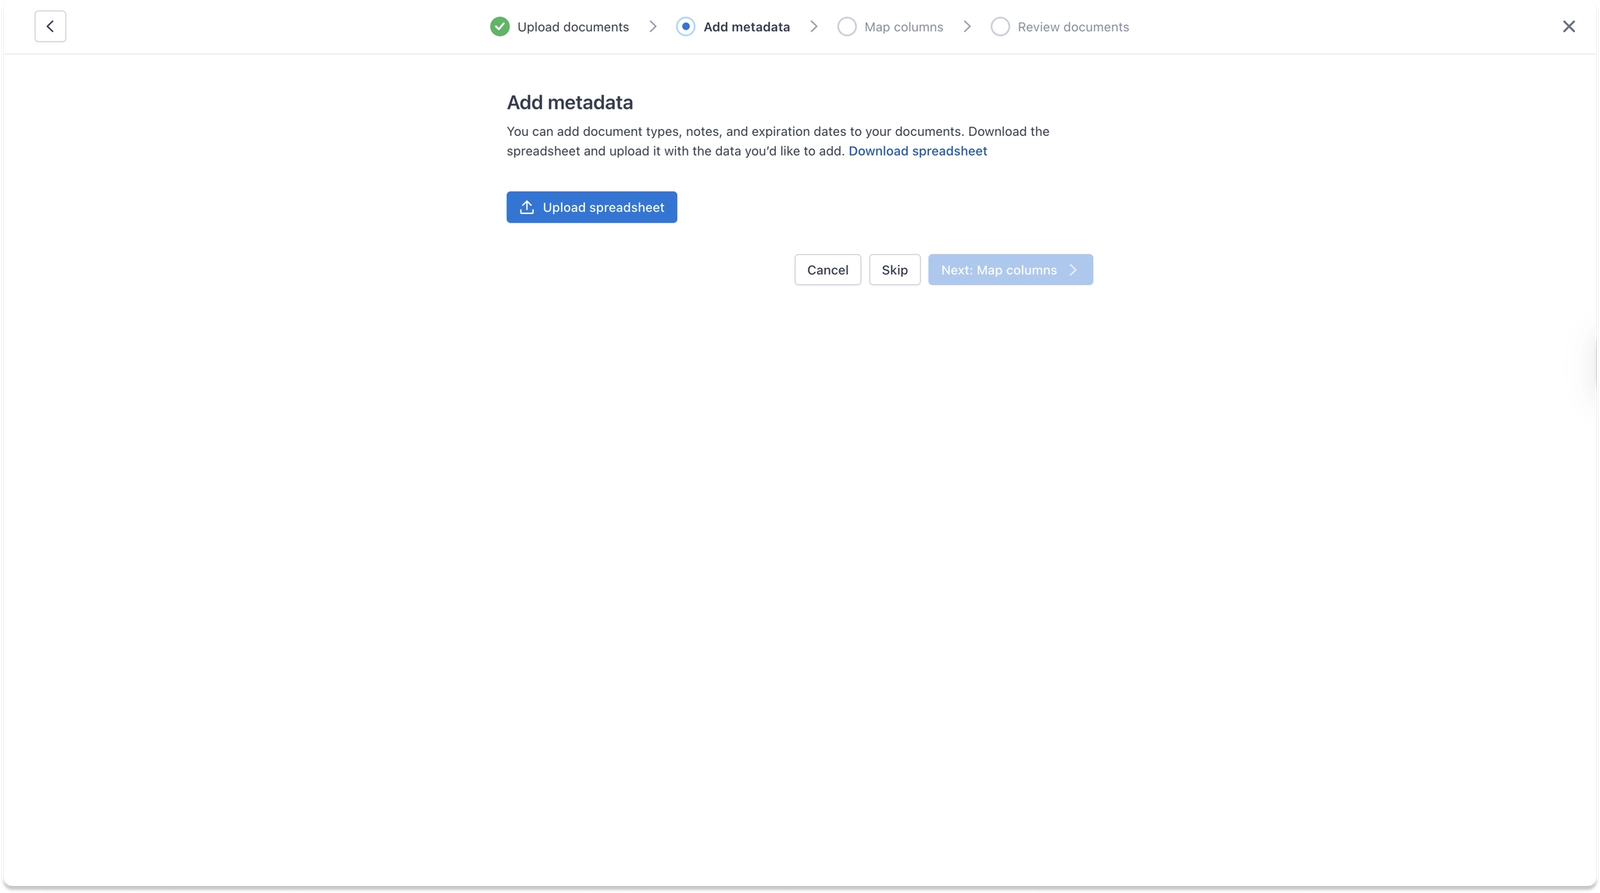
To add metadata, click Download spreadsheet to get the template.
When you first open it, you'll see sample data showing how to fill in the information.
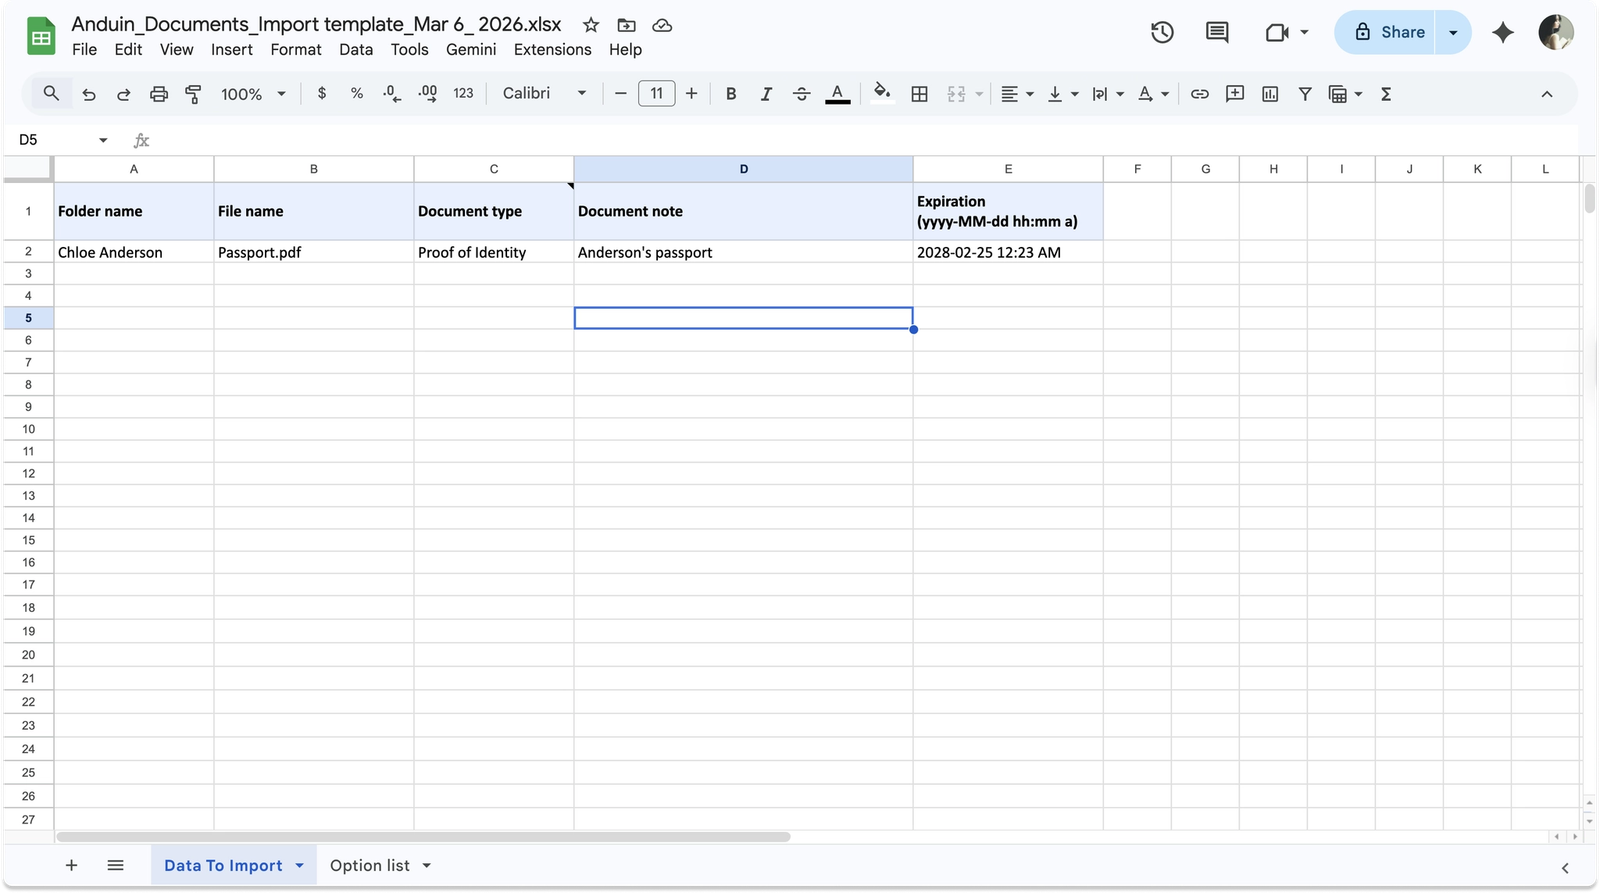
The spreadsheet includes the following columns:
- Folder name - the IE name or ID (must match your uploaded folder names)
- File name - the exact file name of the document
- Document type - the type of document, e.g. Proof of Identity, Tax Documents
- Document note - any additional notes about the document
- Expiration - the expiration date in
yyyy-MM-dd hh:mm aformat
Fill in the columns that are relevant to your documents.
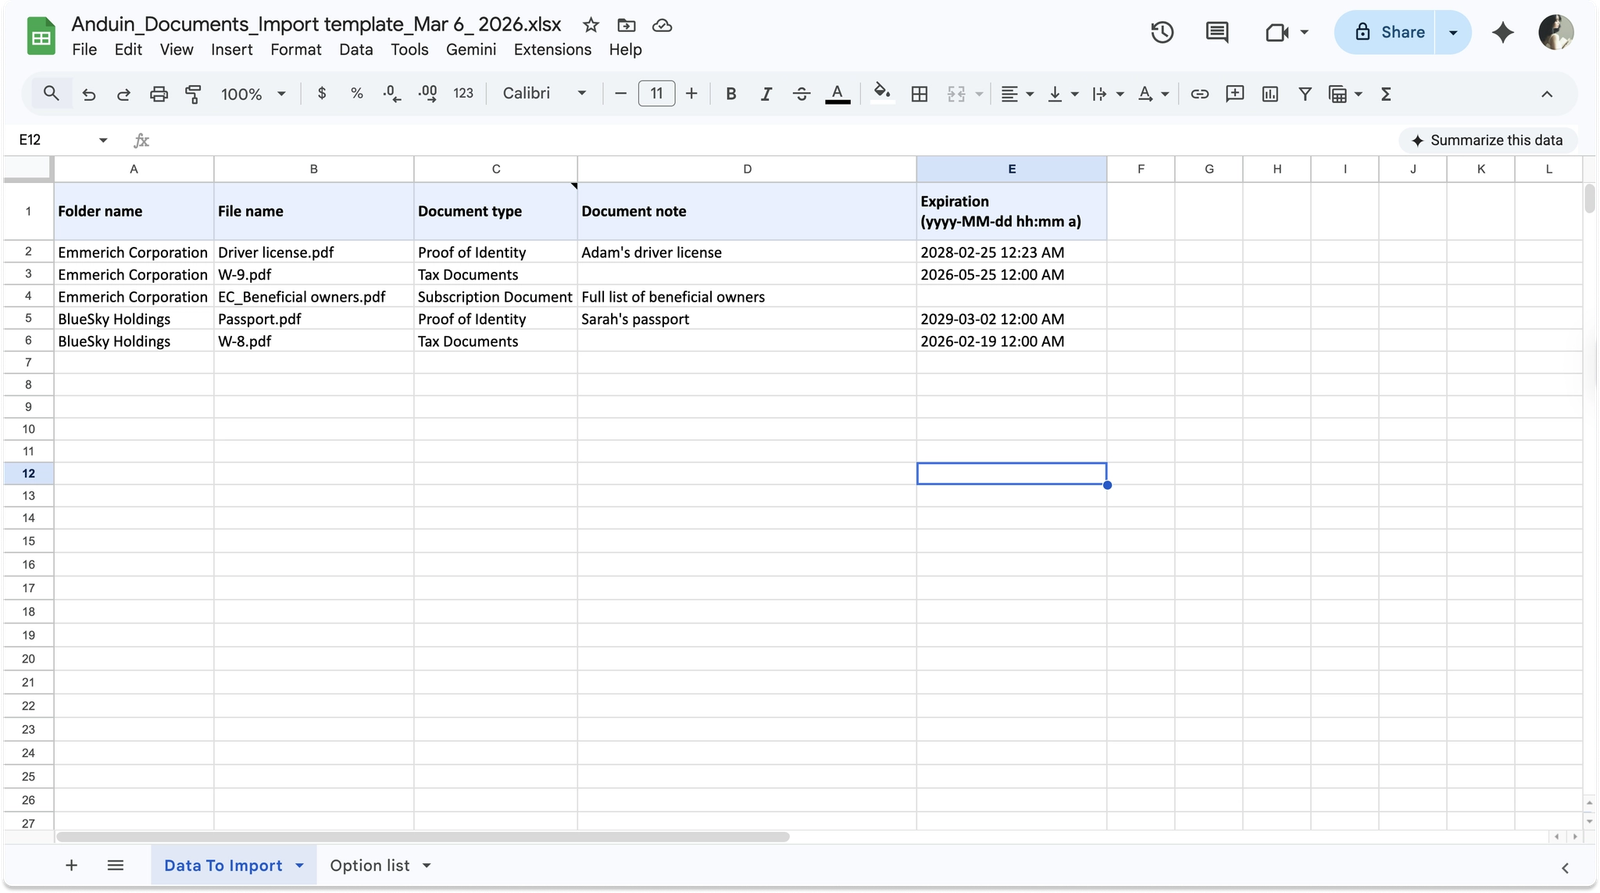
Once done, upload the completed spreadsheet back using Upload spreadsheet and confirm the header row number.
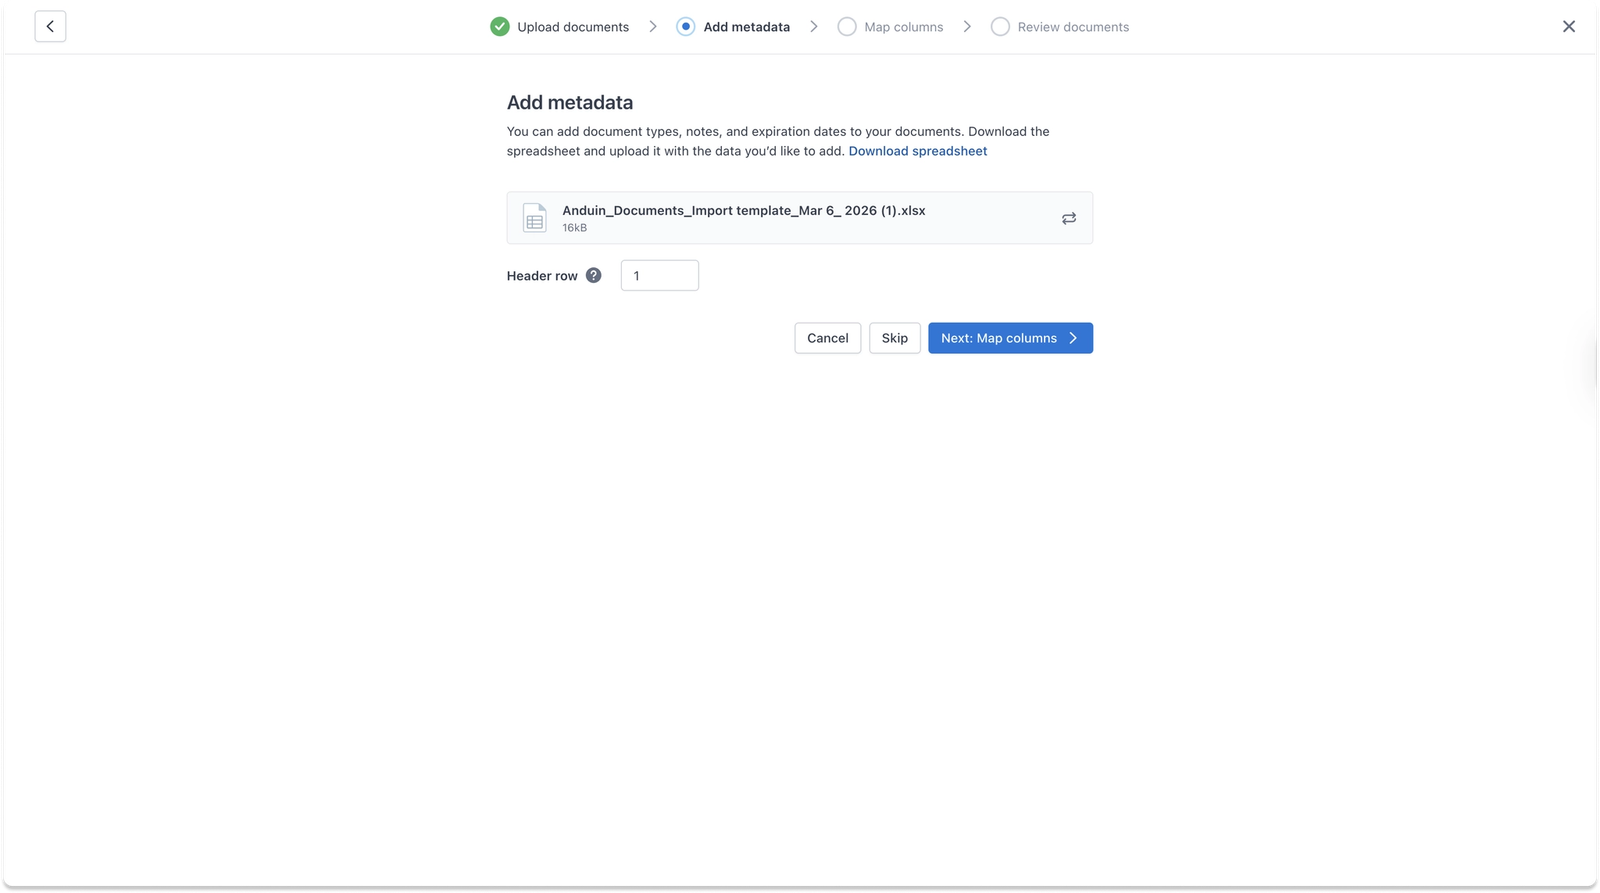
When you're ready, click Next: Map columns to continue.
Step 3: Map columns
In this step, you'll match your spreadsheet's column headers to the corresponding fields in IDM to make sure the metadata can be imported accurately.
The required fields are Investment Entity Name/Id and Document. The remaining fields are optional. If your spreadsheet column names match the template, the system will auto-map them for you.
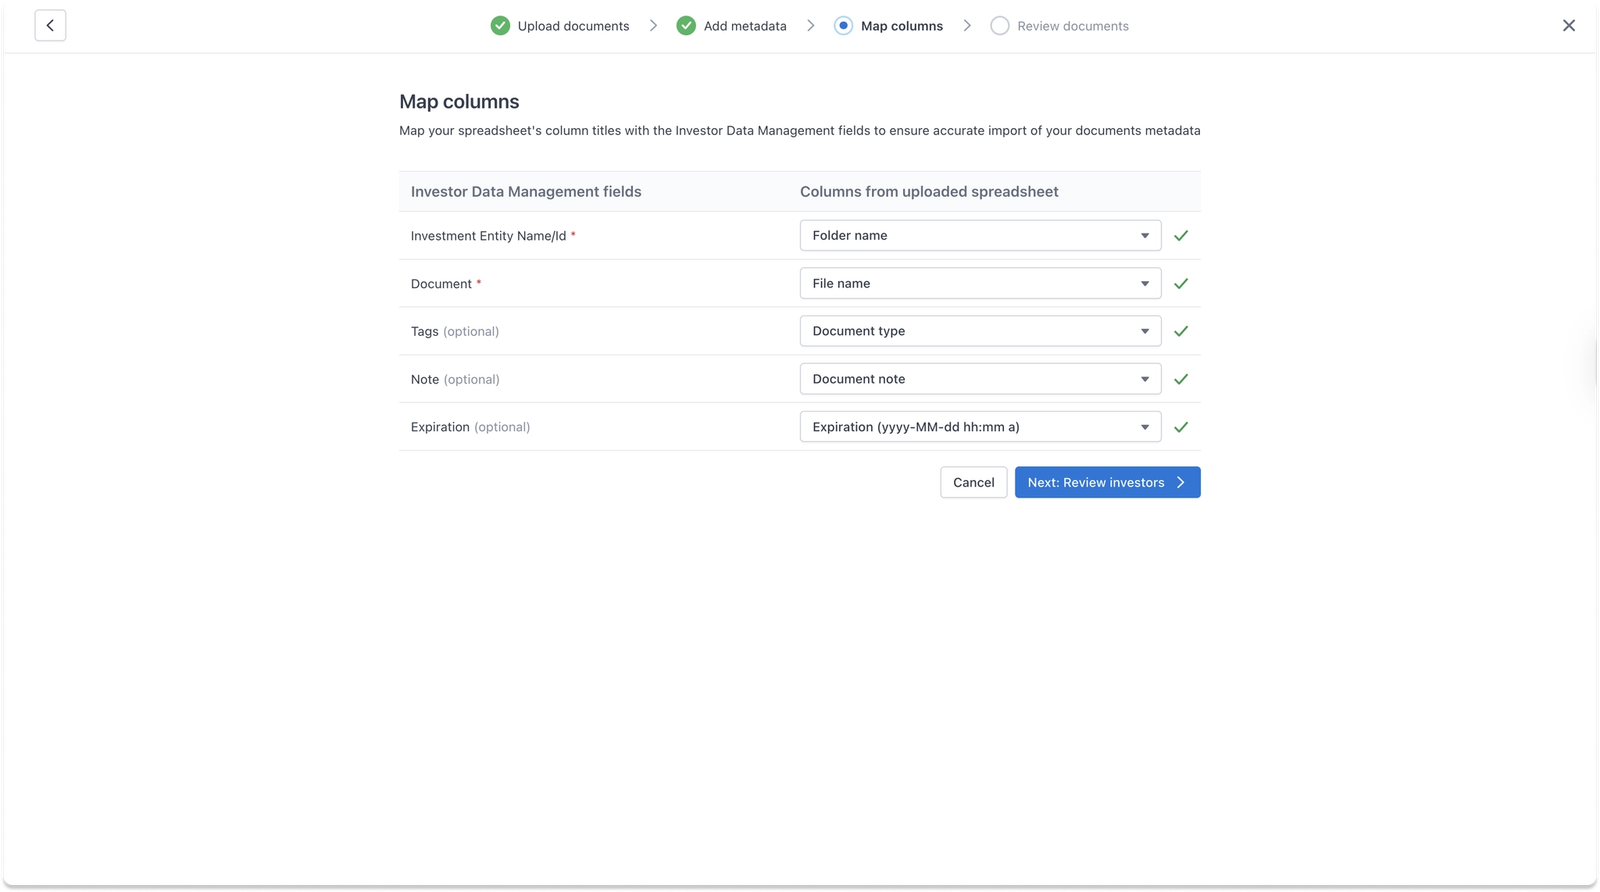
Once everything looks good, click Next: Review investors to continue.
Step 4: Review and import
Before finalizing, review the list of IEs and the number of documents that will be imported for each. You can deselect any IE you'd like to exclude from this import.
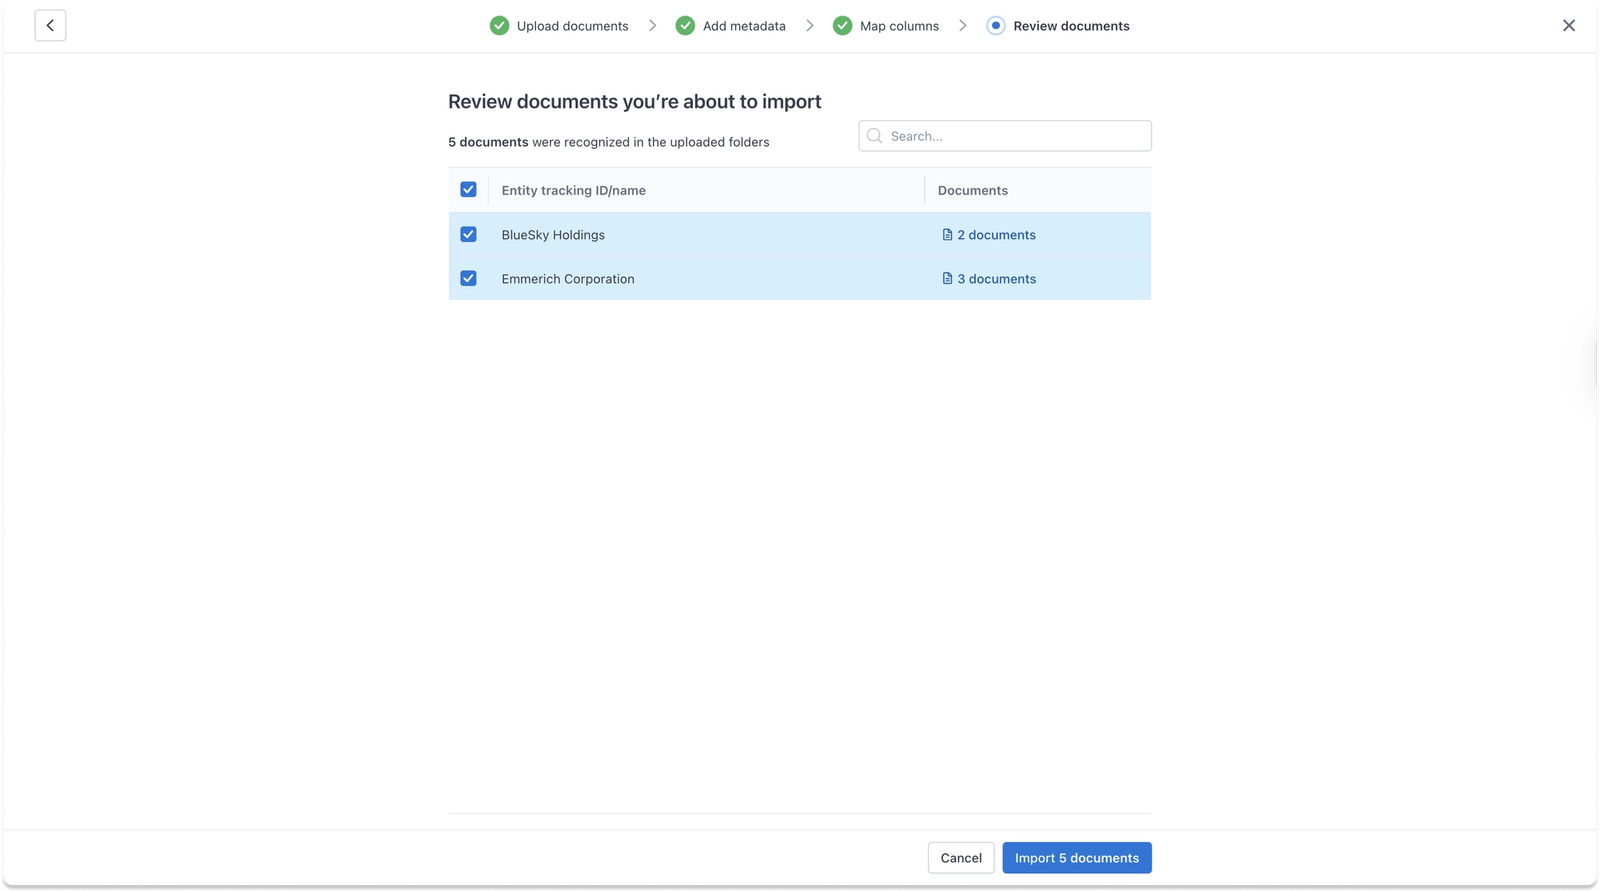
When you're happy with the selection, click Import X documents to complete the import.
The import will begin and you can track its progress directly in the modal.
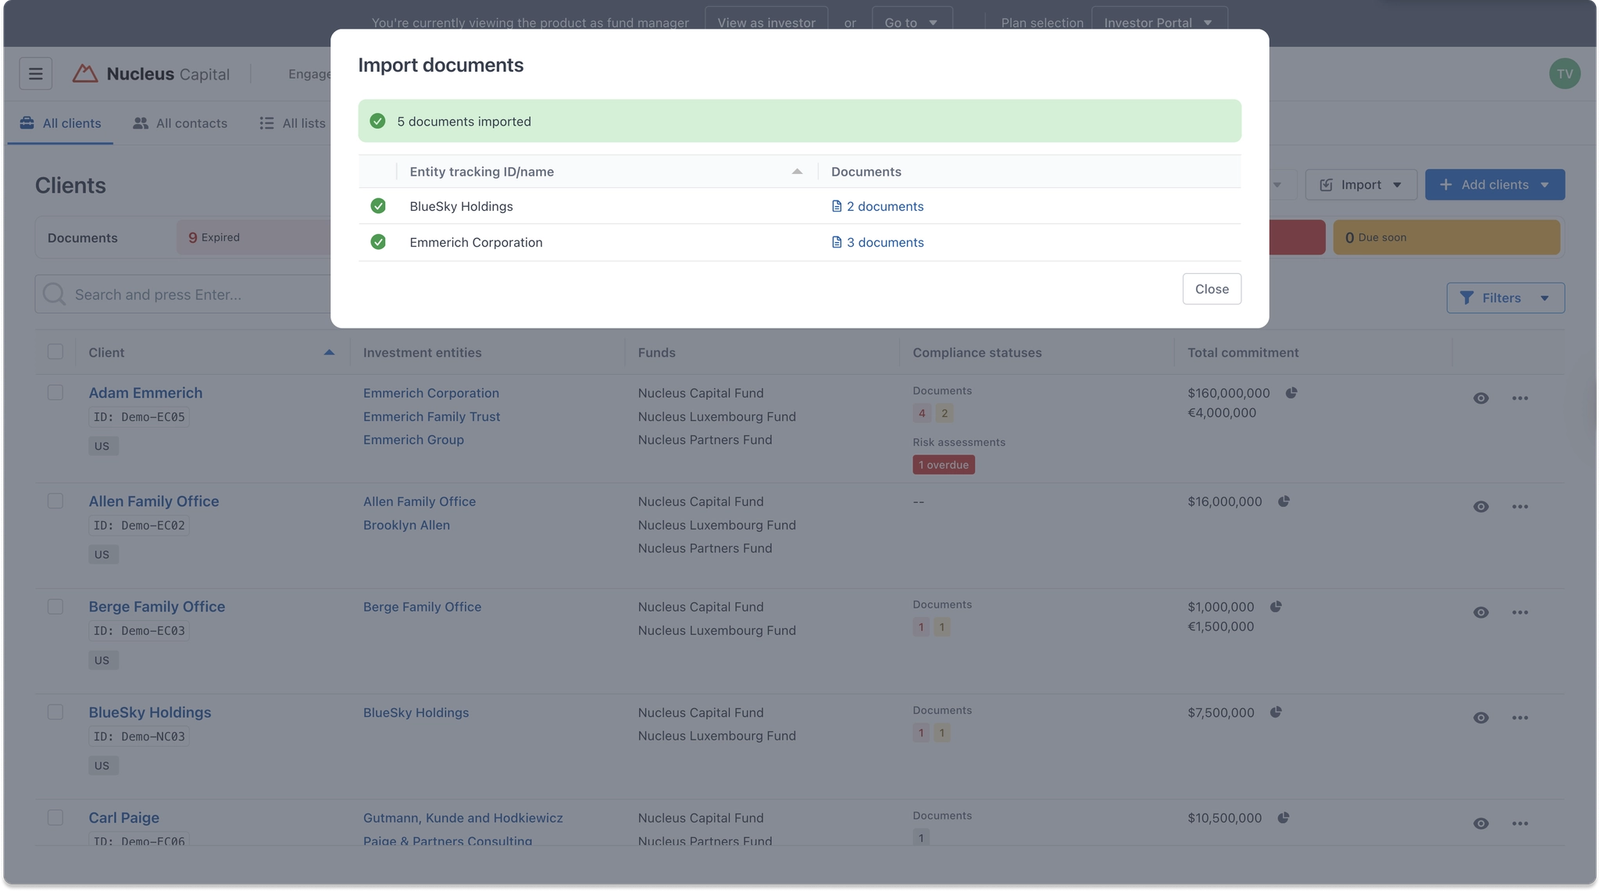
Once completed, the documents will appear under the Documents tab of each respective IE, along with any metadata you provided.