
Track and compose emails in the Communications dashboard
Introduction Fund admins often need a direct way to reach investors outside of document distribution or invitation flows — whether for announcements, inves
Introduction
Fund admins often need a direct way to reach investors outside of document distribution or invitation flows — whether for announcements, investment updates, or time-sensitive messages that stand on their own. The Communications dashboard in the Investor Portal serves as a centralized hub for all outbound GP-to-investor emails, giving fund teams full visibility into what has been sent and a streamlined flow for composing new messages.
This guide walks through how to navigate the dashboard, track sent emails and drafts, and compose a custom email from start to finish.
Guideline
Where to find this feature?
Go to the Portal tab in IDM. Then, click Communications in the navigation bar to open the dashboard.
Part 1: Navigating the Communications dashboard
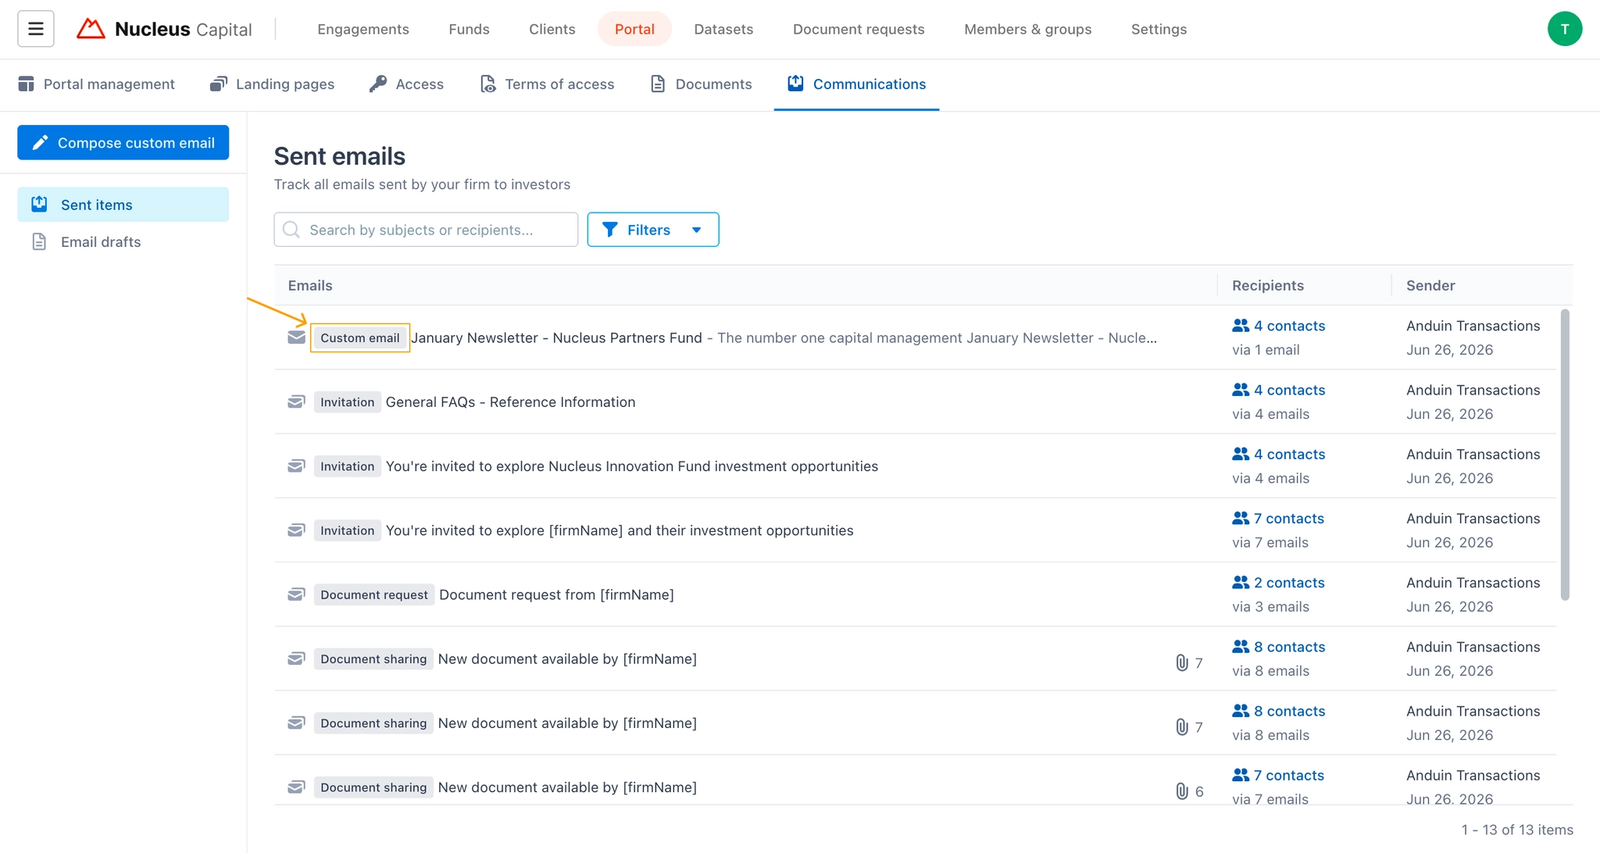
The Communications dashboard is divided into two sections in the left panel: Sent items and Email drafts.
Sent items
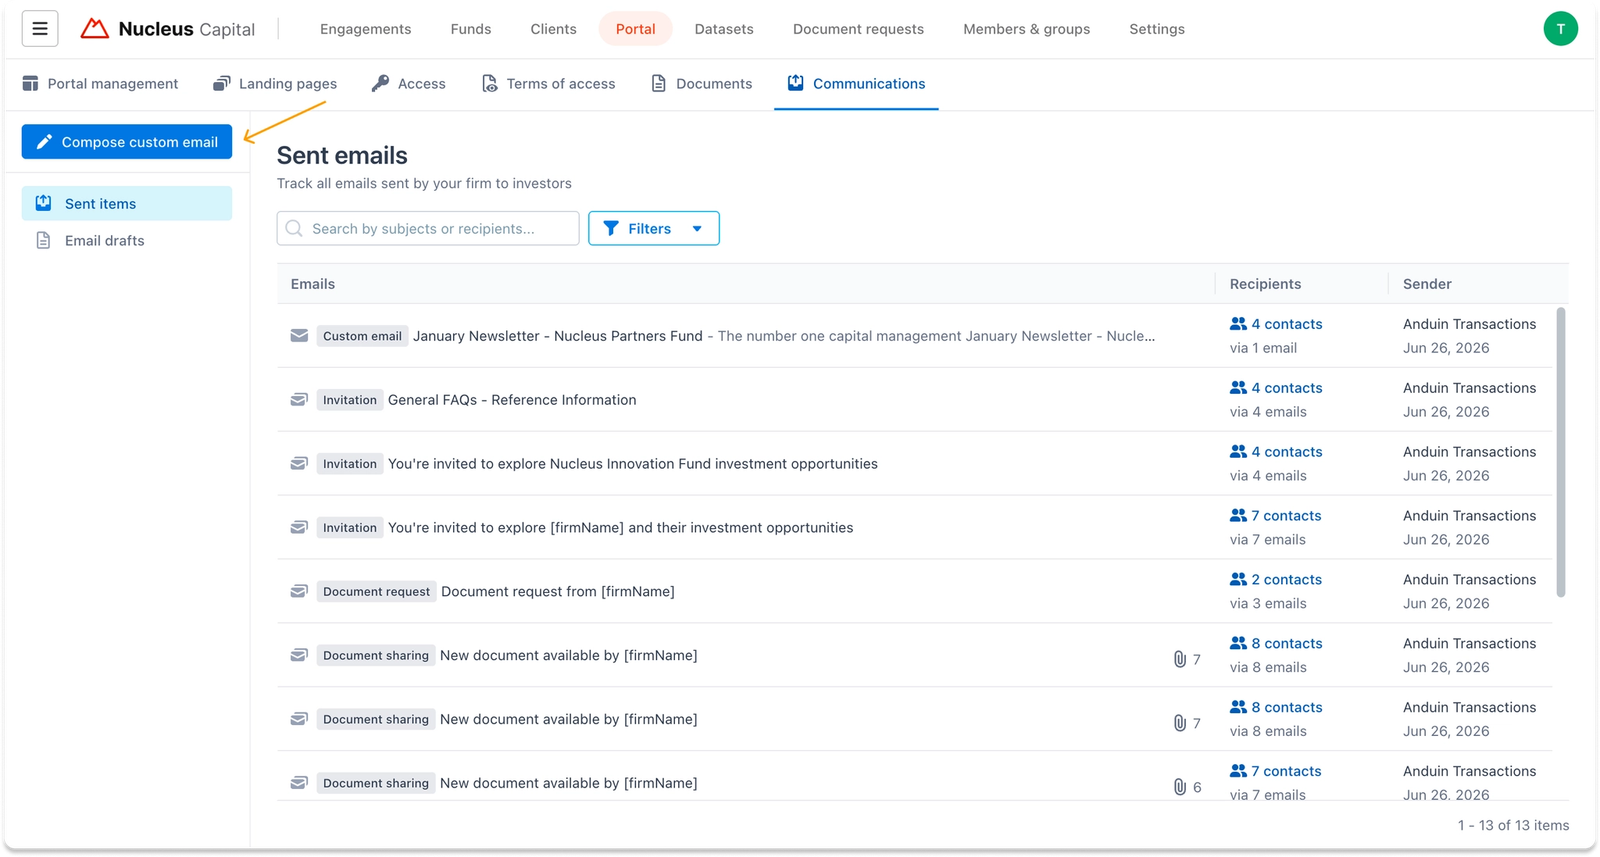
Sent items is the main log of all emails sent from the firm to investors. Each entry shows the email type tag, subject line, number of recipients and emails delivered, the sender, and the date sent.
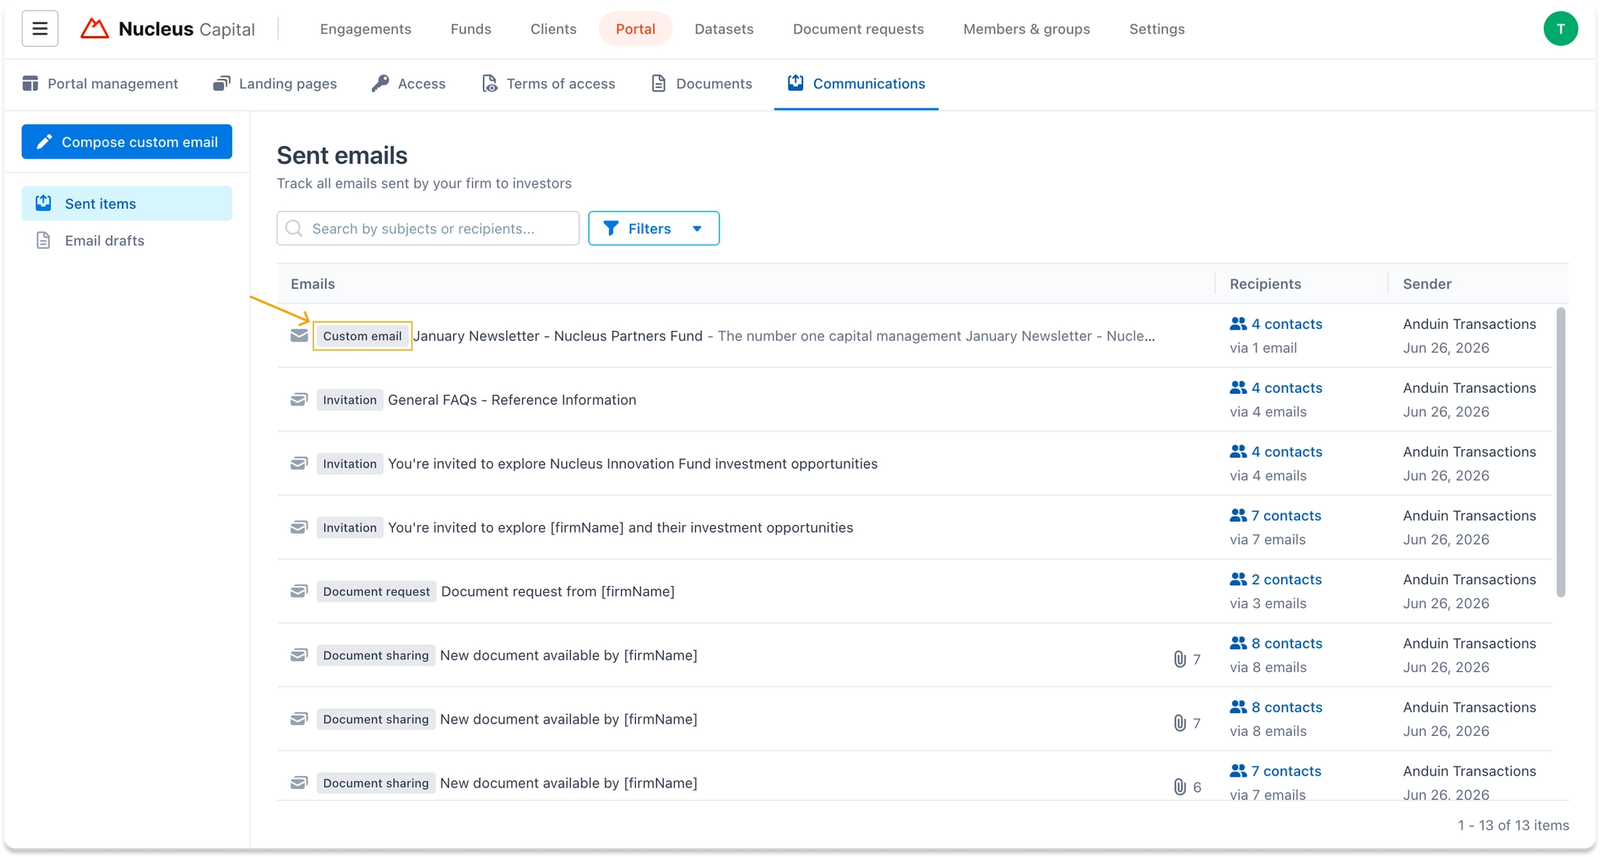
The email type tag helps with quick identification and tracking. It can be one of four values:
Document sharingCustom emailInvitationDocument request
Each entry is also accompanied by an icon indicating how the email was sent:
- Stack of emails icon — the workflow generated multiple separate emails. Each recipient received their own individual copy with personalized content.

- Single email icon — one shared email was sent to a group of recipients, where all recipients are visible to each other. This is typically used when communicating with a group of contacts who share the same investment entity, such as internal team members of an LP firm.

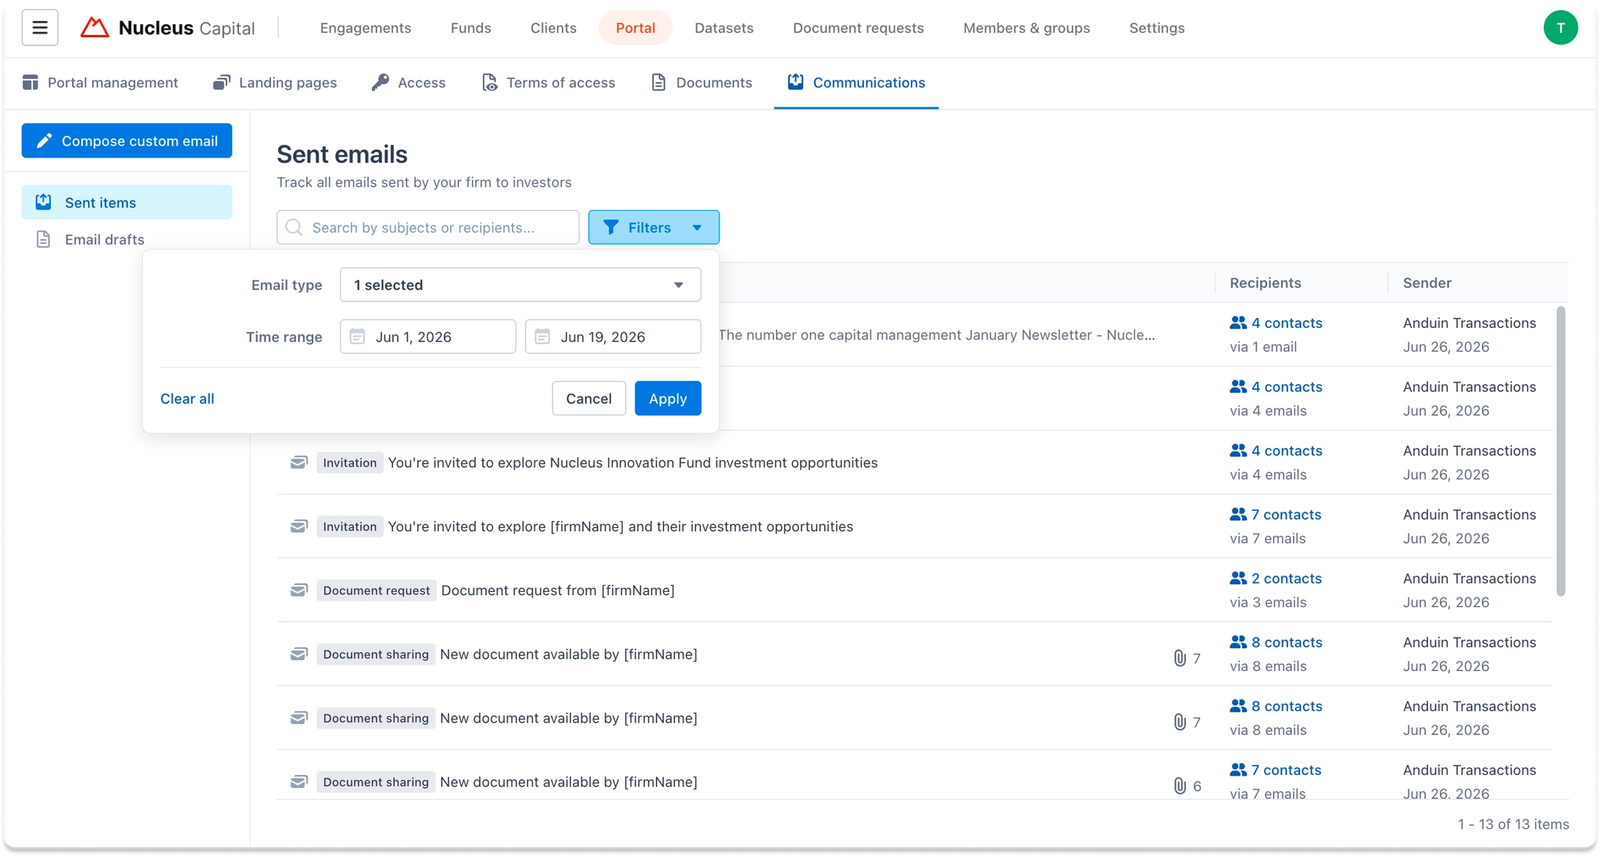
To locate a specific email, use the search bar to search by subject or recipient name. For more targeted filtering, click Filters to narrow results by Email type or a Time range using a start and end date.
Clicking into any entry opens the Email details view. This shows a full summary of the email — including sender, recipients, delivery status, sent date, and a preview of the message content.
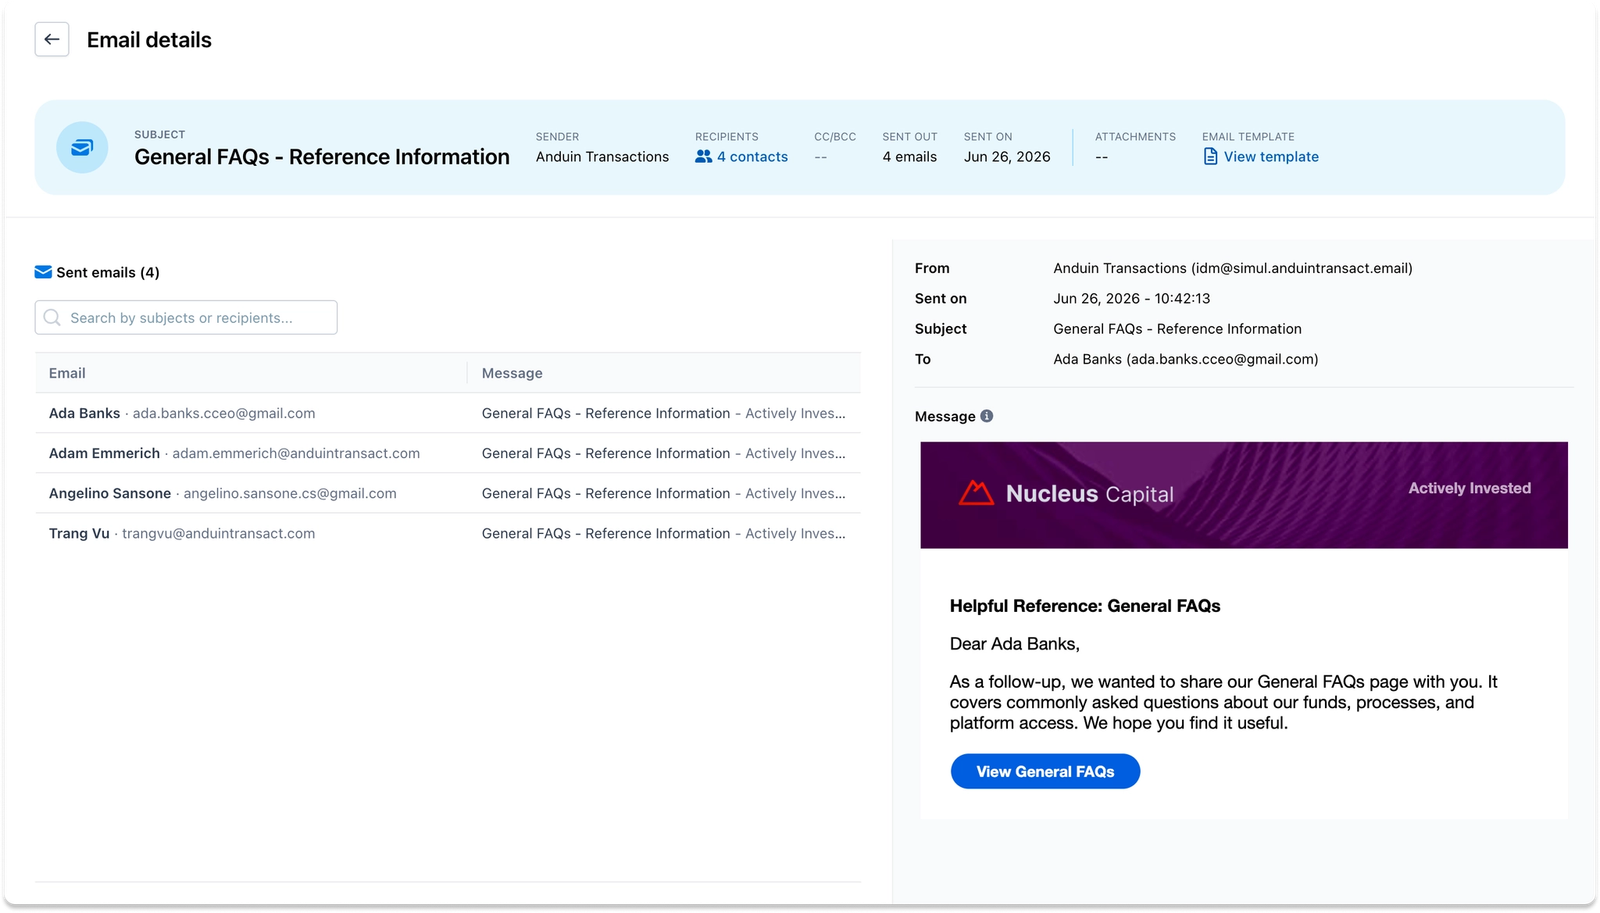
From this view, users can review the delivery status for each individual recipient and see any delivery errors surfaced directly if any.
Email drafts
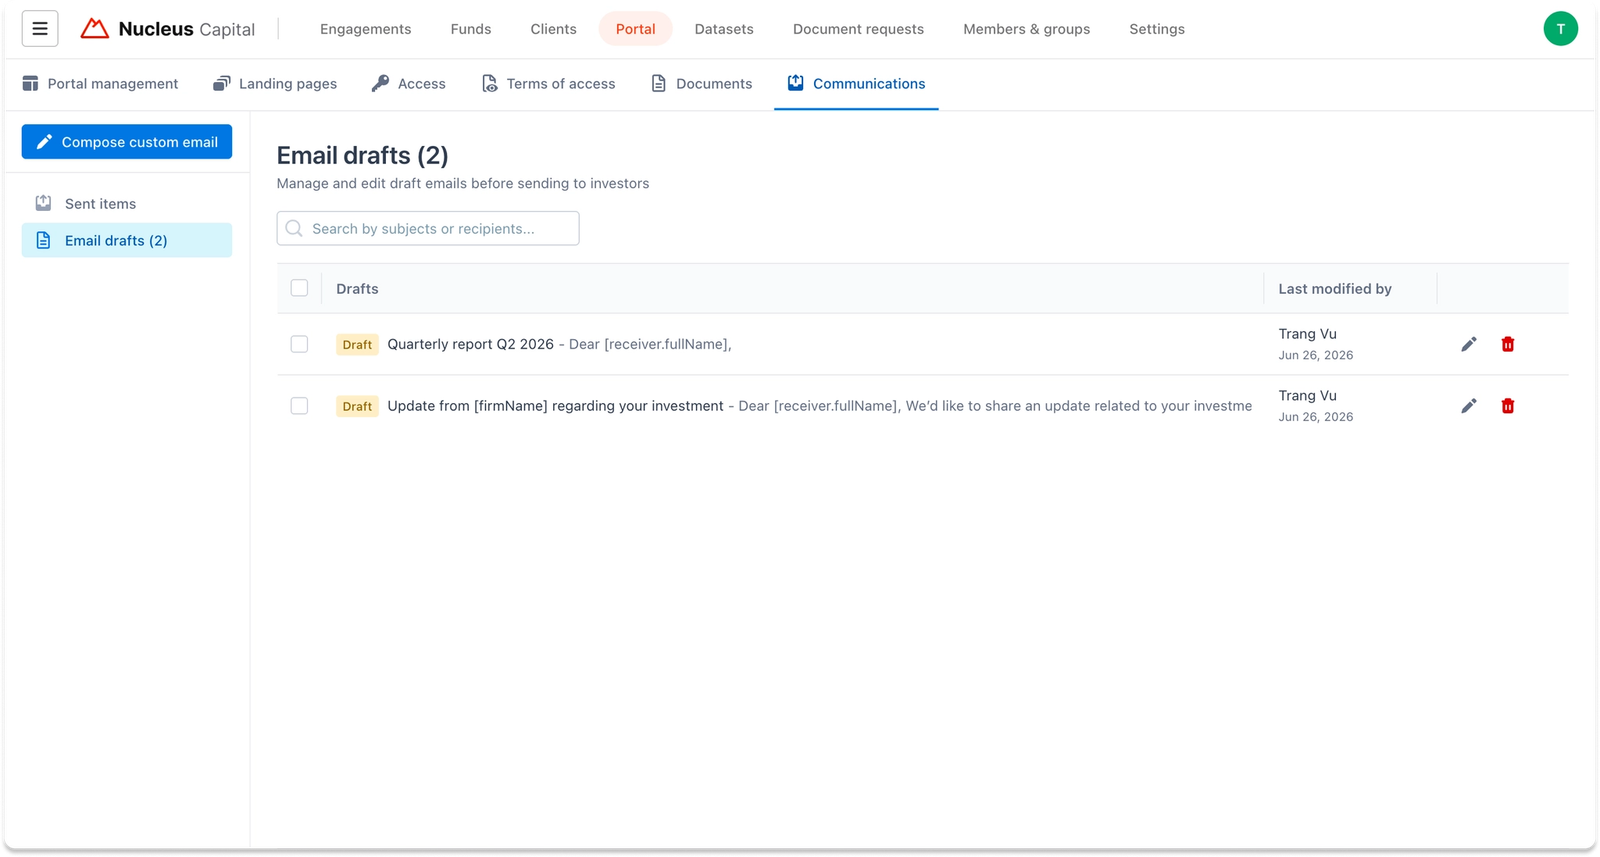
Email drafts shows all messages that have been saved but not yet sent. Each draft displays the subject, a preview of the message body, and the team member who last modified it.
From this view, drafts can be opened for editing or deleted before sending.
Part 2: Composing a custom email
To start a new message, click Compose custom email at the top of the left panel. This opens the compose modal where all details of the message can be configured.
Step 1: Select recipients
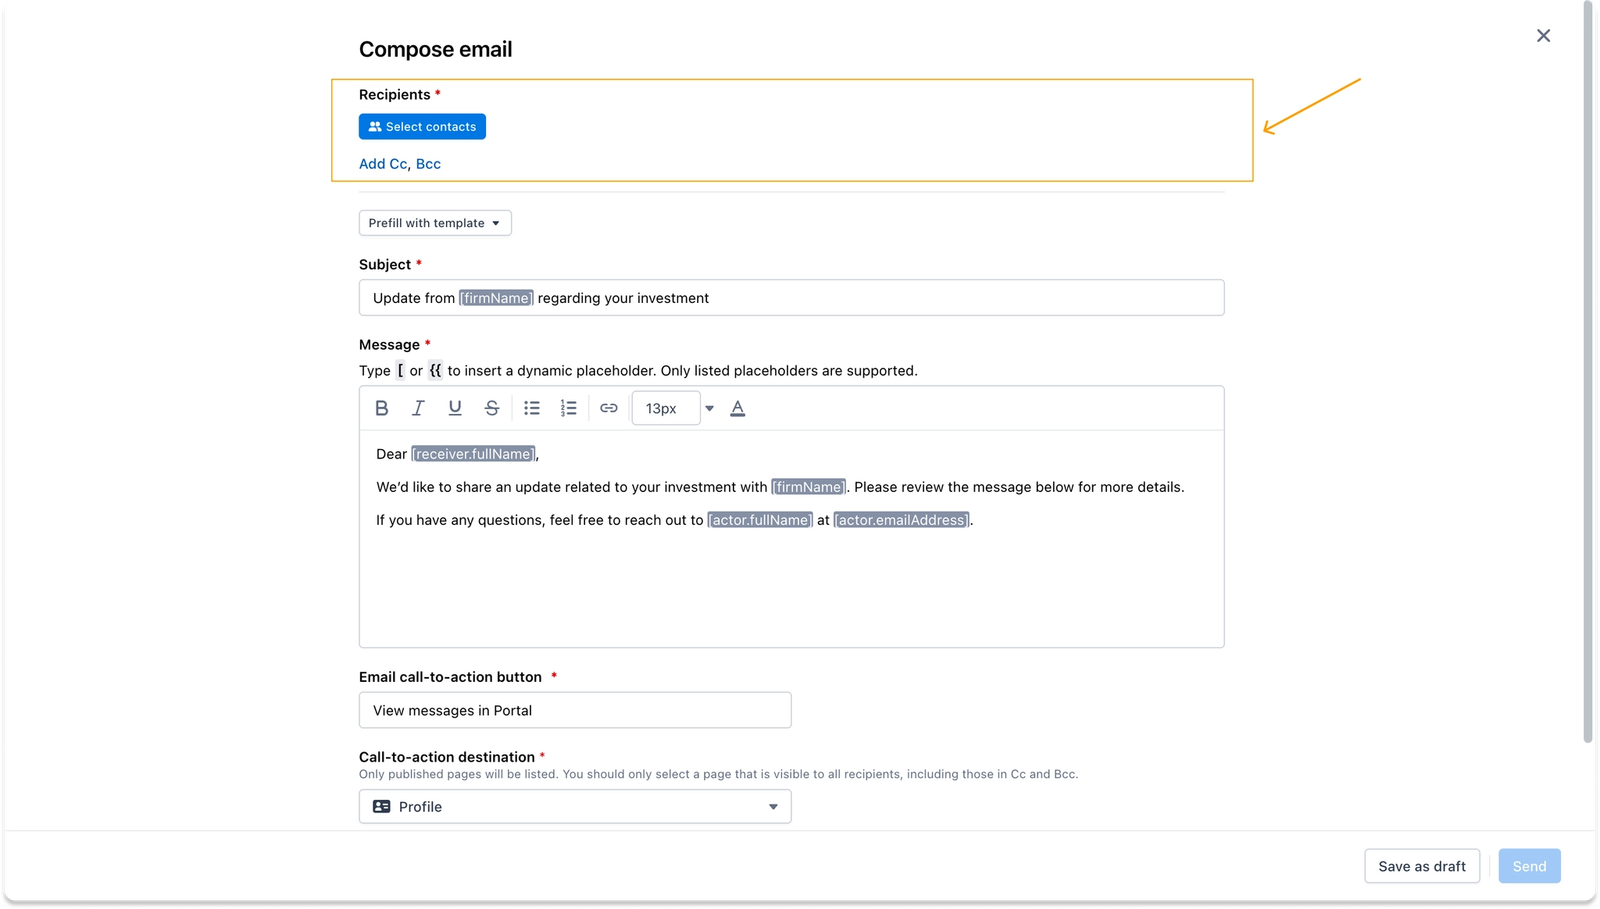
The first section of the modal is Recipients. Click Select contacts to open the contact selection modal, where any contact from the firm's contact list can be selected.
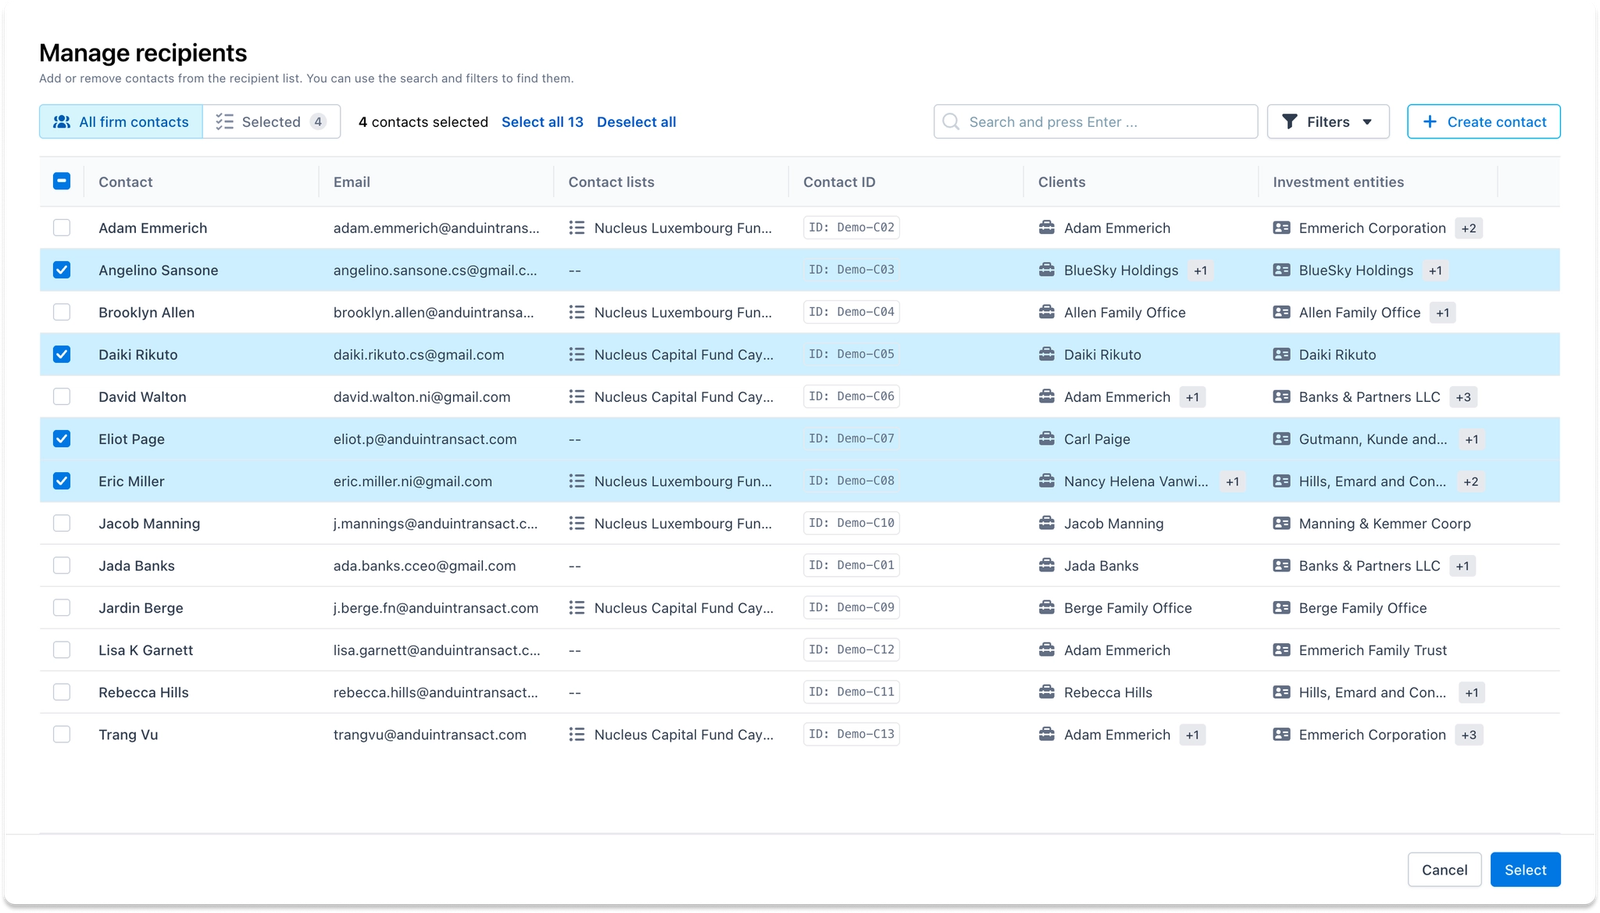
Once confirmed, the selected contacts appear in the Recipients field for review.
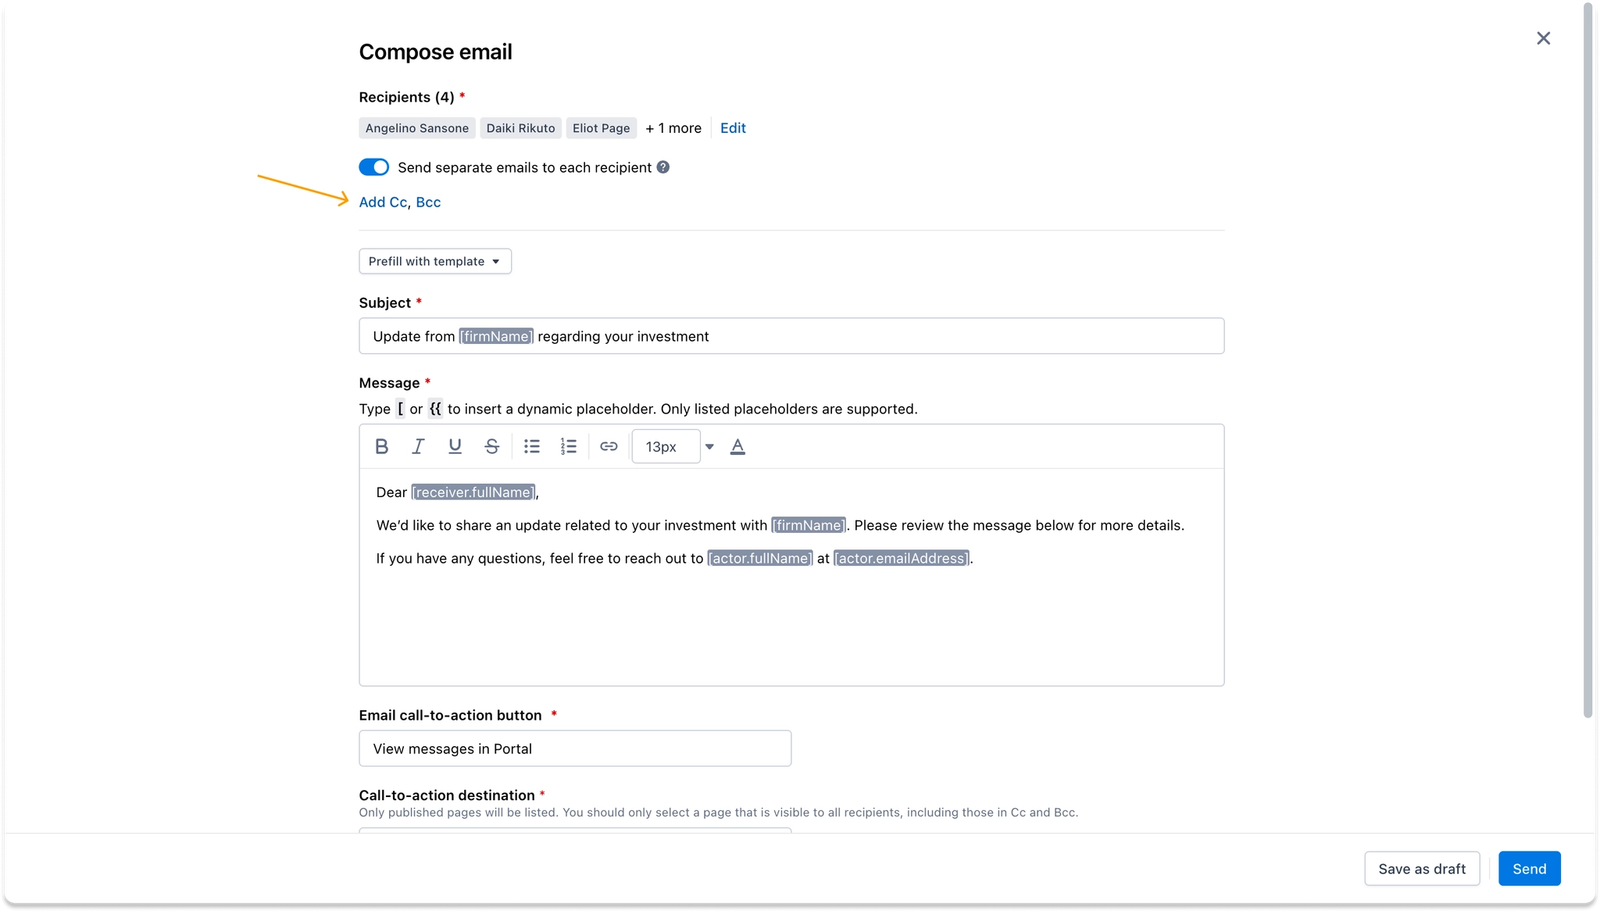
Cc and Bcc recipients can also be added from the same contact selection modal.
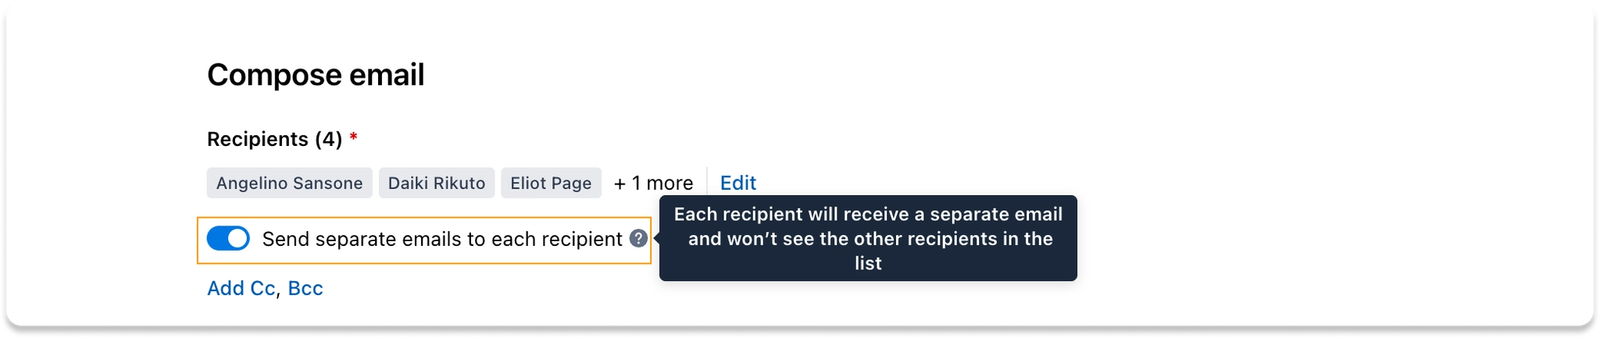
By default, the Send separate emails to each recipient toggle is turned on — meaning each recipient receives their own individual copy of the email. Turning this toggle off sends a single shared email to all recipients at once, which is useful when the message is addressed to a group or internal team rather than to each contact individually.
Step 2: Prepare the subject and message
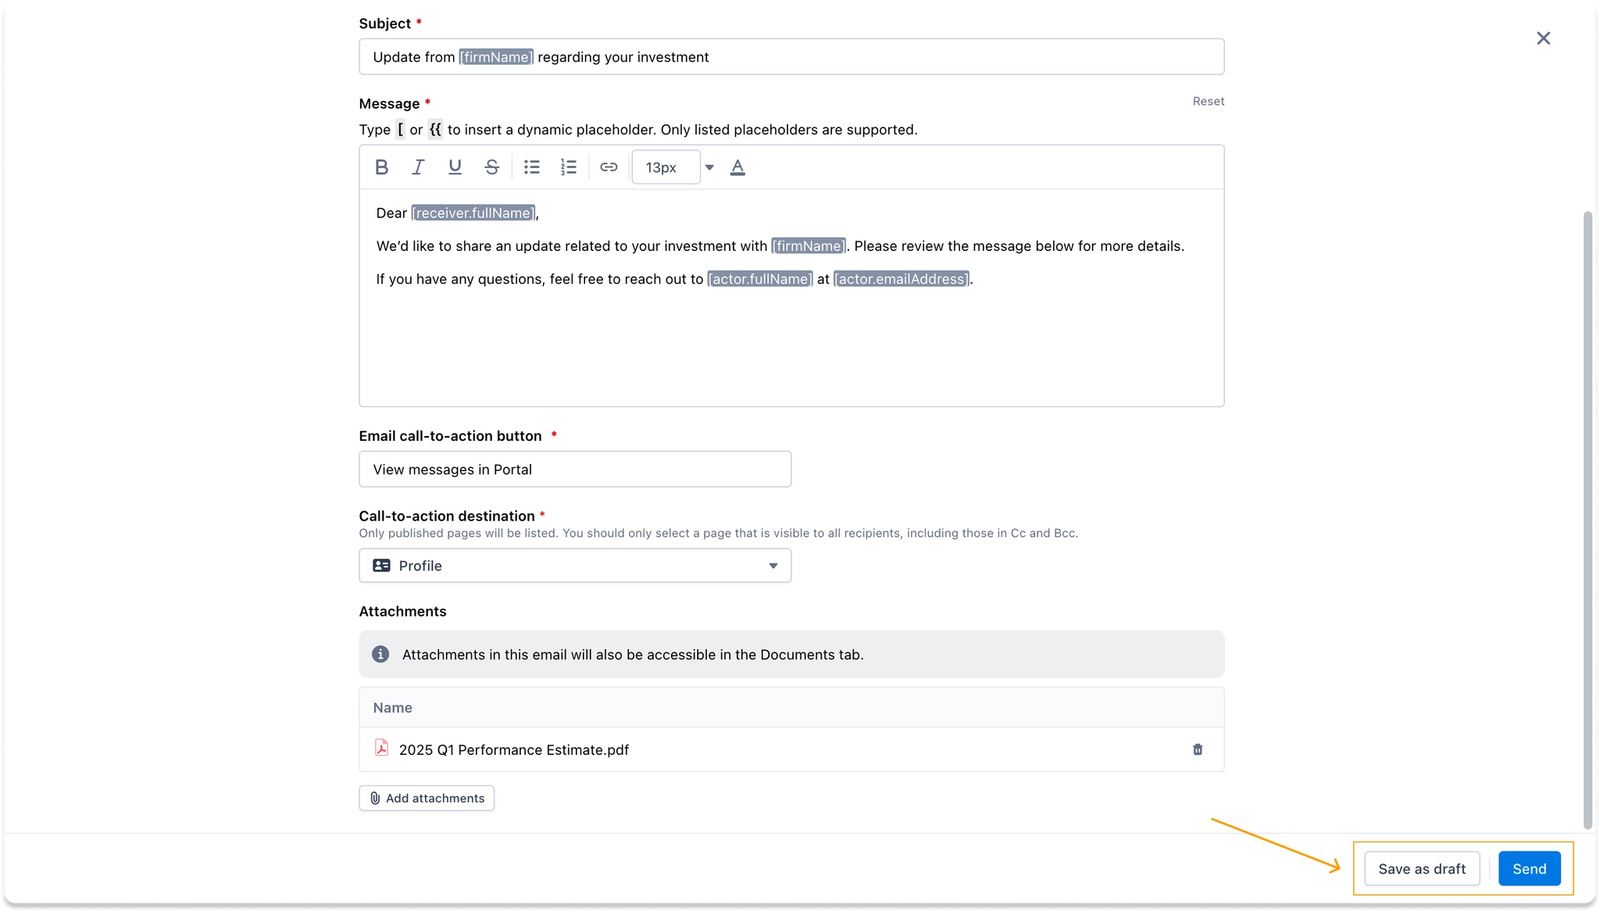
When landing on this view, the Subject, Message, and Email call-to-action button fields are all pre-filled using the firm's default email template, configured in Settings > Email templates.
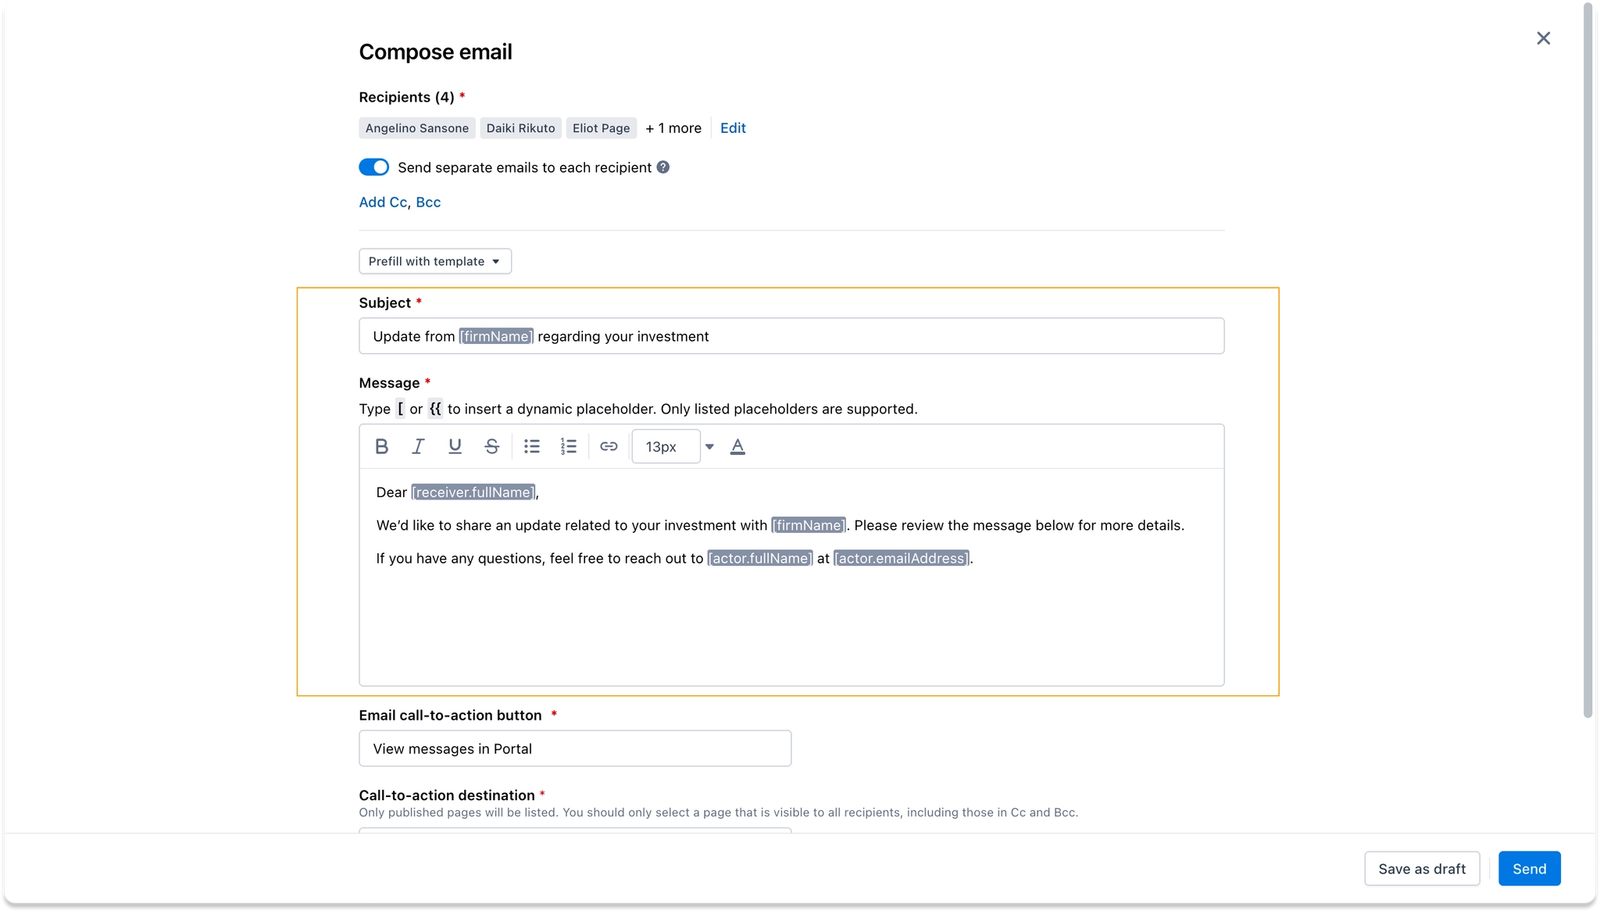
To switch to a different template, click the Prefill with template dropdown — this lists all available templates, and selecting one replaces the current subject, message, and call-to-action button content. From this same dropdown, new templates can also be created or existing ones managed without leaving the compose flow.
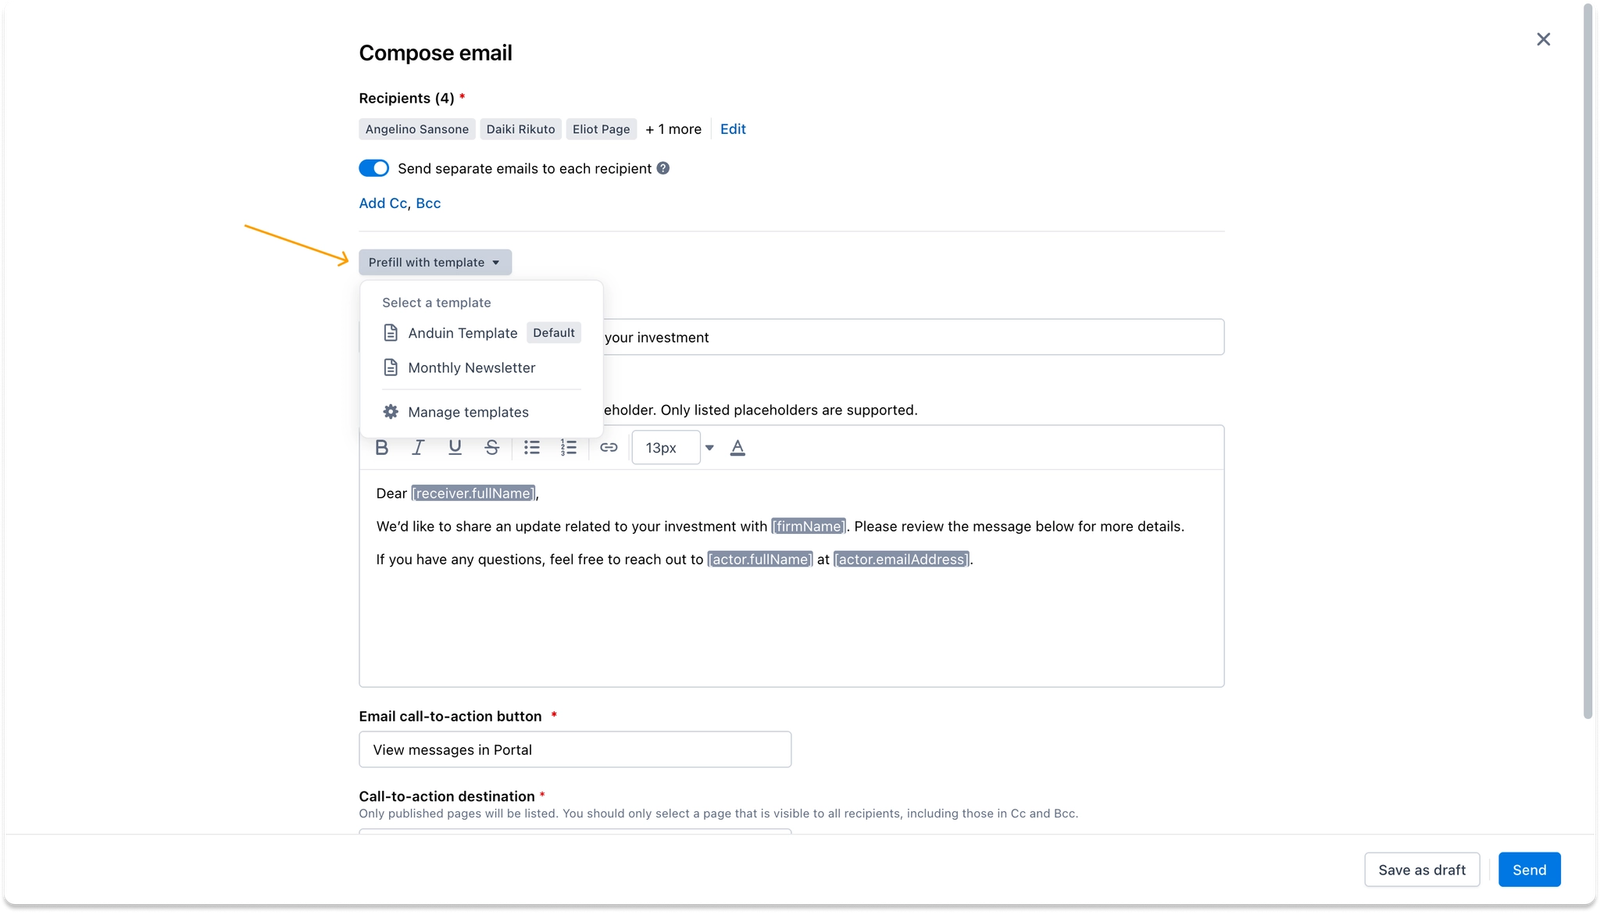
Note
Any manual edits made to the Subject, Message, or Email call-to-action button after selecting a template will override the template content. The final version sent always reflects what is shown in the fields at the time of sending.
The message body supports dynamic placeholders to personalize emails at scale. Typing [ or {{ opens a list of supported placeholders — such as receiver.fullName, firmName, and actor.emailAddress.
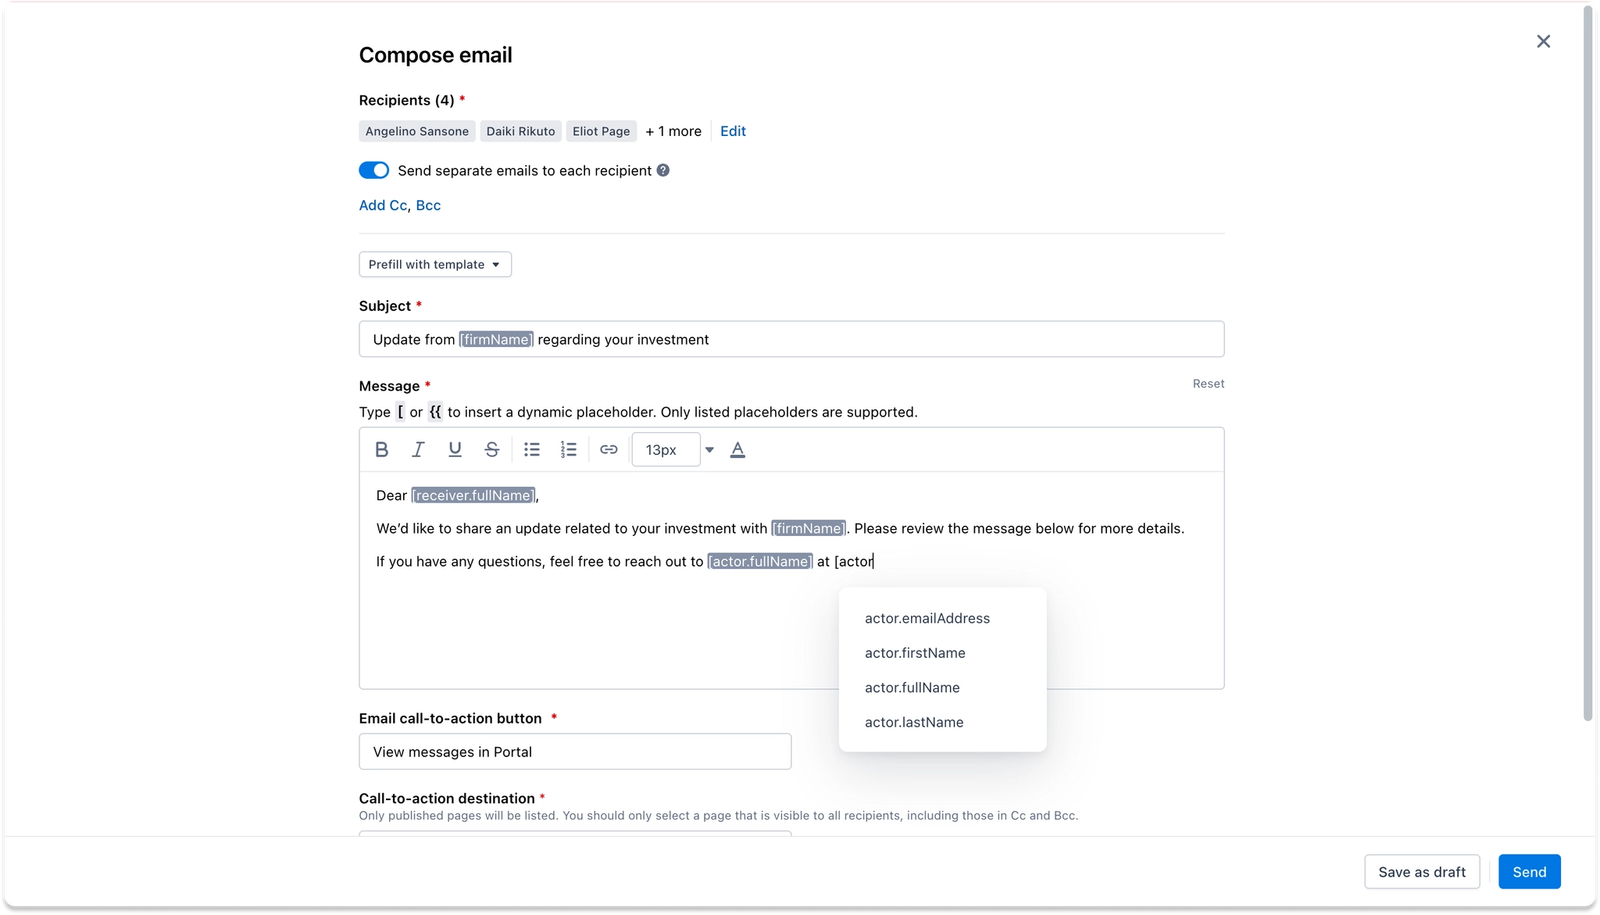
The message body supports dynamic placeholders to personalize emails at scale. Typing [ or {{ opens a list of supported placeholders. When the email is delivered, these are automatically replaced with the actual values for each recipient — so every investor sees their own name and correct details without manual customization.
Any unsupported placeholder entered will be flagged before the message can be sent.
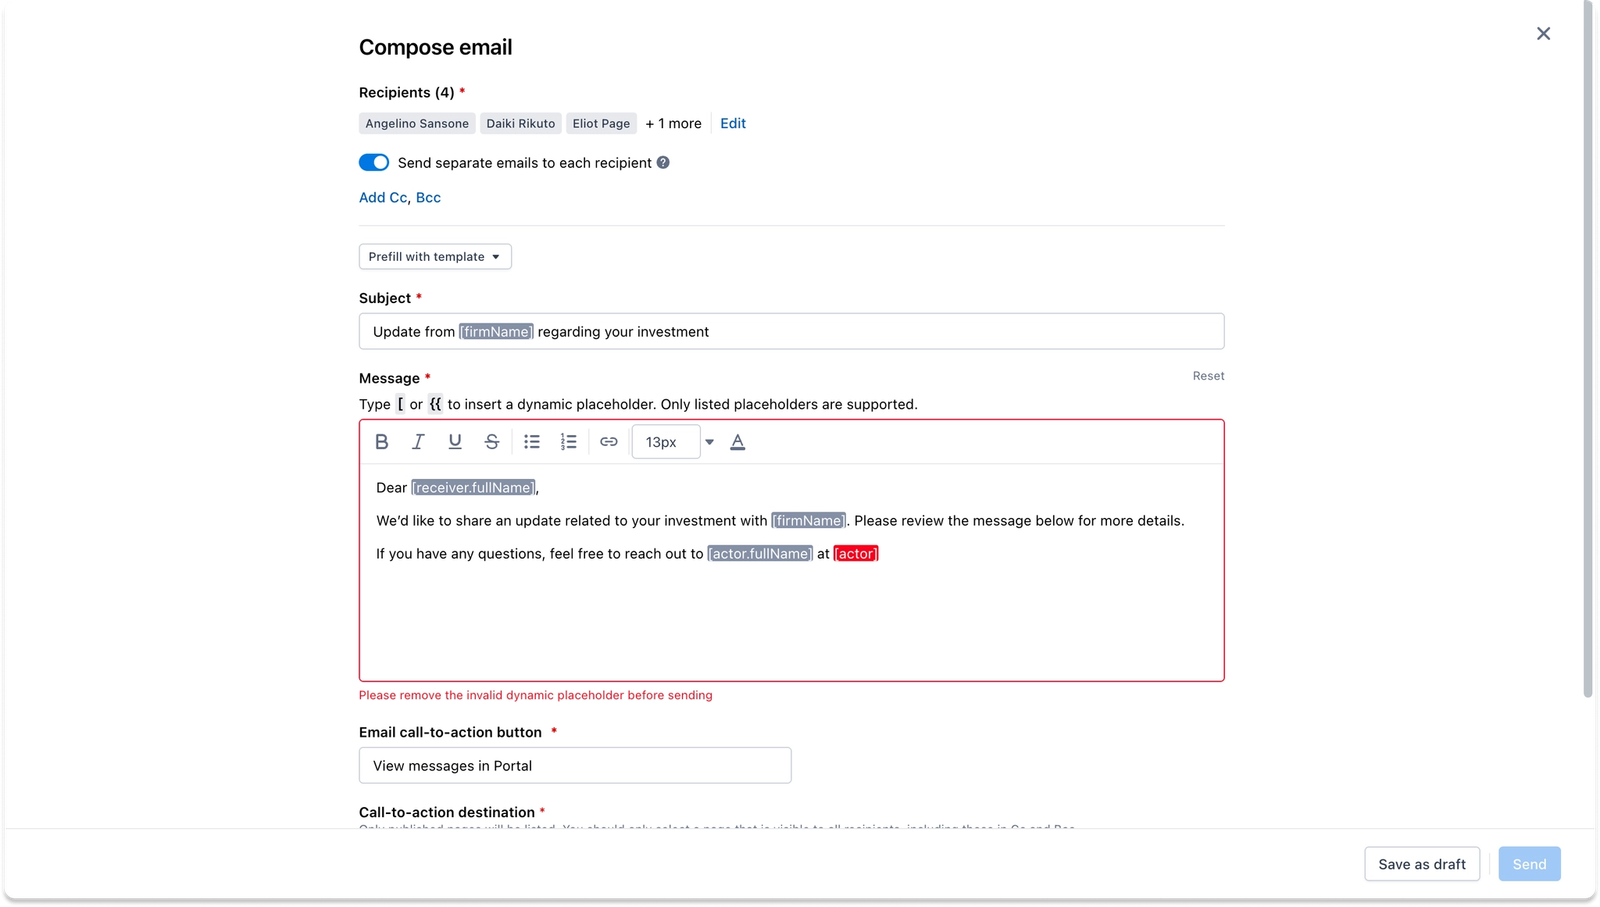
he available placeholders depend on the email workflow:
Invitation, Document Distribution, and Custom Email
receiver.fullNamereceiver.firstNamereceiver.lastNamereceiver.prefixAndLastNamereceiver.prefixAndFullNamereceiver.prefixAndFullNameAndSuffixreceiver.fullNameAndSuffixactor.fullNameactor.firstNameactor.lastNameactor.emailAddressfirm.name
Document Request
All of the above, plus:
investmententity.name
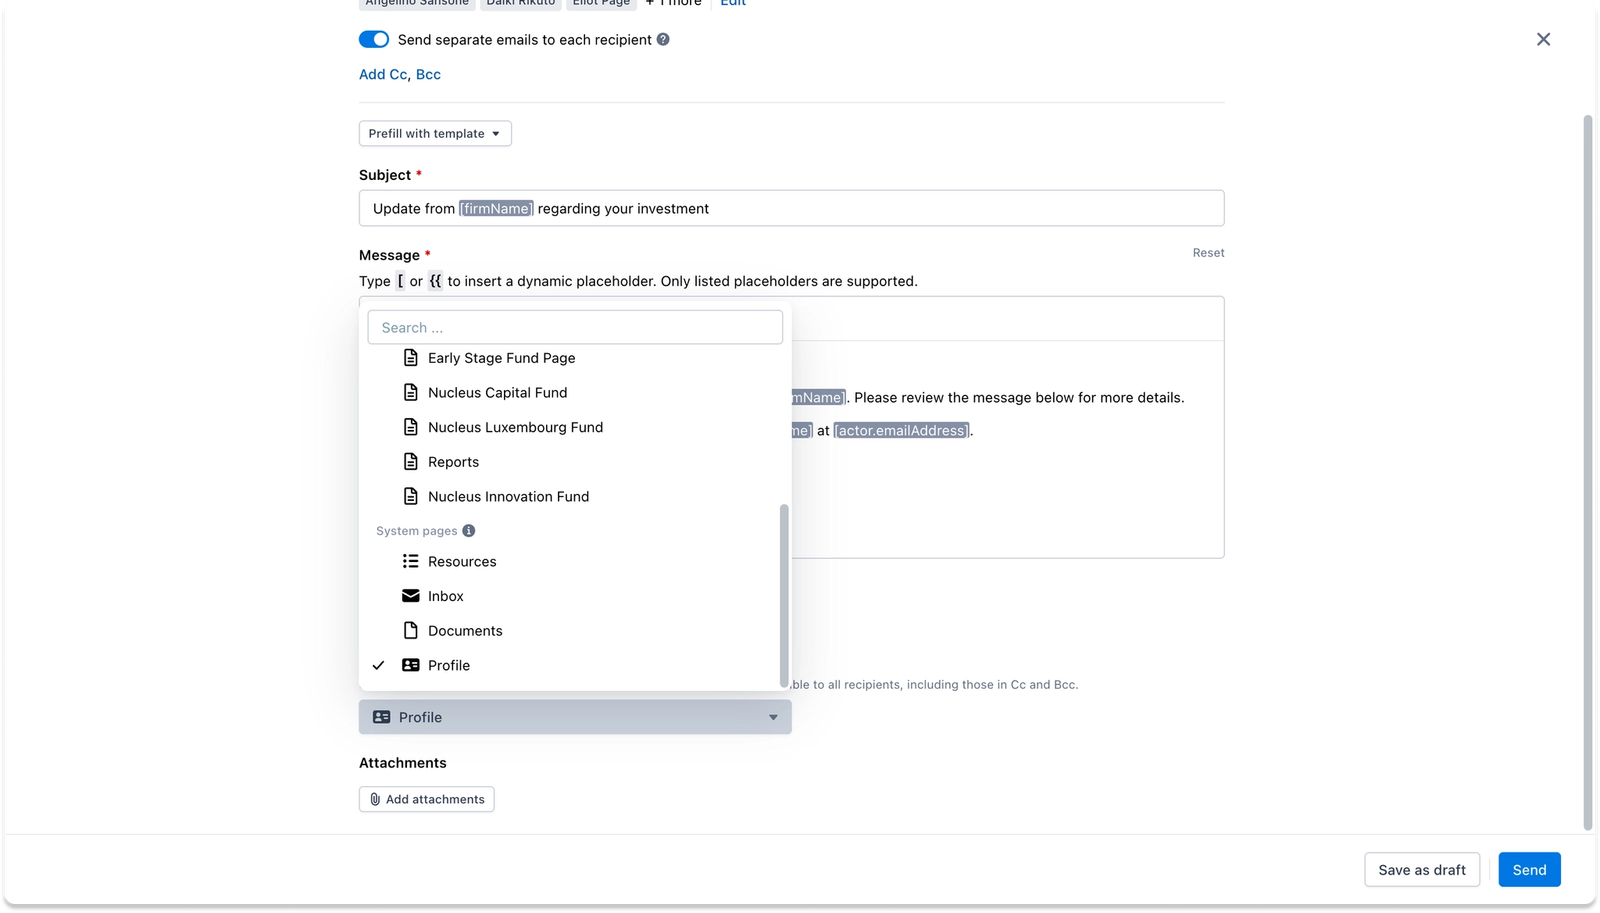
Step 3: Configure the call-to-action button
Below the message body, the Email call-to-action button field sets the label for the button that appears at the bottom of the email.
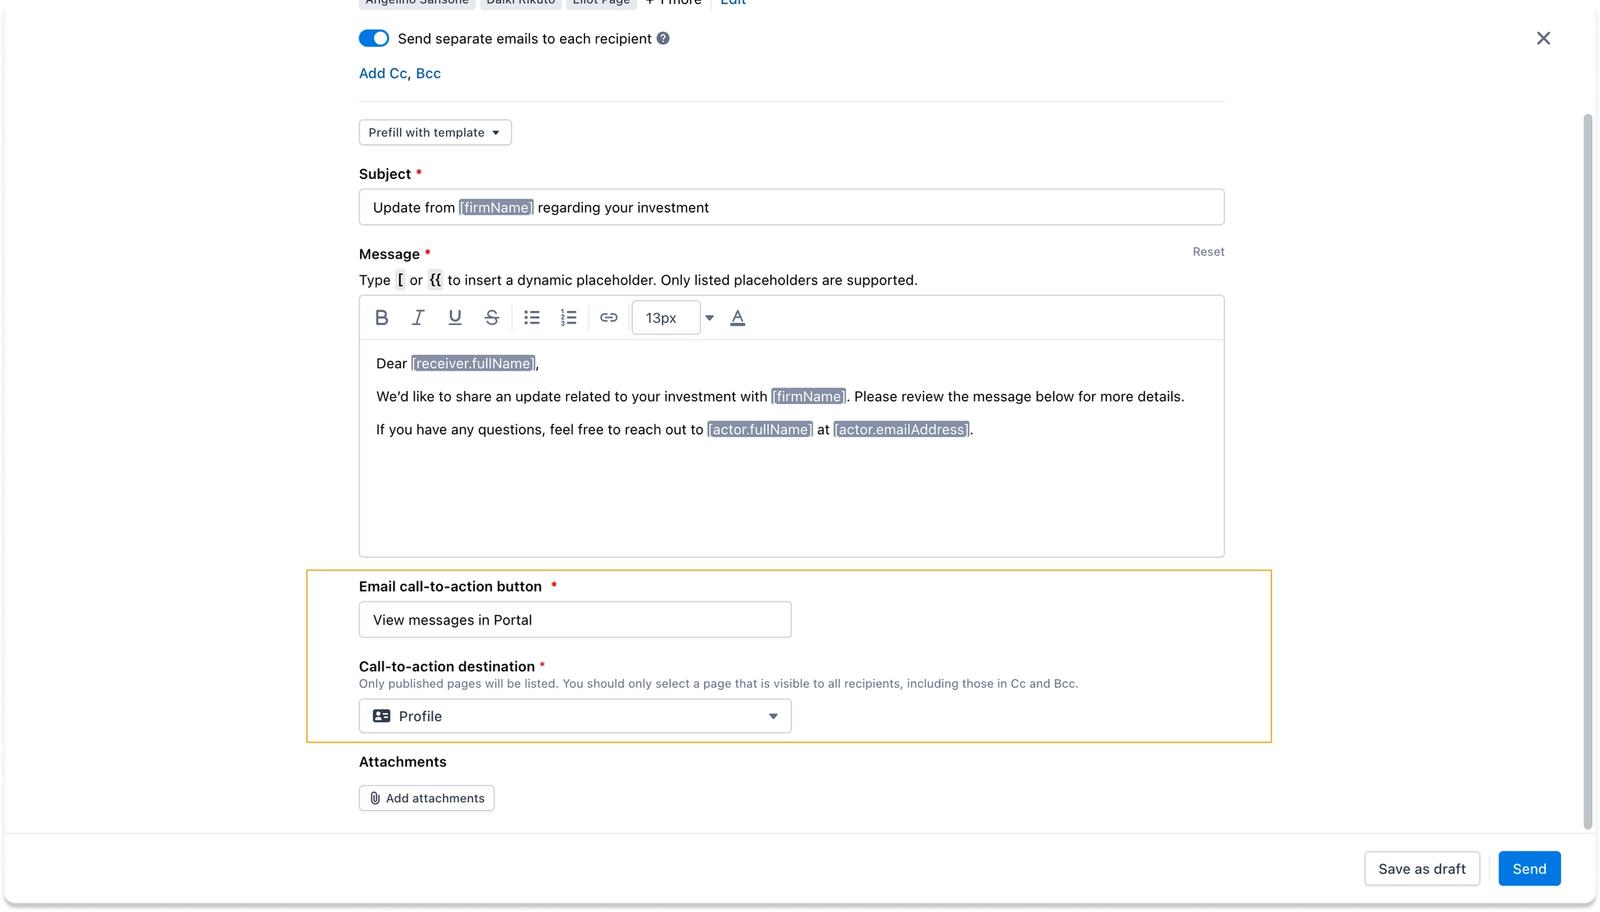
The Call-to-action destination dropdown lets fund admins choose which published portal page the button links to. Only pages visible to all selected recipients will appear as options.
Step 4: Add attachments (optional)
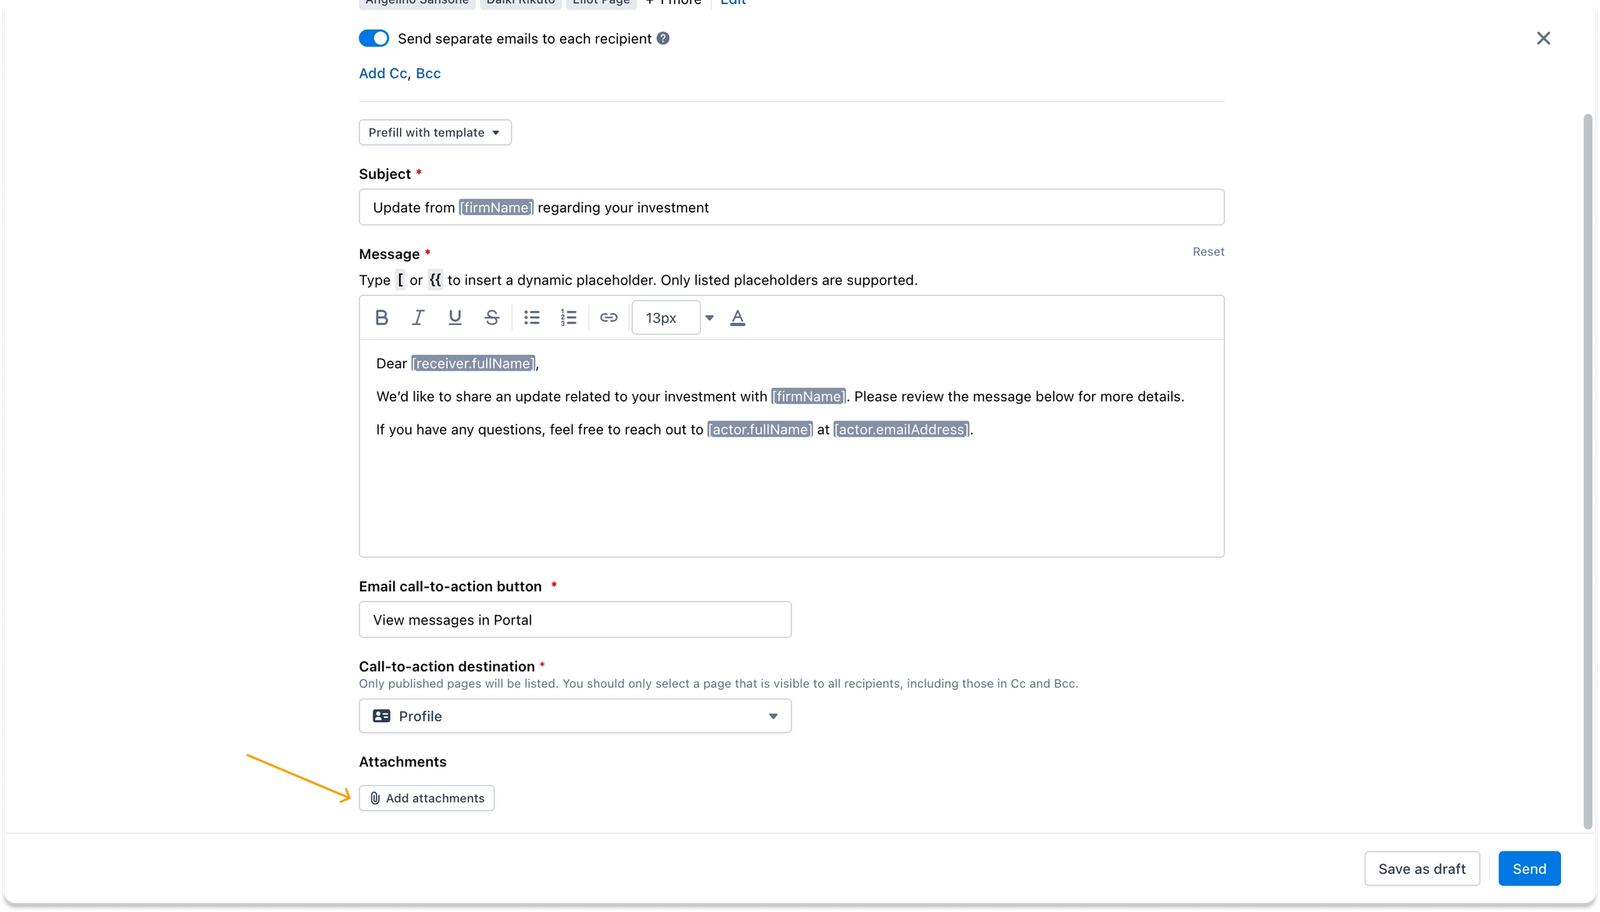
If the email needs to include files, click Add attachments.
Tip
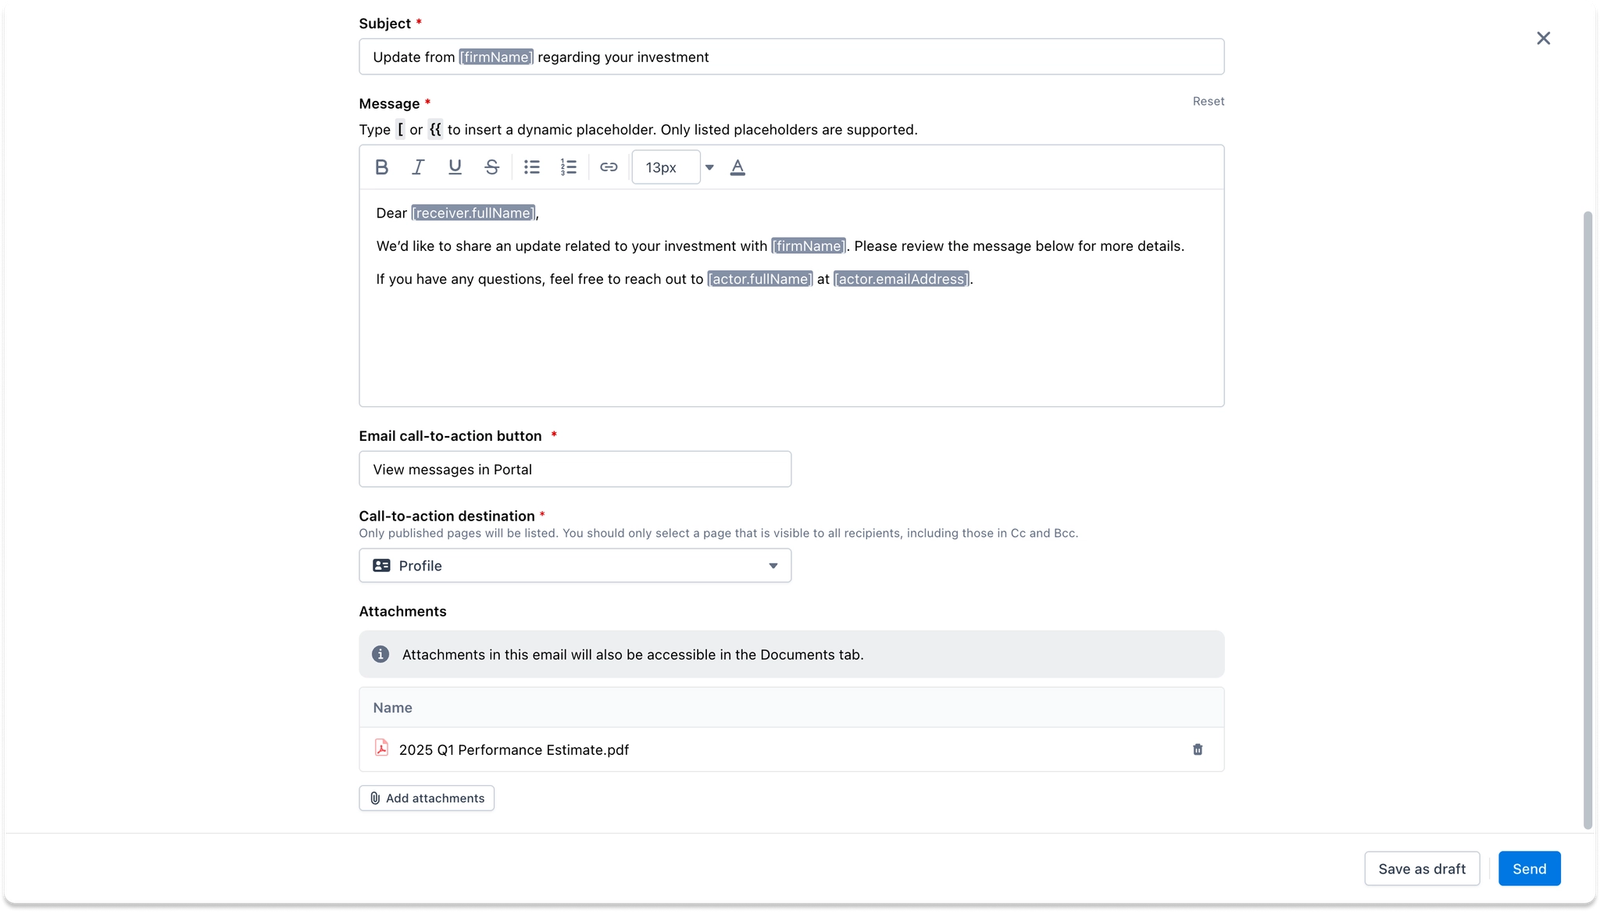
Any documents added here will also appear in the Documents dashboard in both IDM & in the Investor Portal — there is no need to upload the same file separately.
Step 5: Send or save as draft
Once everything is ready, click Send to deliver the message immediately. The record will be logged in Sent items in the Communications dashboard.
To save the message for later, click Save as draft. This is useful when an email is being prepared in advance or needs review by another team member before it goes out. Saved drafts are accessible from the Email drafts section at any time.