
For LPs: How to Fulfill a Document Request
Introduction This guide is intended to guide investors (LPs) through the steps to review and complete AML/KYC document update requests sent by the fund man
Introduction
This guide is intended to guide investors (LPs) through the steps to review and complete AML/KYC document update requests sent by the fund manager (GP).
Guideline
Step 1: Receive the document request in your mailbox
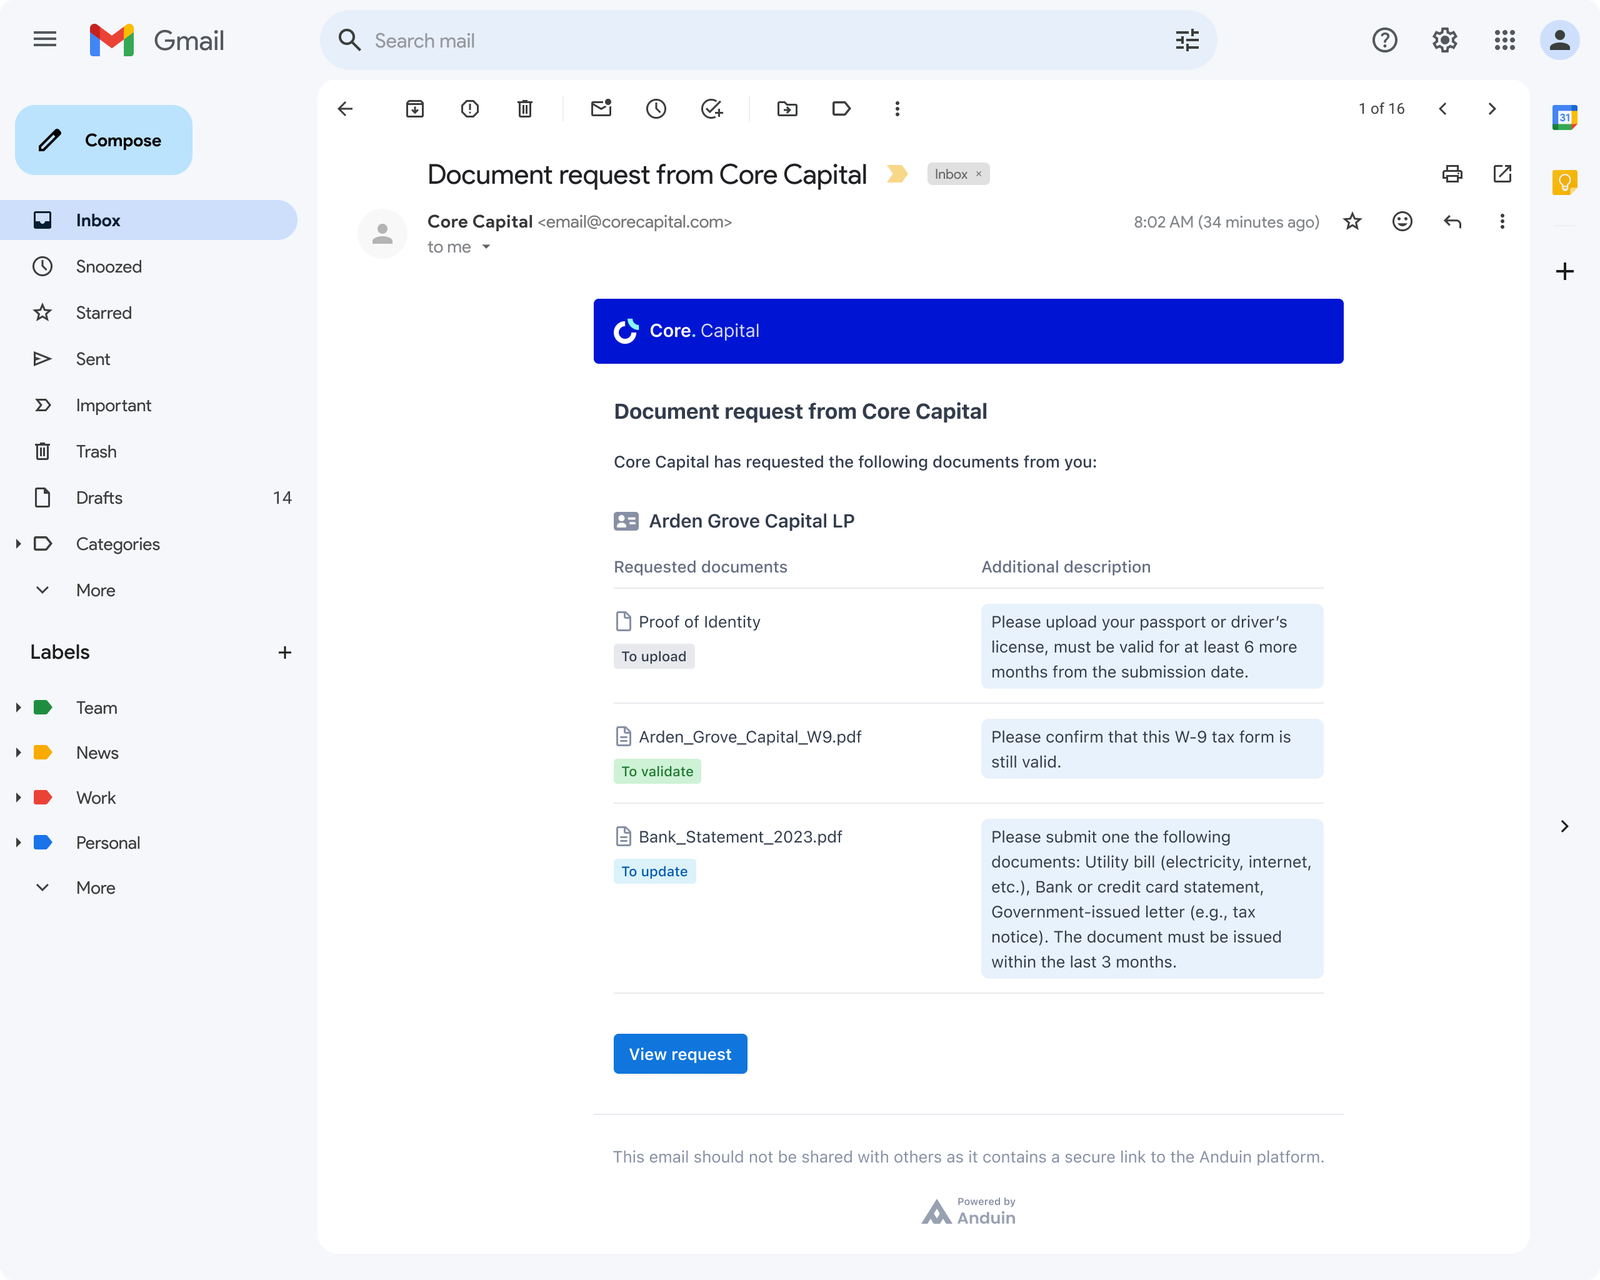
When the GP requests documents from you, you will receive an email titled “Document Request from <Firm Name>”.
The email includes:
- A summary of what is being requested
- A secure link to view the request in Anduin app
Click “View request” in the email to continue.
Step 2: Log In to Anduin
After clicking the email link:
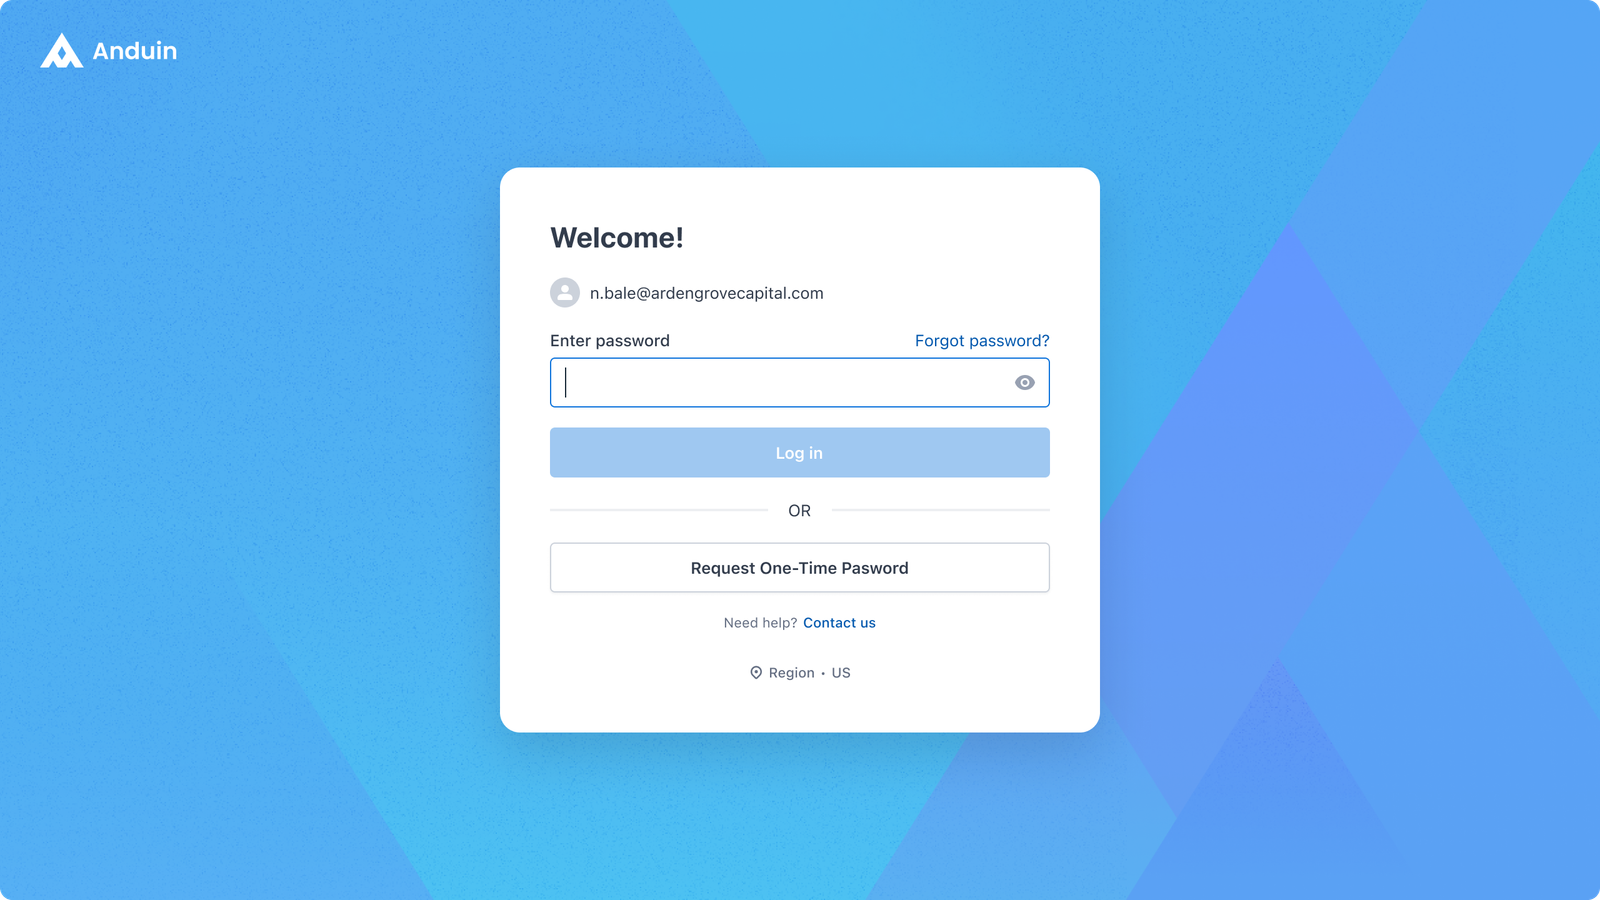
- You will be taken to the Anduin login page.
- Enter your email address and password.
- If you are new to the system, you will be prompted to create an account.
After login, you will be taken to the Anduin Investor Access app, our dedicated application for investors to view requests, manage documents, and securely maintain your investor information.
From here, you’ll be automatically directed to your pending document request list.
Step 3: Open Your Document Request
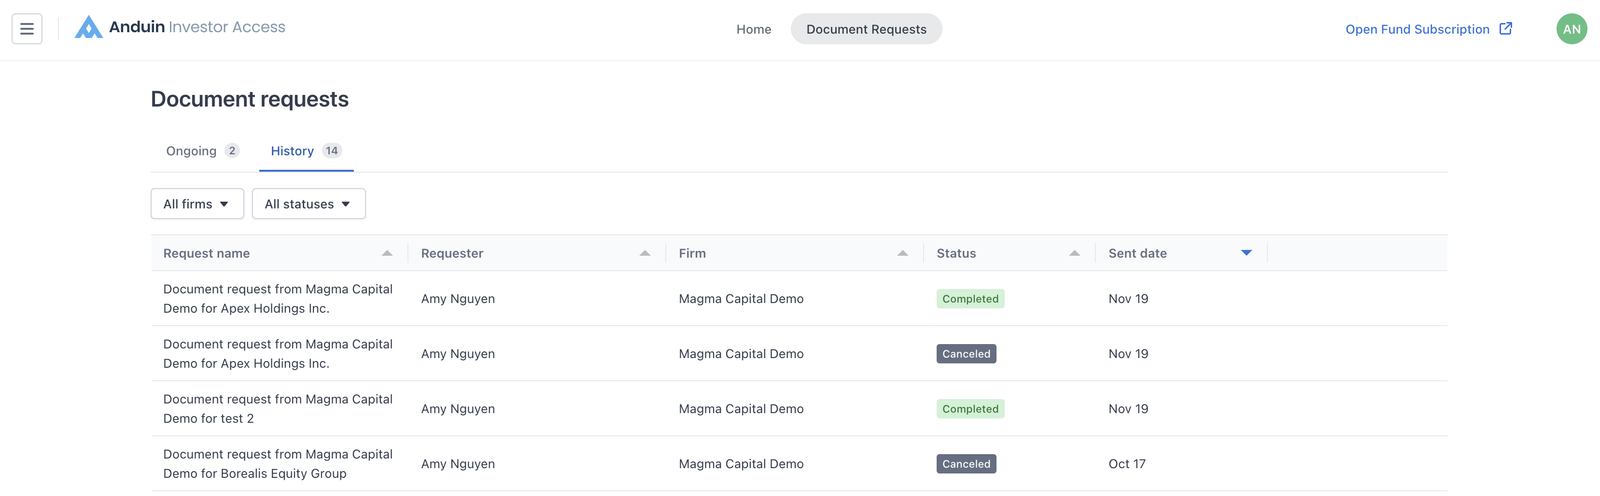
On the Document Requests screen, you will see all requests sent to you.
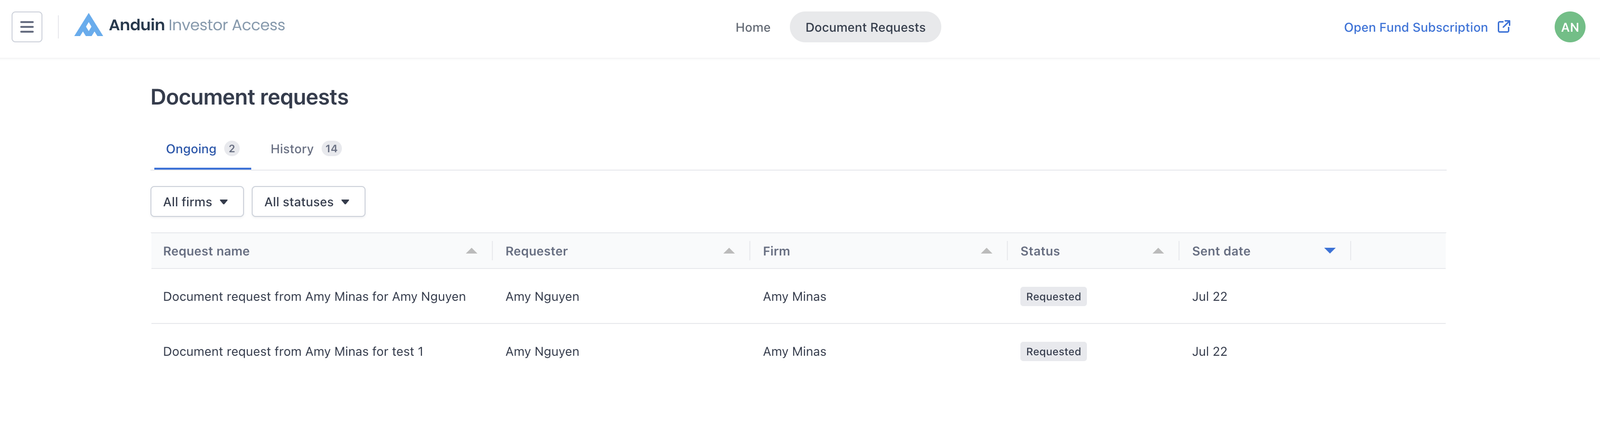
- The Ongoing tab contains all open requests, pending for your fulfillment.
- The History tab lists out the finished requests.
Each request corresponds to one investment entity (IE).
Click the open request you want to fulfill to continue.
Step 4: Reviewing and Fulfilling The Request
When you open a document request, you will see several items listed. Each item represents one document the GP needs from you.
Depending on the document status, you will see different actions available.
Below is a clear explanation of the different actions you can take in one request.
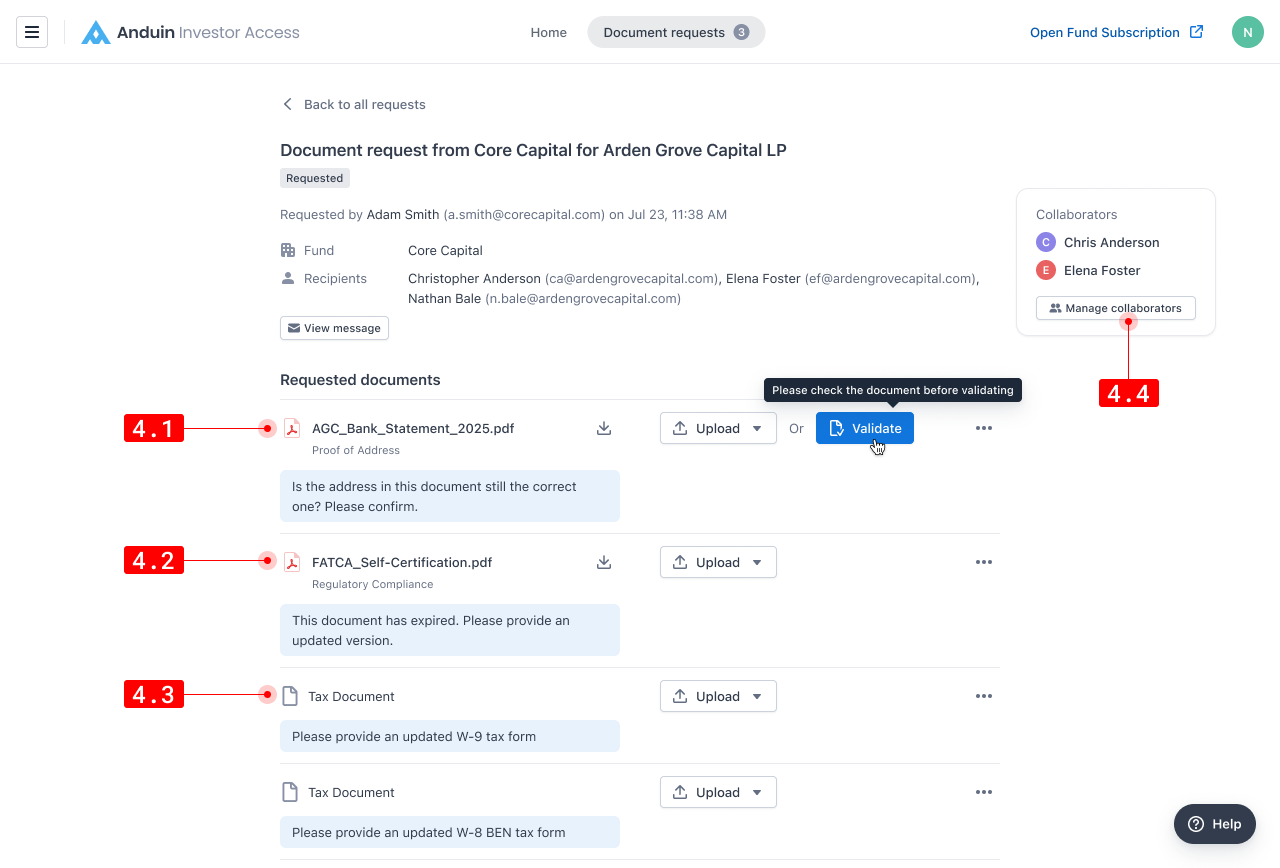
4.1. Validate existing documents
These are documents you previously submitted, and the GP is asking you to confirm whether the information is still valid.
You can take one of these actions:
- Validate: if the document is still valid to use
- Upload a new file: if the information has changed and you wish to submit a replacement
- Mark as Not Applicable (from the ⋯ menu): if you believe this document no longer applies to you
- Add a note: once you have taken one of the three actions above, you can include a note if you want to add additional explanation to the GP
4.2. Renew existing documents
These are documents that have expired or are outdated (e.g., old passport, expired certification).
You can take these actions:
- Upload: submit the updated file
- Mark as Not Applicable (from the ⋯ menu): if you believe the GP requested it in error or this document no longer applies to you
- Add a note: once you have taken one of the twp actions above, you can include a note if you want to add additional explanation to the GP
4.3. Submit new documents
These are items the GP has never collected from you before. You will see the document type and some description of what is needed (if provided by the GP).
You can take these actions:
- Upload: submit the updated file
- Mark as Not Applicable (from the ⋯ menu): if you believe the GP requested it in error or this document no longer applies to you
- Add a note: once you have taken one of the twp actions above, you can include a note if you want to add additional explanation to the GP
4.4 Add collaborators to help you fulfill the request
If you need assistance completing a document request, you can add collaborators directly from the request screen.
Collaborators can do everything you can — including viewing existing files, uploading new ones, and even submitting the completed request.
To add a collaborator:
- Click the Manage collaborators button on the floating card
- Enter their name and email address
- They will receive an email invitation and gain access to this specific request
Step 5: Submit The Request
When you’ve completed all actions for each document, a black card will appear at the bottom of the screen. Click Submit request button to finish.
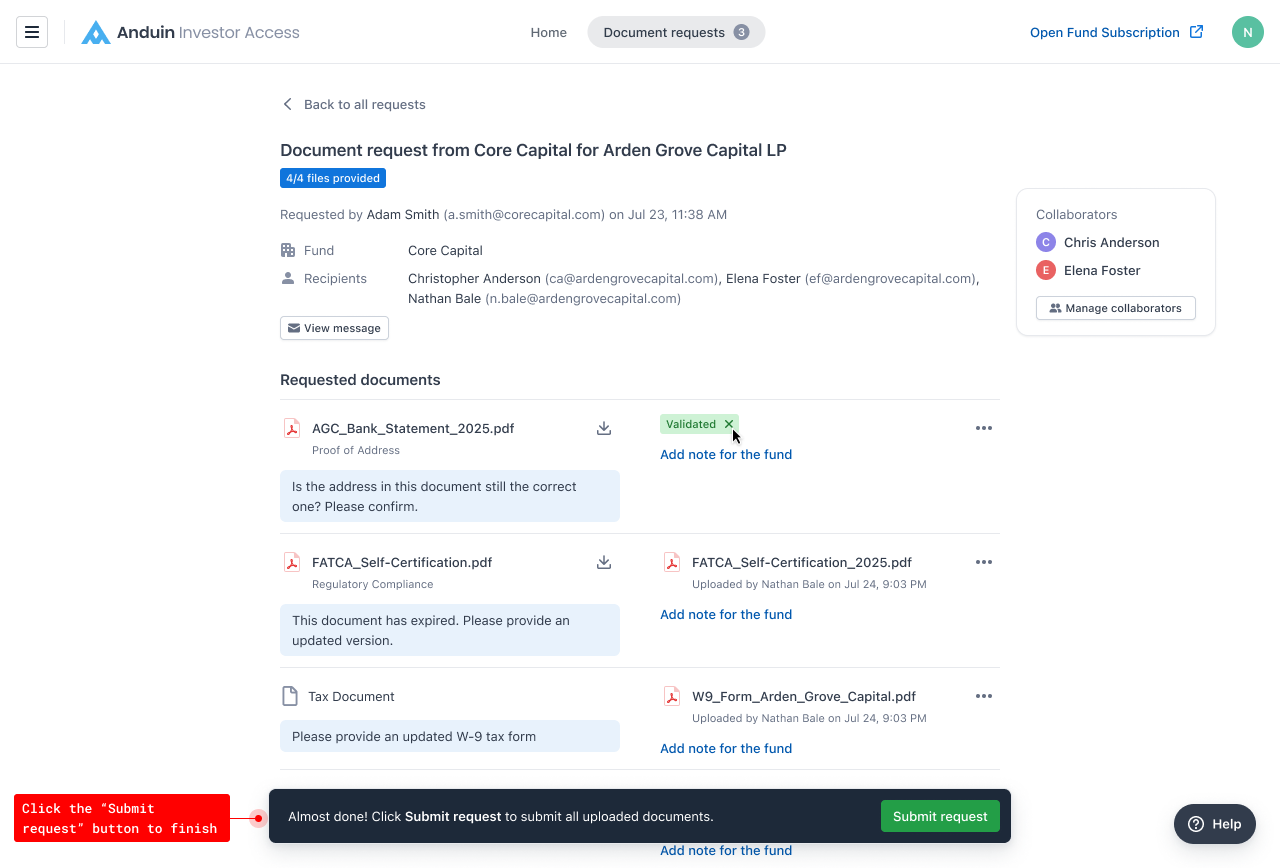
Submitting the request notifies the GP that your part is complete.
Important notes:
- The GP will only receive your uploaded files after you have submitted the request.
- Once you submit the request, you cannot make further changes.
After you submit, the request will automatically move to the History tab. This helps you stay organized and focus only on the requests that are still Open.