

For GPs: Review submitted documents
Introduction When an LP submits all required documents, the request becomes ready for GP review. This guide walks you through how to review and complete th
Introduction
When an LP submits all required documents, the request becomes ready for GP review. This guide walks you through how to review and complete those submissions.
Guideline
Step 1: Locate Submitted Requests
Access from IDM app
- In IDM app, go to Document Requests > Ongoing.
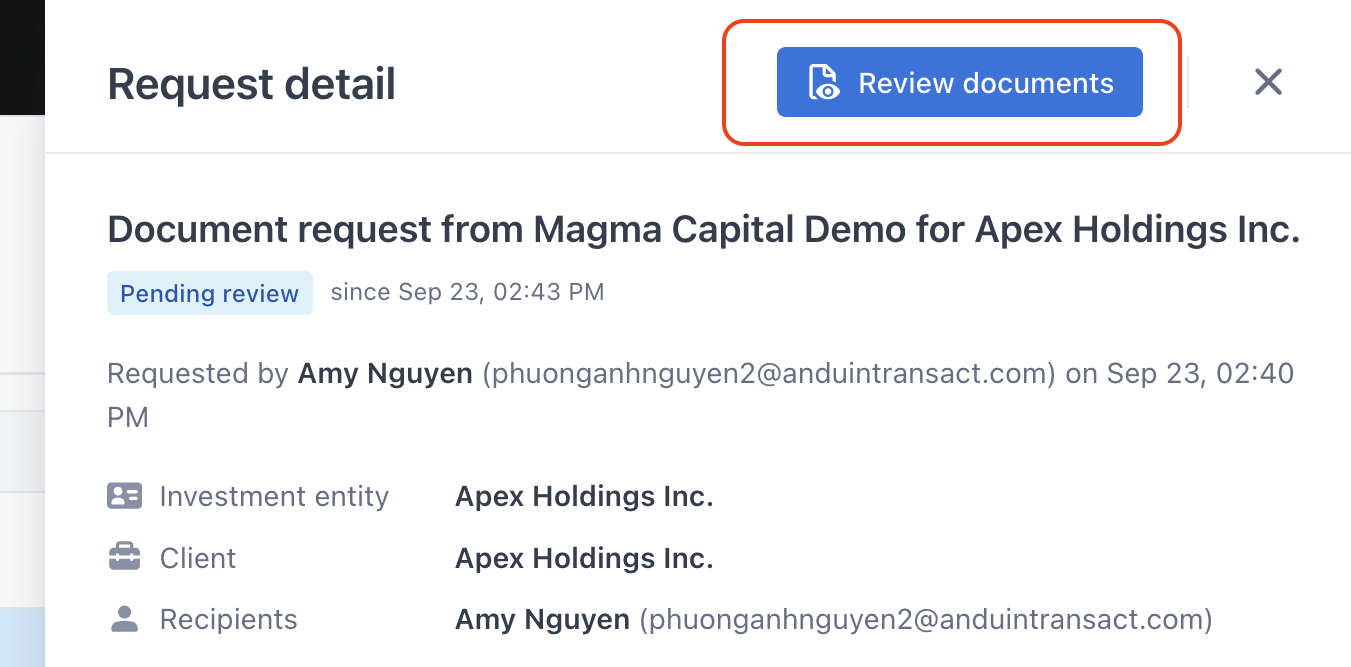
- Any request that has been submitted by the LP will show the status Pending review.
- Click the request to open it. Then, click the Review documents button to open the review wizard.
Access from email notification
- You can configure email notifications for yourself or your team when a request becomes Pending review. Go to Settings > Document settings > Document requests > Notify members for review.
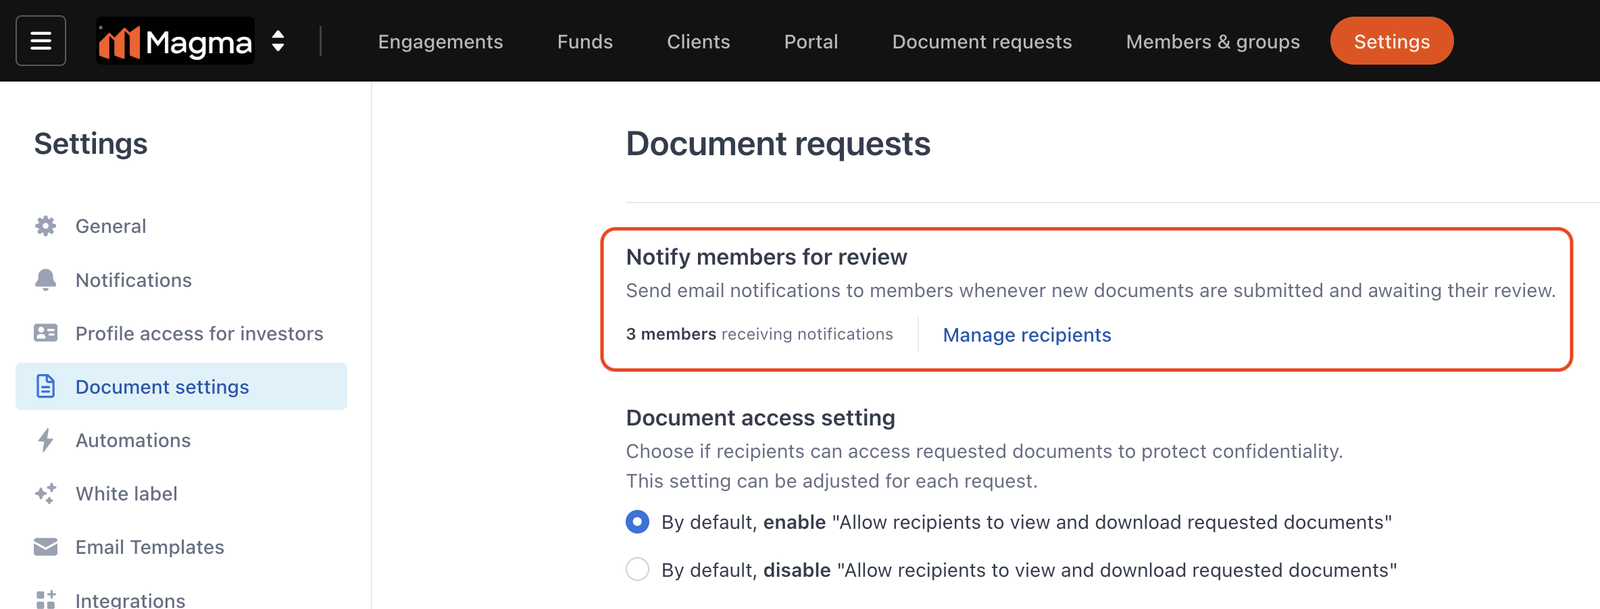
- Once configured, whenever there is a request submitted for review, you will receive a notification. Click the CTA button on the email to access the request.
Step 2: Review The Documents
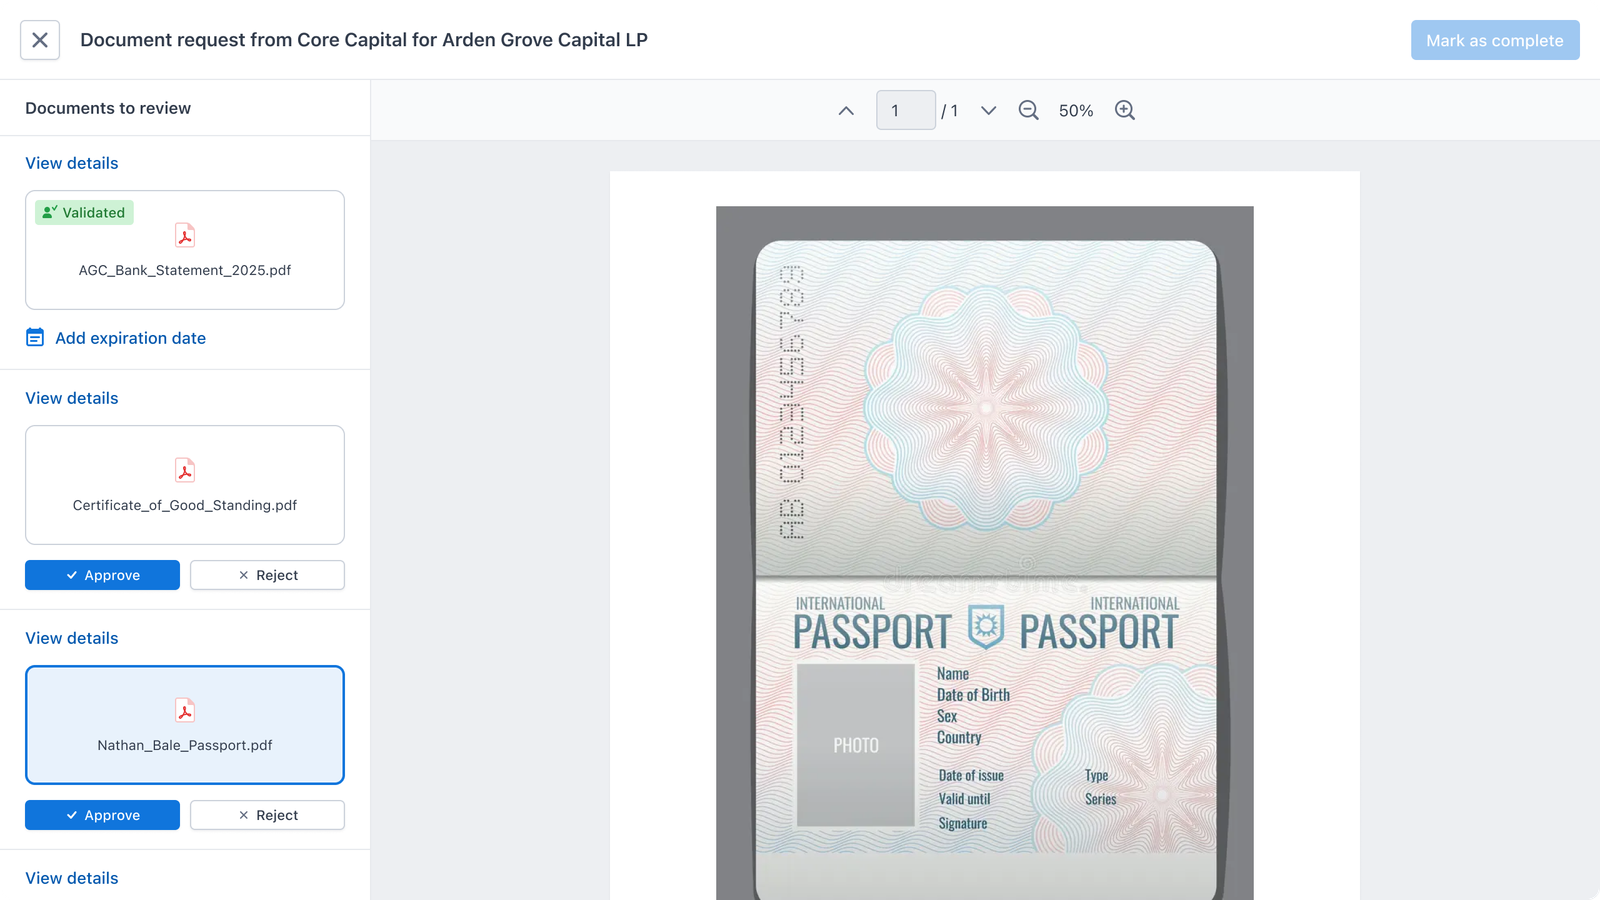
In the Review wizard, you will find the following:
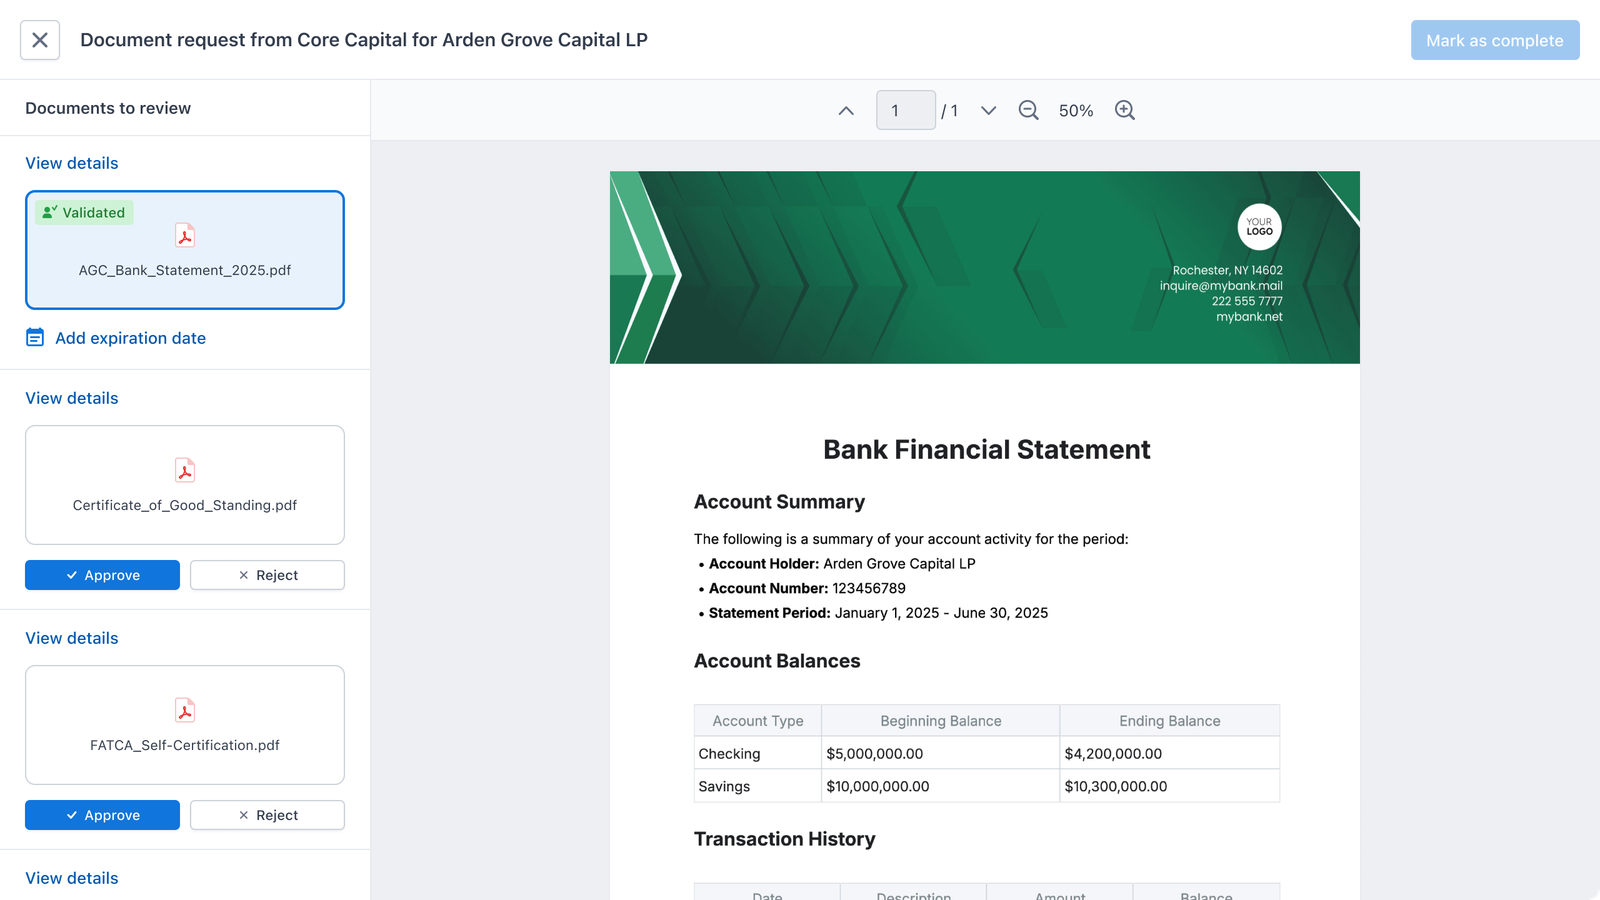
2.1 Validated Document
For documents that require LPs validation, you can:
- View the file.
- (Optional) Add or update the expiration date.
2.2 Renewed Document
For documents that need renewal, you can:
- Compare the old and new versions side-by-side.
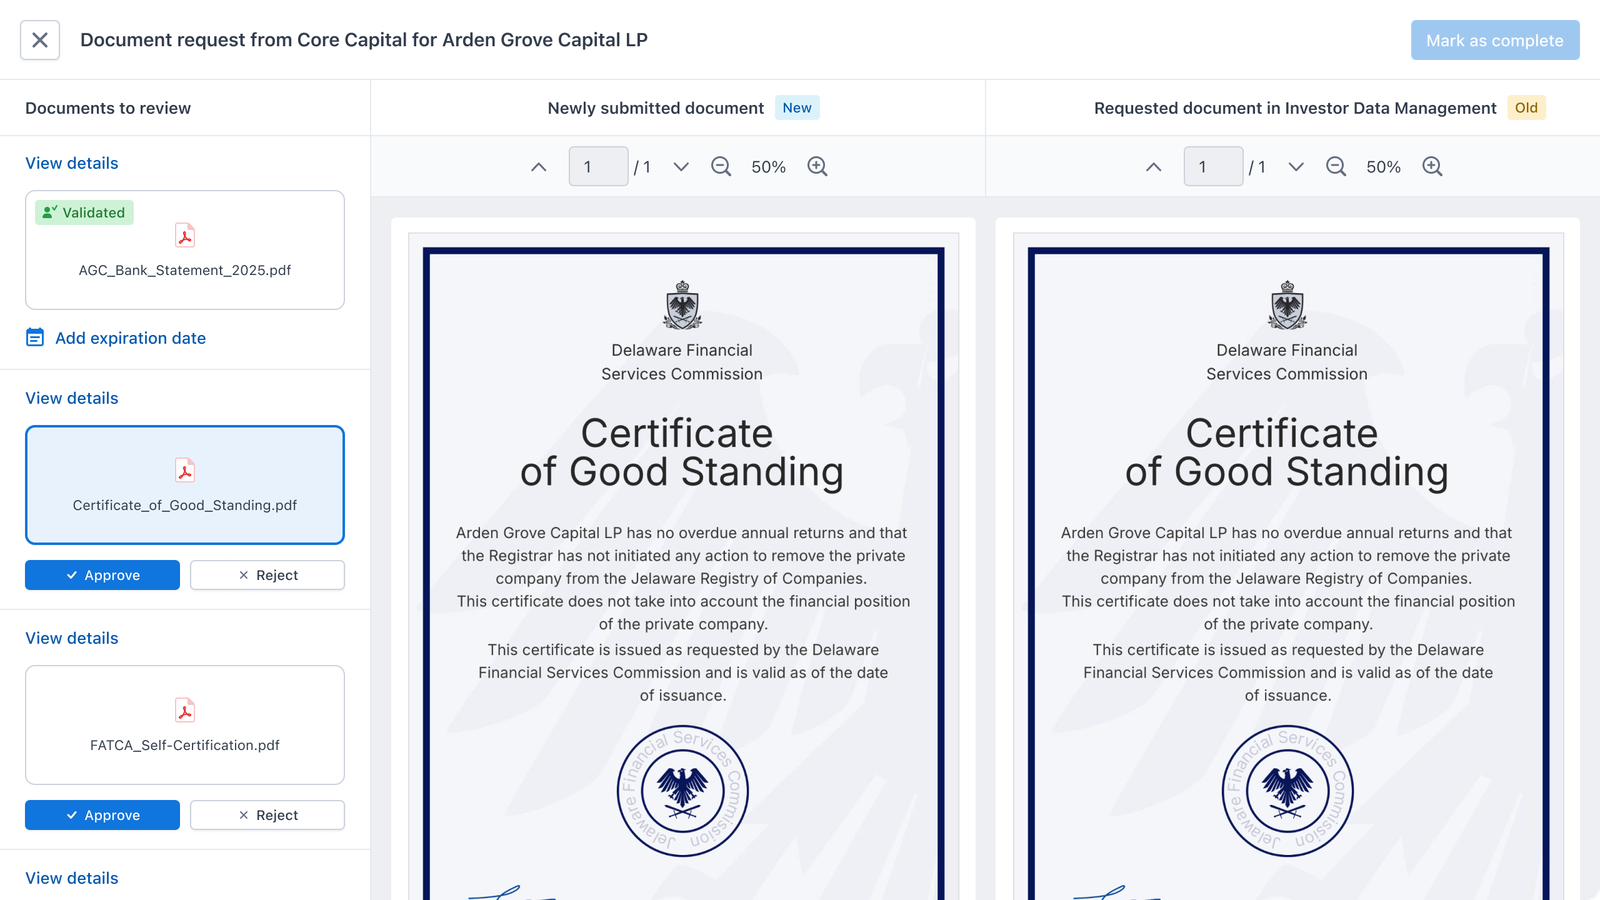
- Approve or Reject:
– If approved, add a new expiration date if applicable.
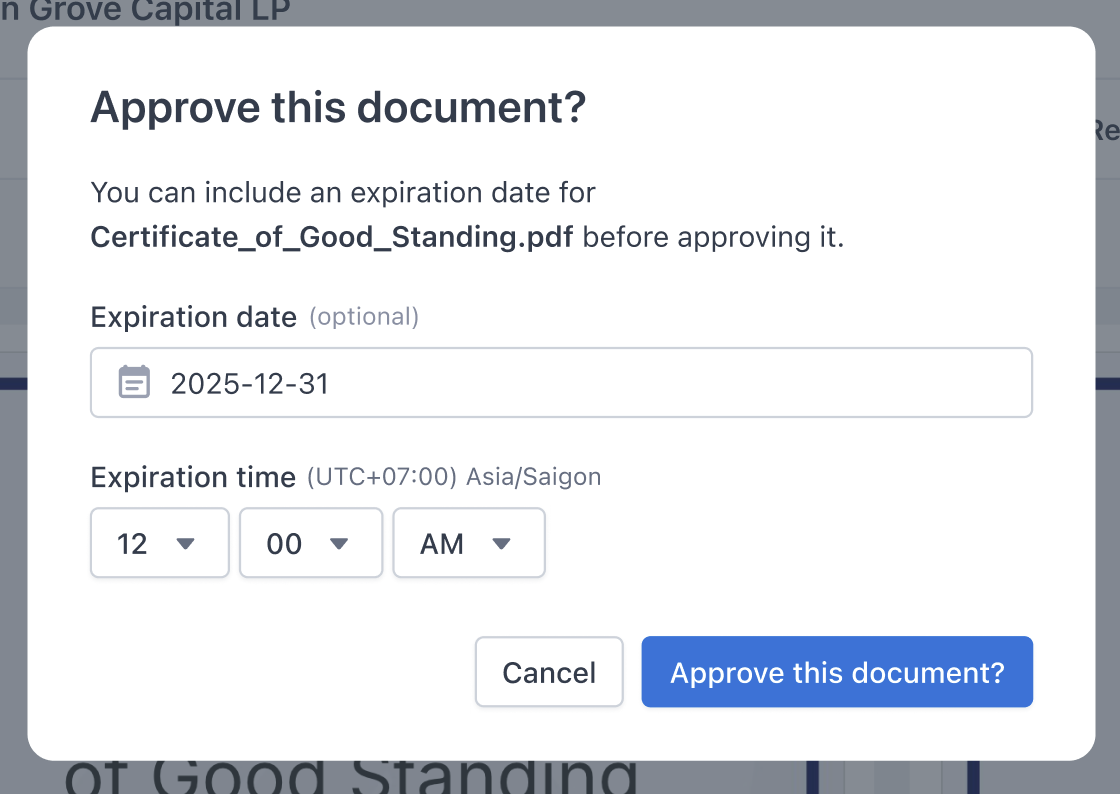
- If rejected, you can enter a reject reason (for internal tracking; LPs do not see this).
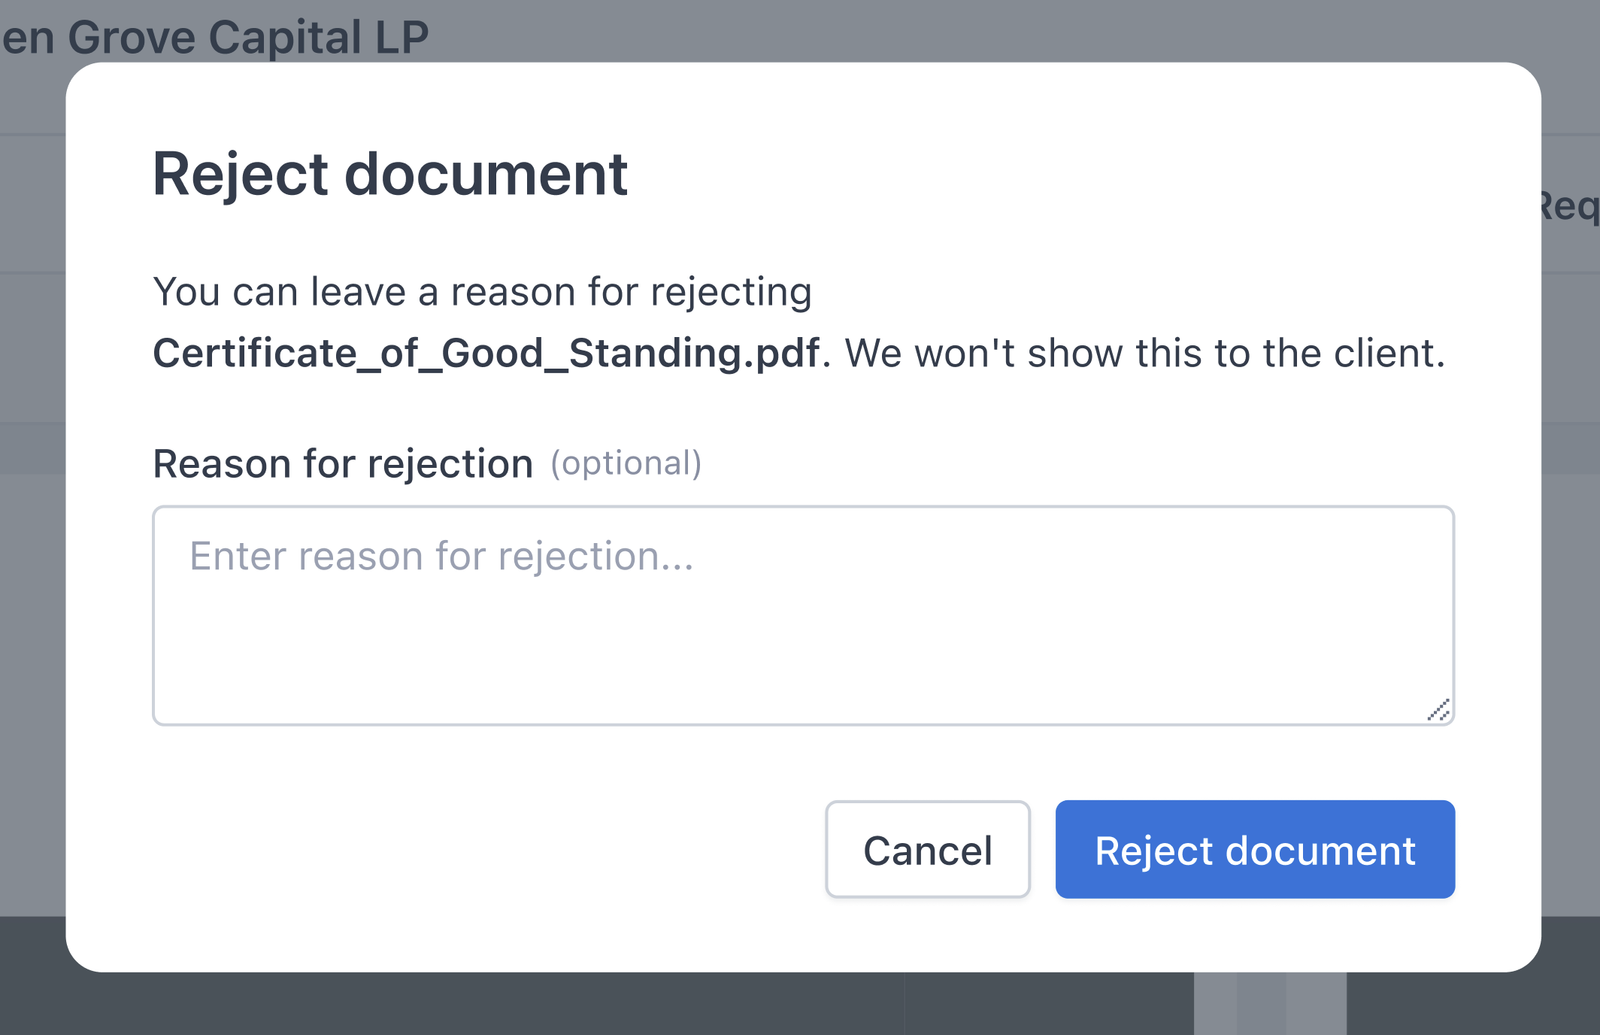
2.3 New Document Submitted
For documents that are newly provided, you can:
- View the file and choose Approve or Reject.
Step 3: Complete the Review
Once all documents have been actioned, click Mark as complete.

In the summary modal, you will see:
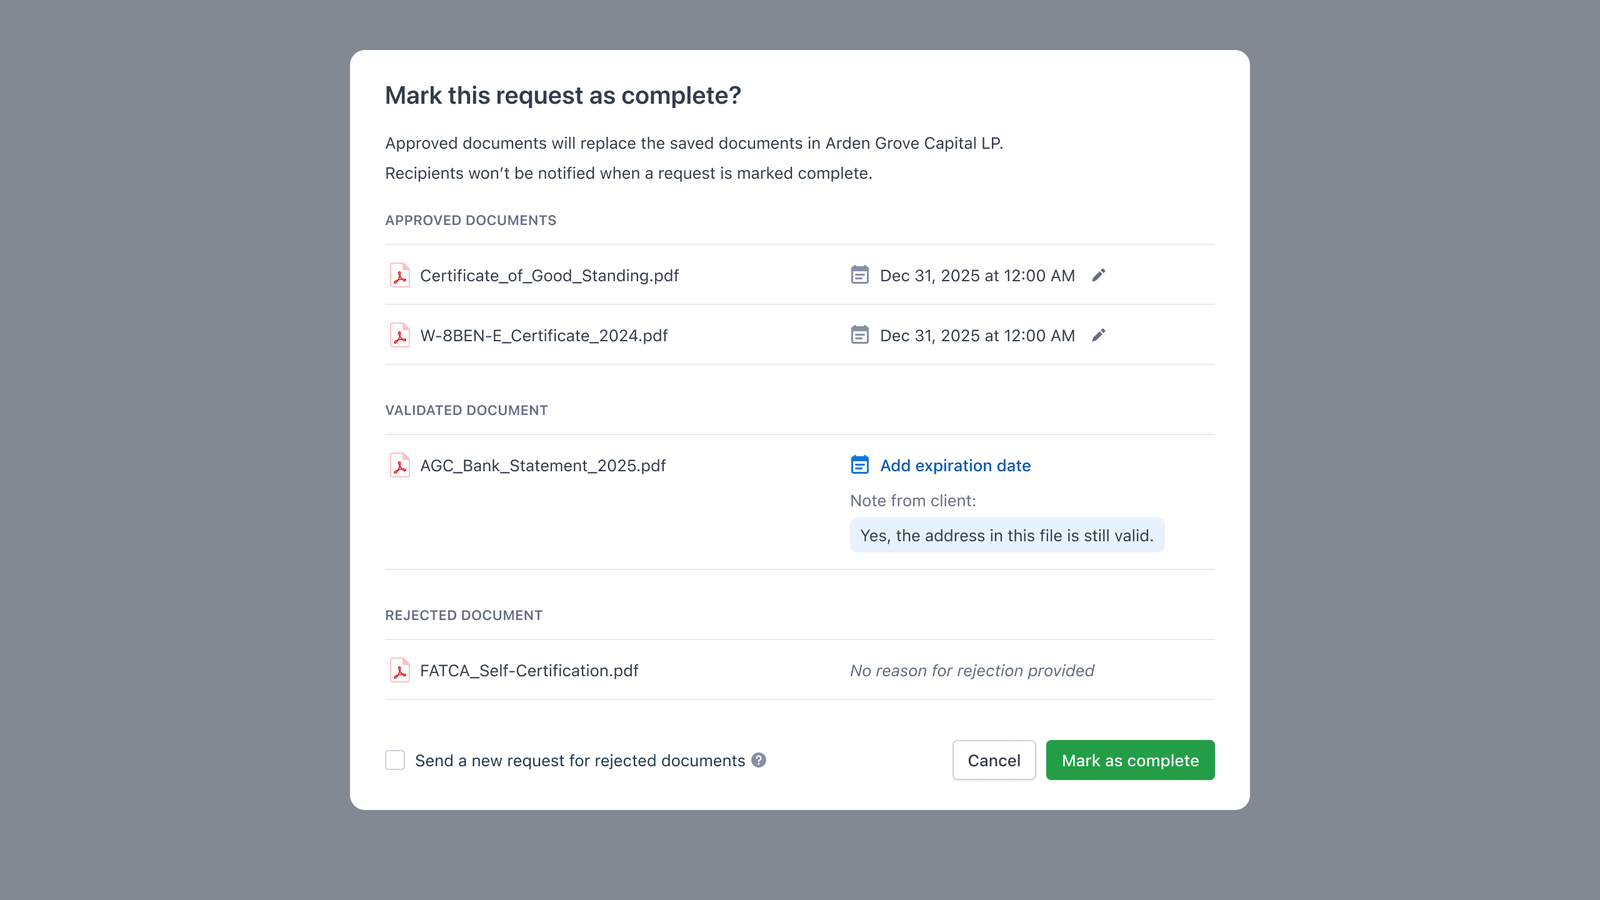
- Approved documents → Will be saved to the system.
- Validated documents → Expiration date updates only.
- Rejected documents → Option to create a new request for these documents.
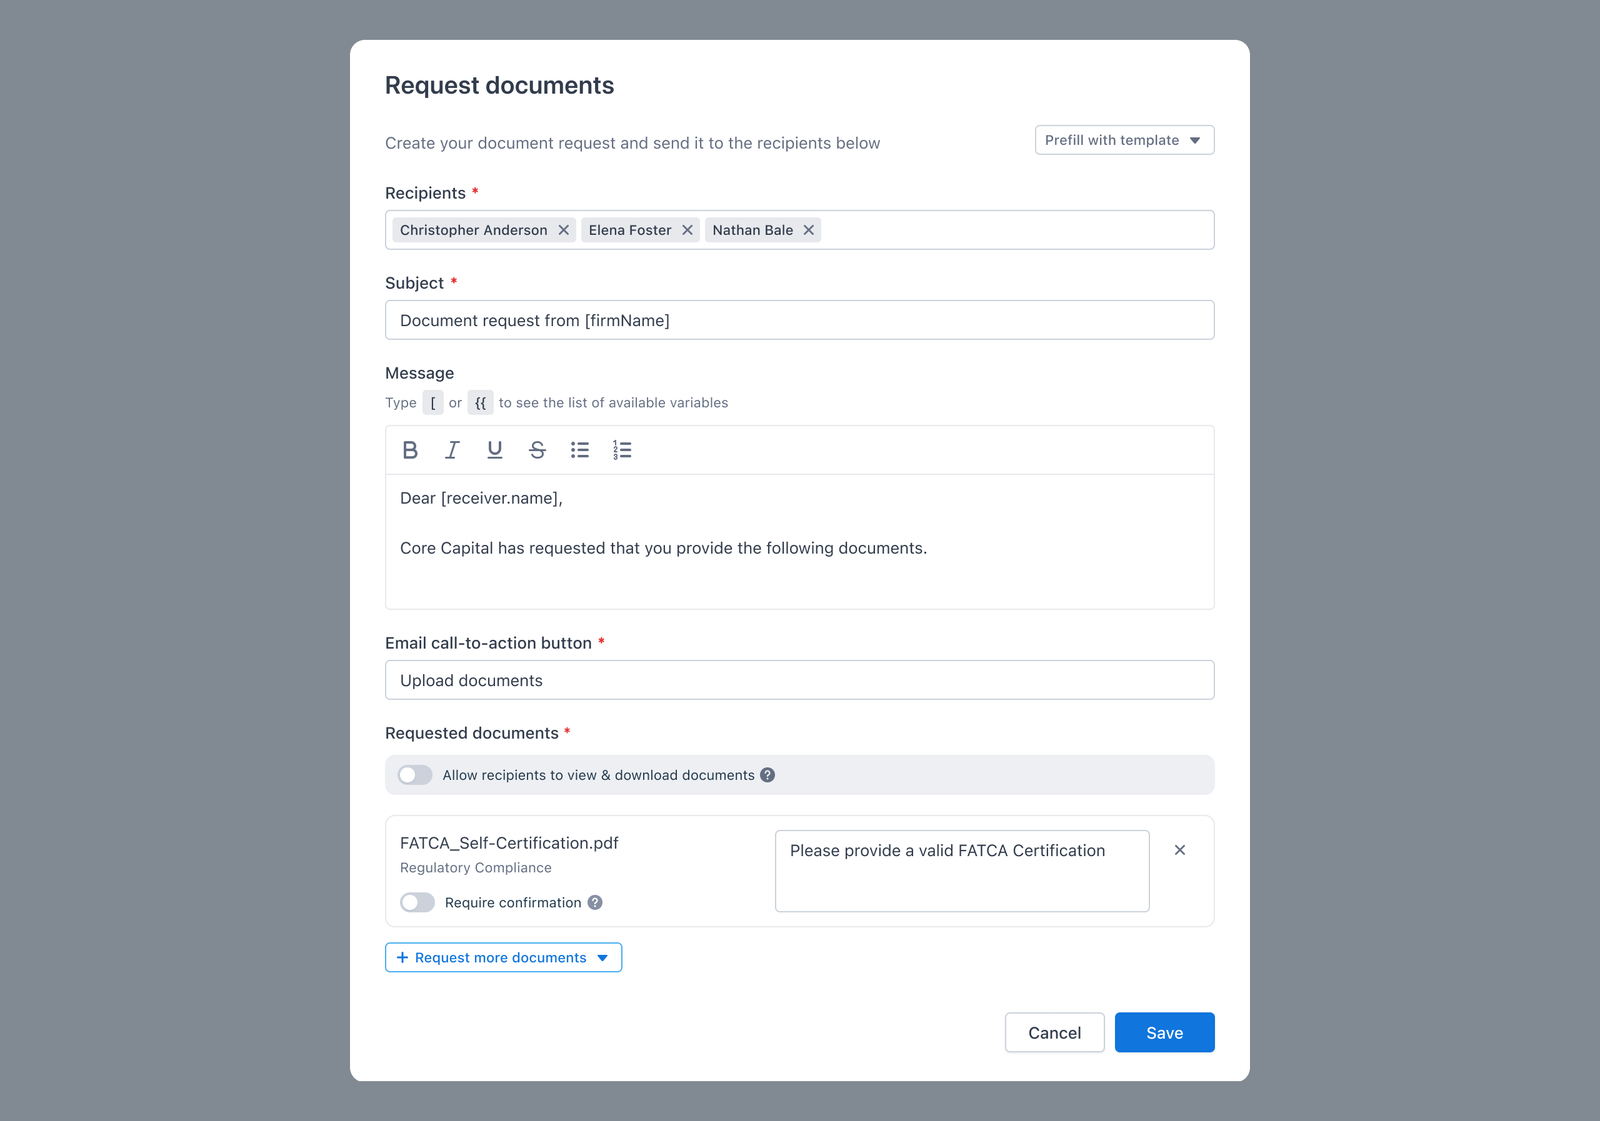
– Check the “Send a new request for rejected document” box at the bottom-left of the modal – Click the Edit request button to customize the request – Click Save to finish

After confirming Mark as complete:
- The request becomes Completed.
- Approved documents are saved.
- A new follow-up request for rejected documents (if enabled) is sent.