
Permission & Client Group in IDM
Introduction Previously, our IDM granted all users with the “Admin role” unrestricted access to the entire client database. However, in practice, firms typ
Introduction
Previously, our IDM granted all users with the “Admin role” unrestricted access to the entire client database. However, in practice, firms typically organize their clients into groups. This involves assigning a relationship manager to manage a specific group of clients that share common characteristics.
This approach highlights some limitations in IDM, particularly:
- Security concerns: Granting every firm member universal access to the entire client database poses a security risk.
- Inconvenience: Manually configuring accesses for individual users to manage a list of specific clients can be time-consuming.
To address these issues, we are introducing the Permission & Client group, which includes:
- Granular Permissions: Introducing multiple roles, namely Admin and Member, to customize accesses more precisely.
- Client Groups: Facilitating management experience for Admin by allowing grouping clients.
This guide will provide instructions on how to edit and manage access in terms of roles and groups of clients.
Where to find this feature?
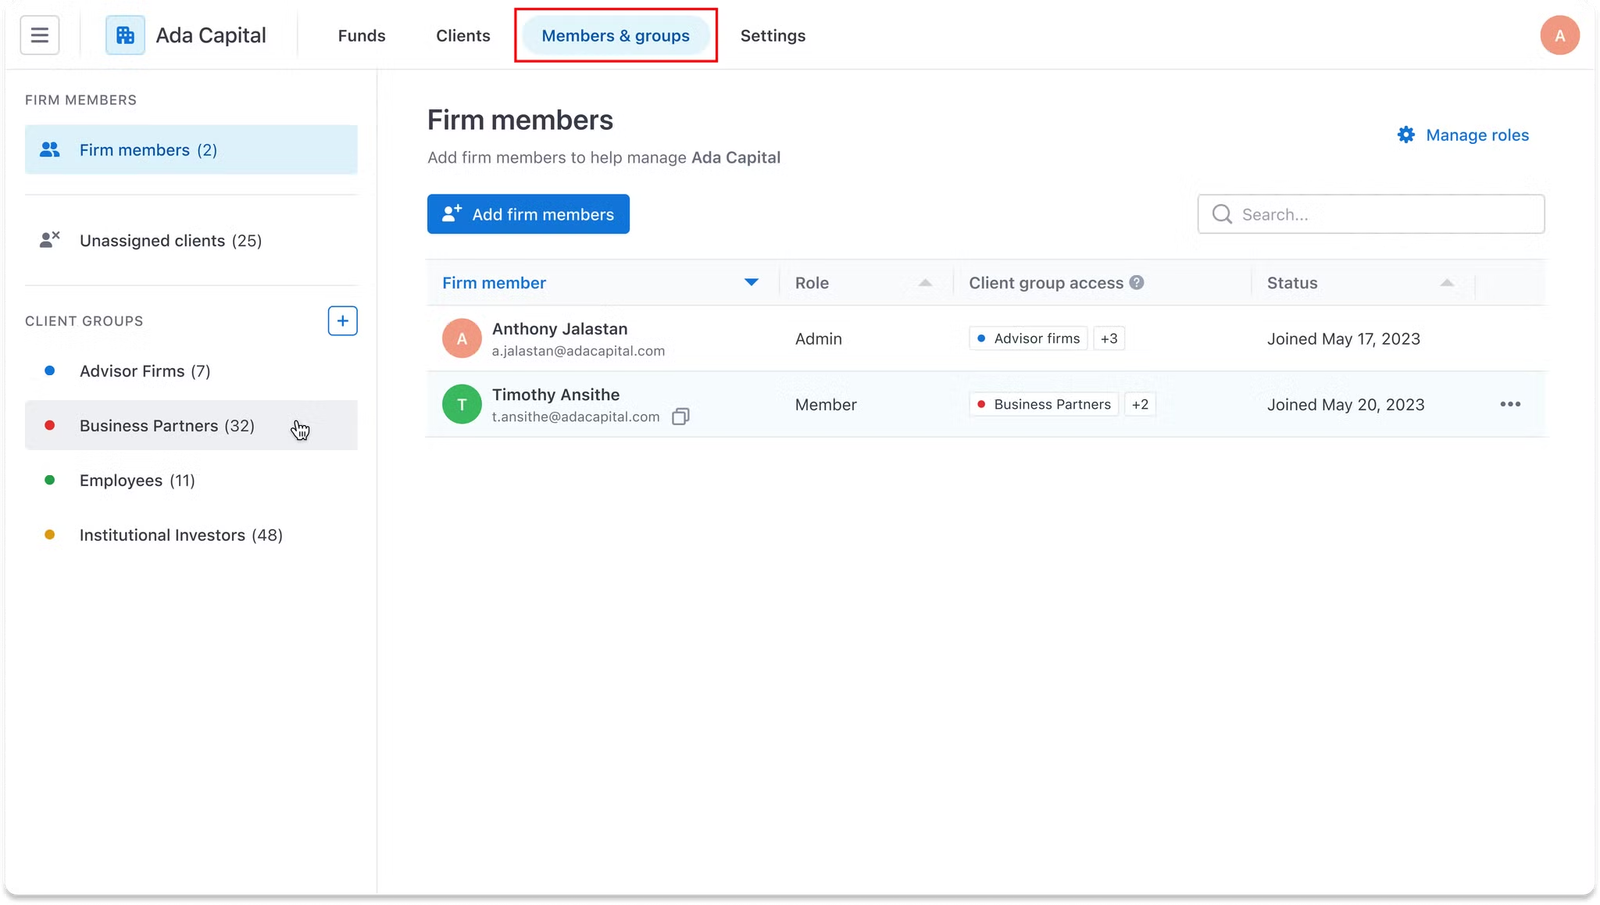
To access this feature in IDM, navigate to our newly established Members & groups tab. On this page, you can find your way to create client groups on the left-hand side tab and to manage the roles of each individual by clicking on the … button.
Guideline
A. Permission
1. Add new firm members and define their permissions
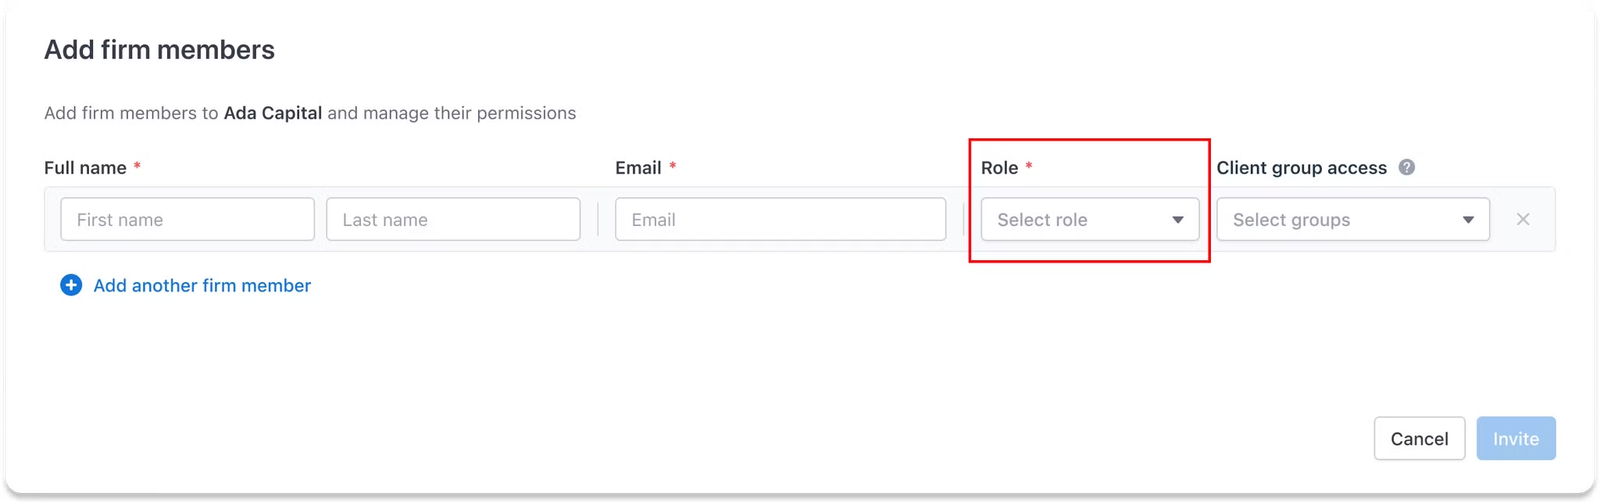
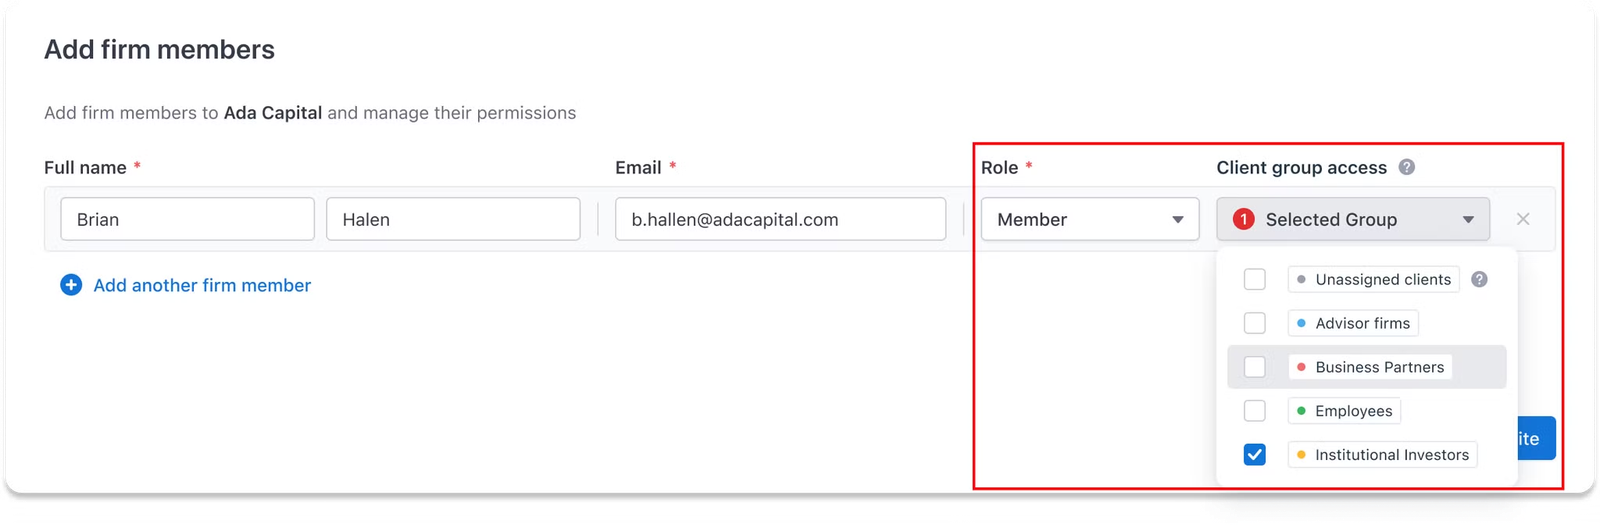
As we now have more than one role, when users want to add a new firm member, it is mandatory for them to define the role immediately
Permission logic:
This role will directly determine the status of “Client group access” field
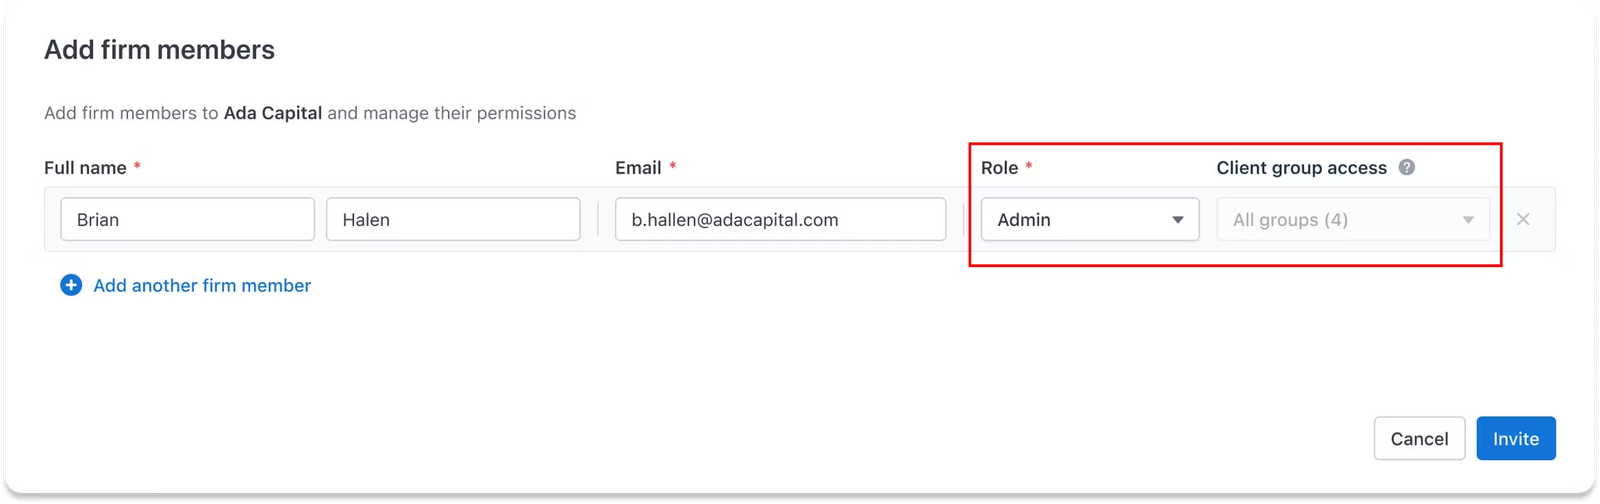
- If role = admin: Users automatically have access to all client group
- If role = member: Users can select client groups that new members will have access to
2. Modify existing members’ permissions
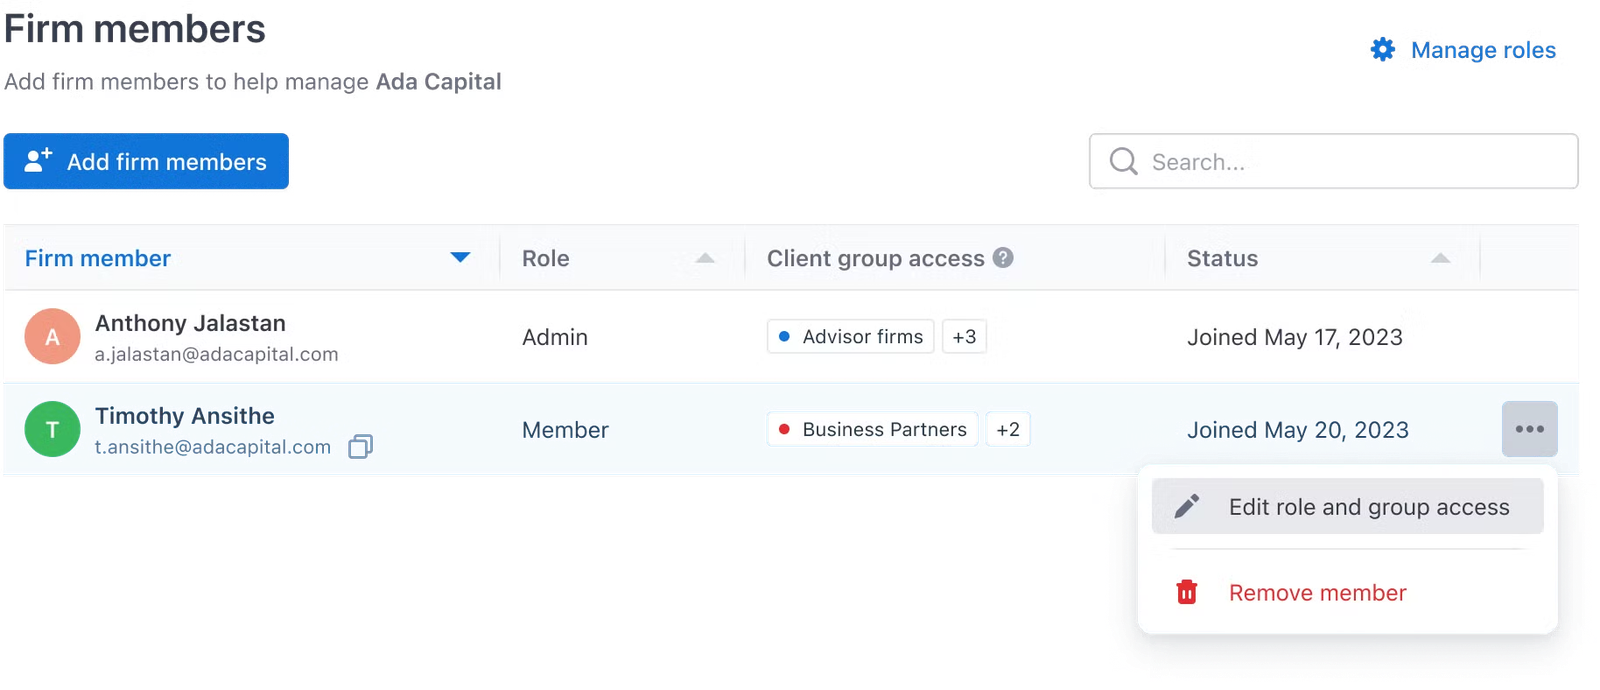
Step 1: In order to modify the permission, navigate to the … menu and open the Edit role and group access modal on that individual member row.
Step 2: In this modal, users can modify the role and client group access of the selected firm member.
💡 The permission logic here remains the same as the Permission logic above
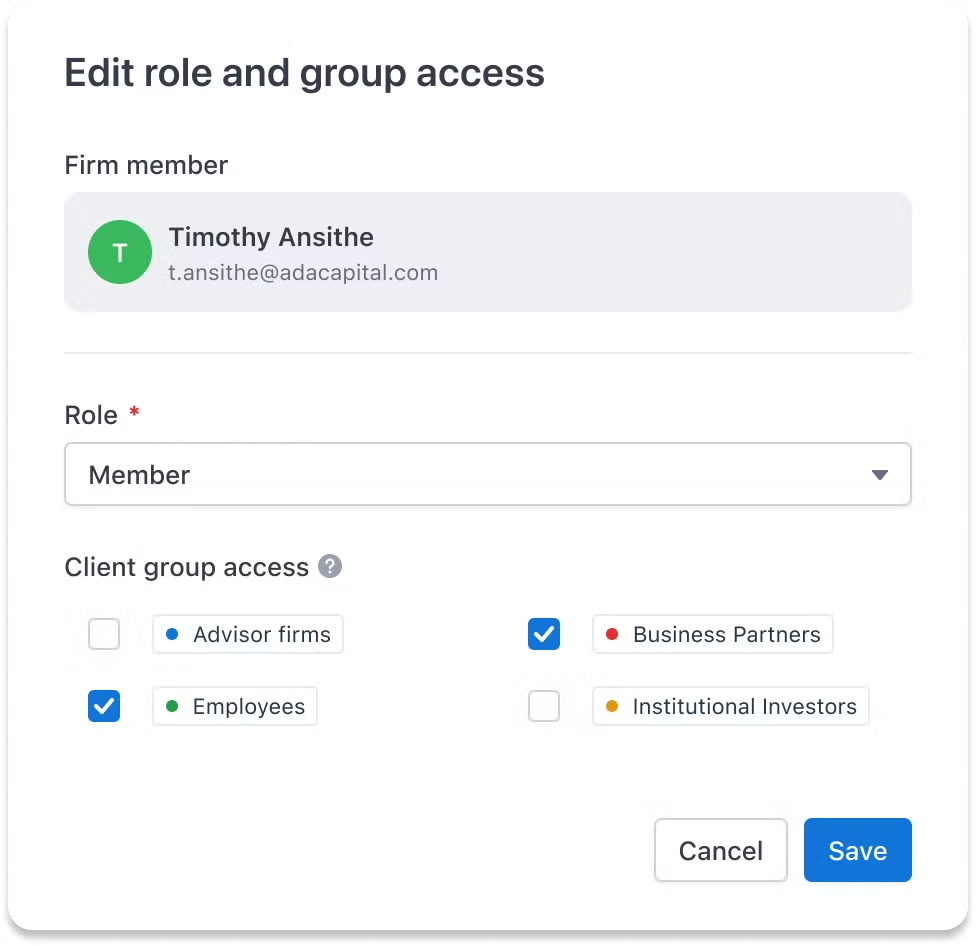
Step 3: After changes have been set, click the Save button to apply the changes immediately.
3. Remove members from a firm
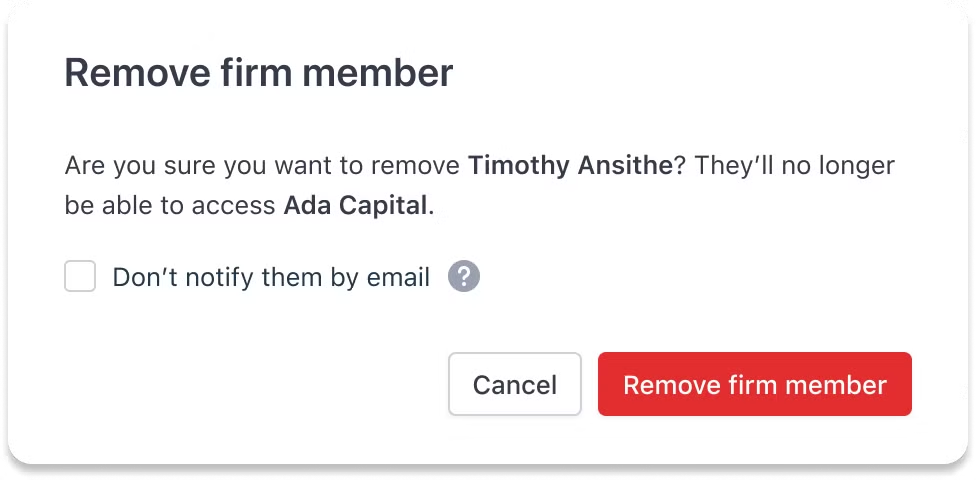
Step 1: In order to remove a member from a firm, navigate to the … menu and open the Remove member modal on that individual member row.
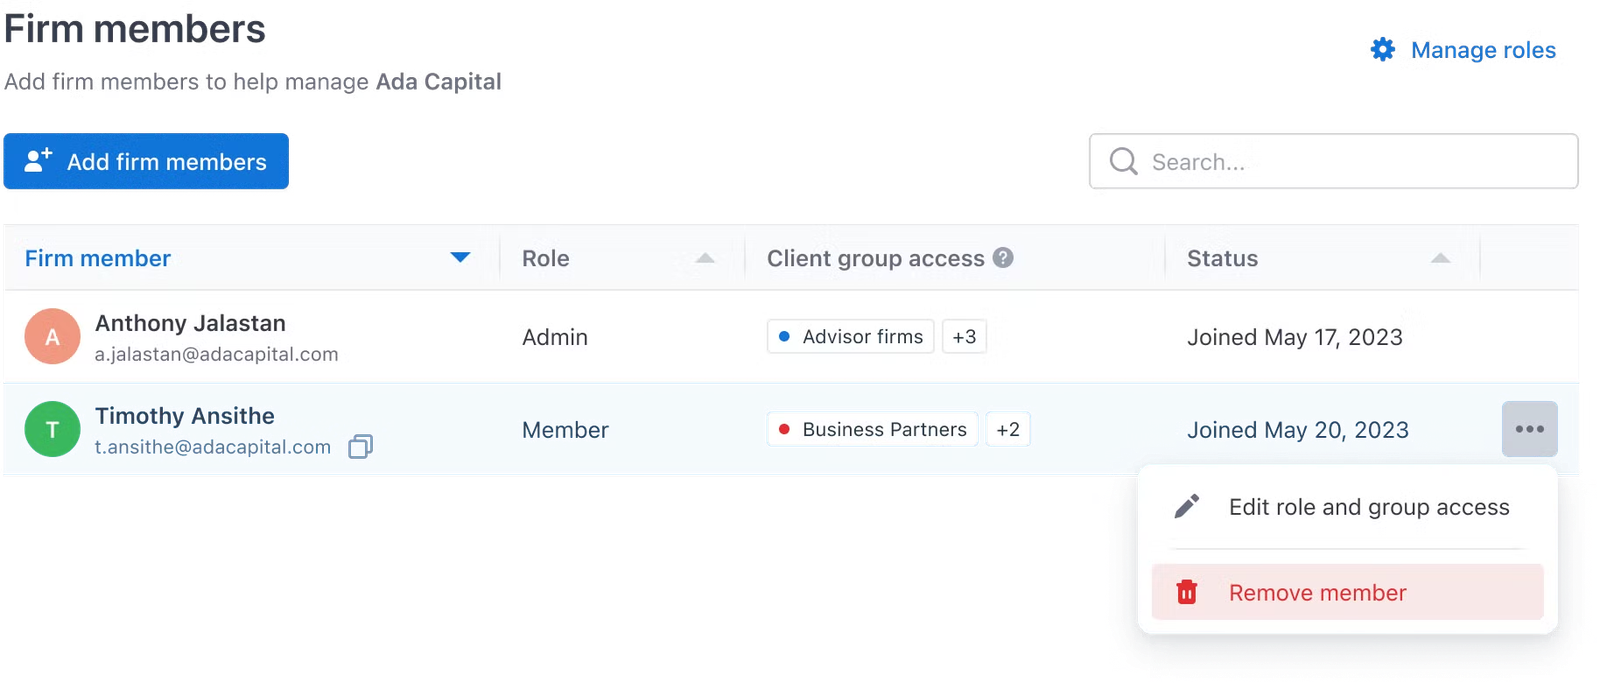
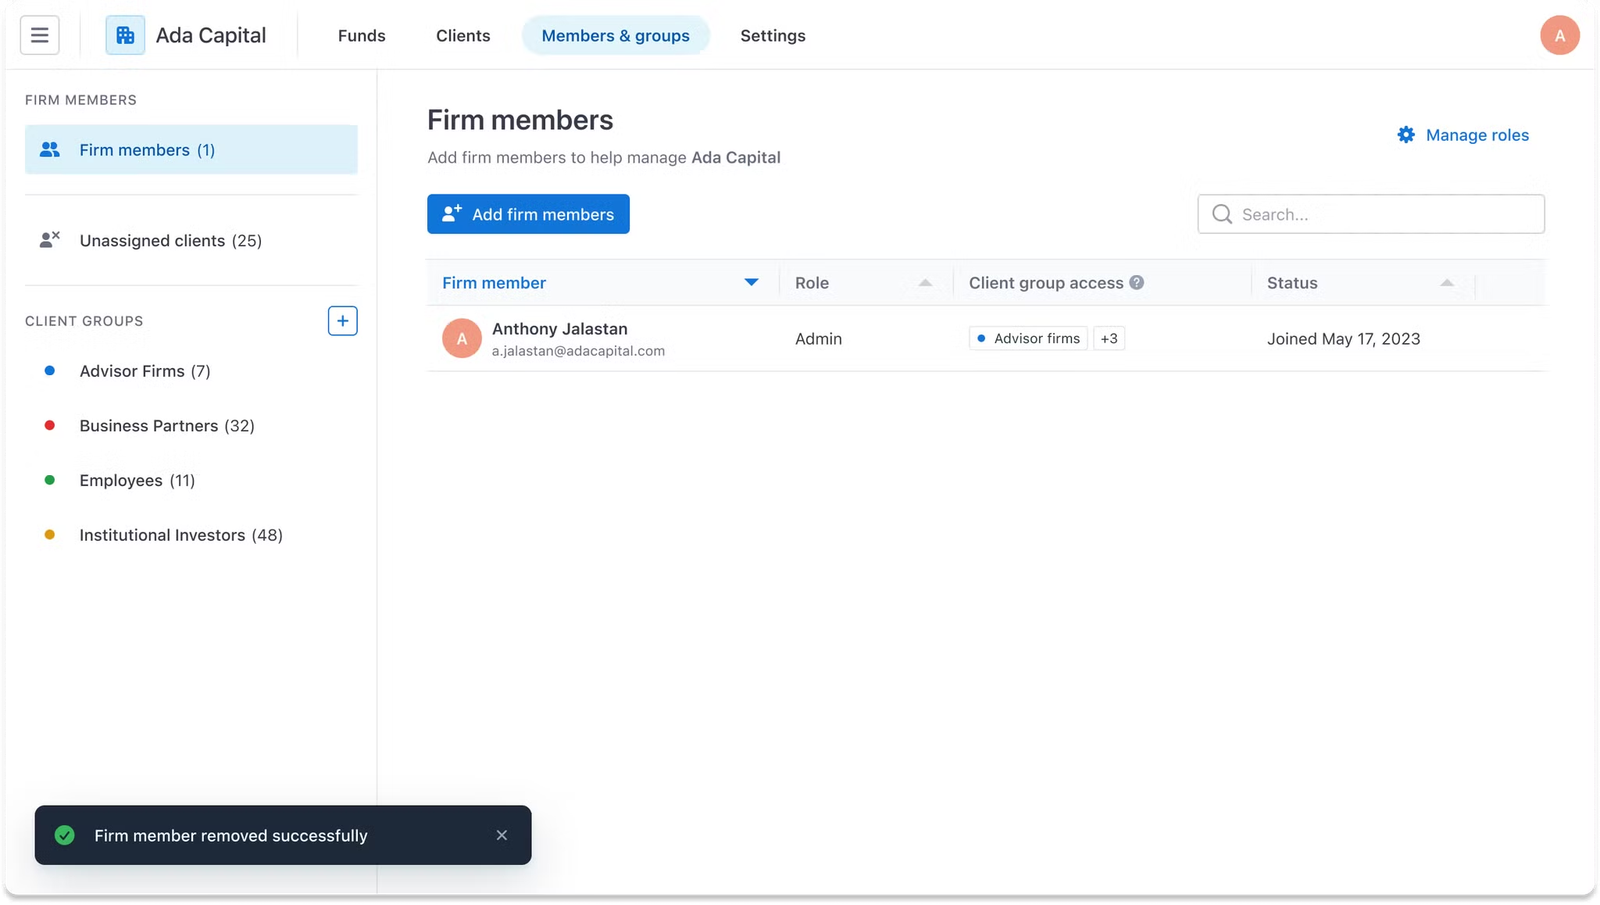
Step 2: In this modal, users can confirm their remove action by clicking the Remove firm member button. As a result, that firm member will be removed immediately as the screen below.
4. Global role customization
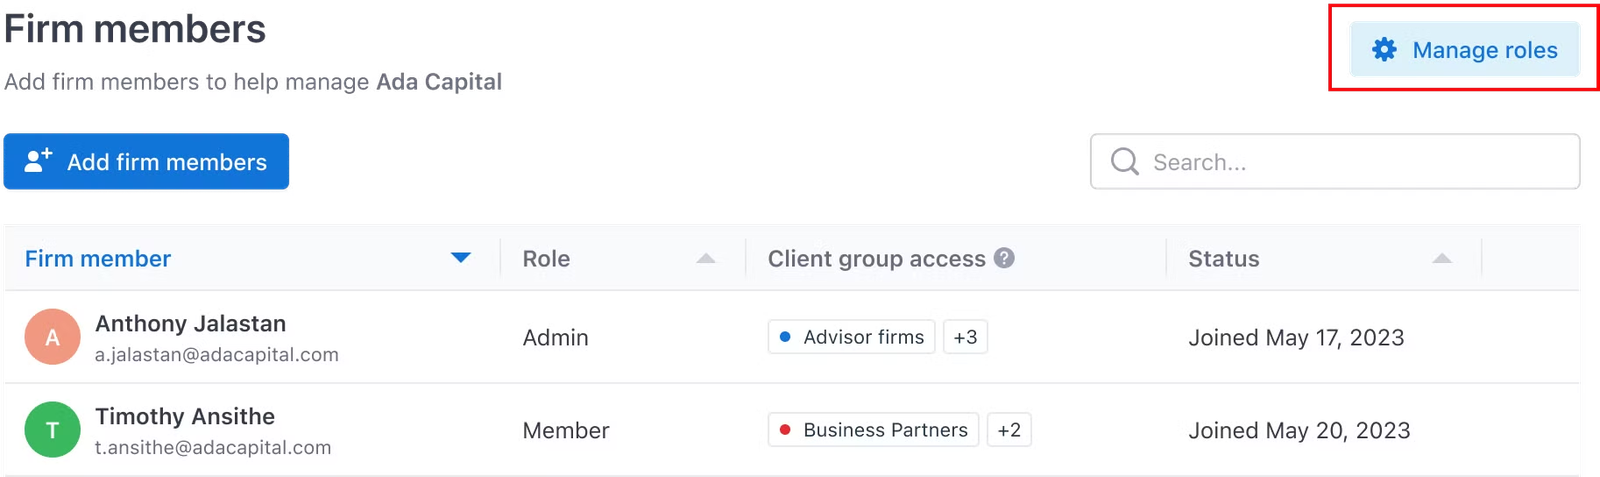
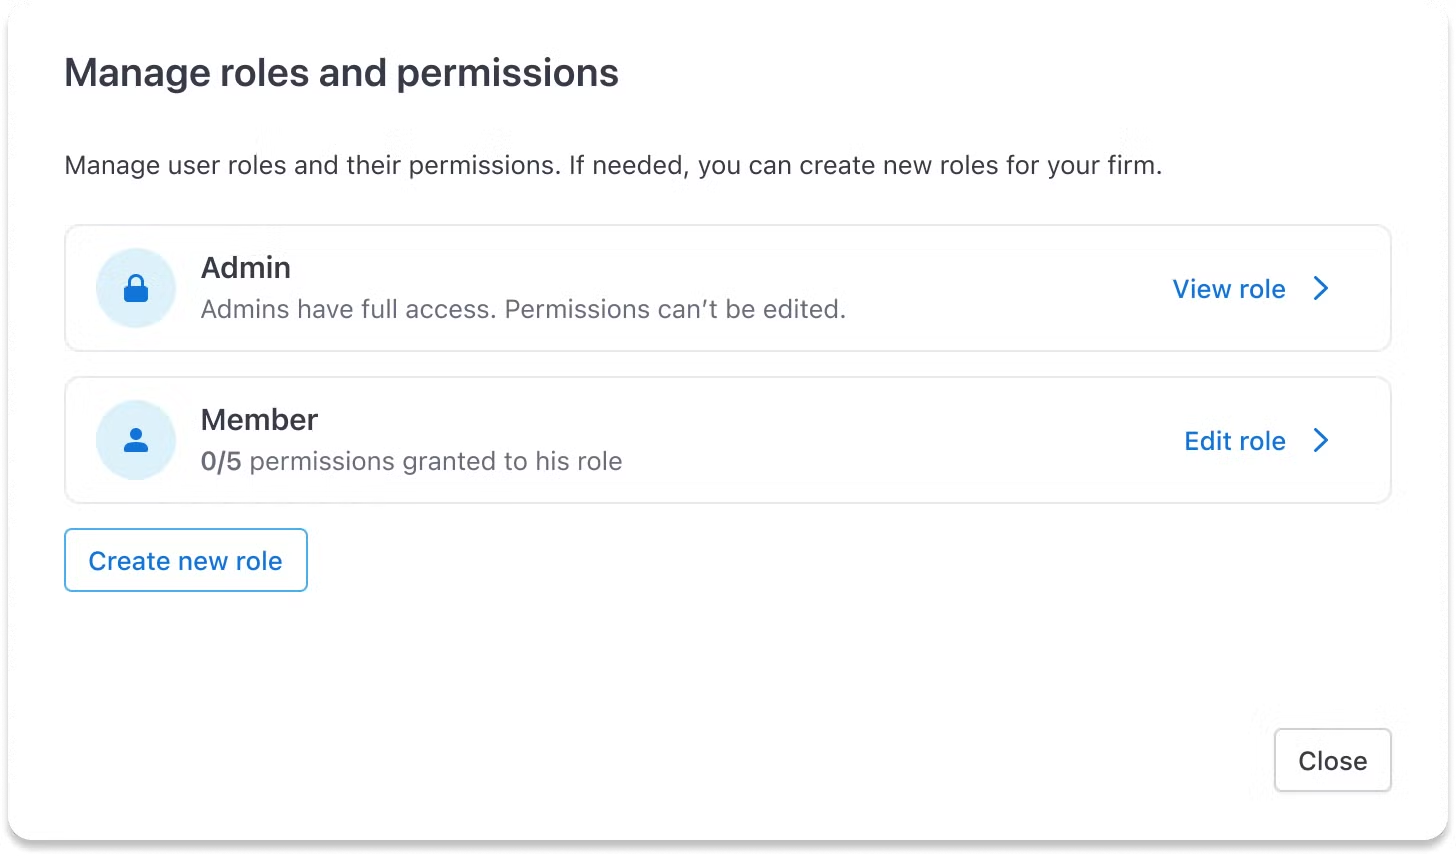
Step 1: Users can view & customize role access and permission by navigating the Manage roles button in the top right corner of the Firm members tab. The Manage roles and permissions modal will be opened.
Step 2:
- If visit Admin role permissions: Admins always have full access → Permission settings can be viewed only but can’t be changed
- If visit Member role permissions: Users can customize permissions for Member role here Note: The configuration here will apply to all users with the Member role.
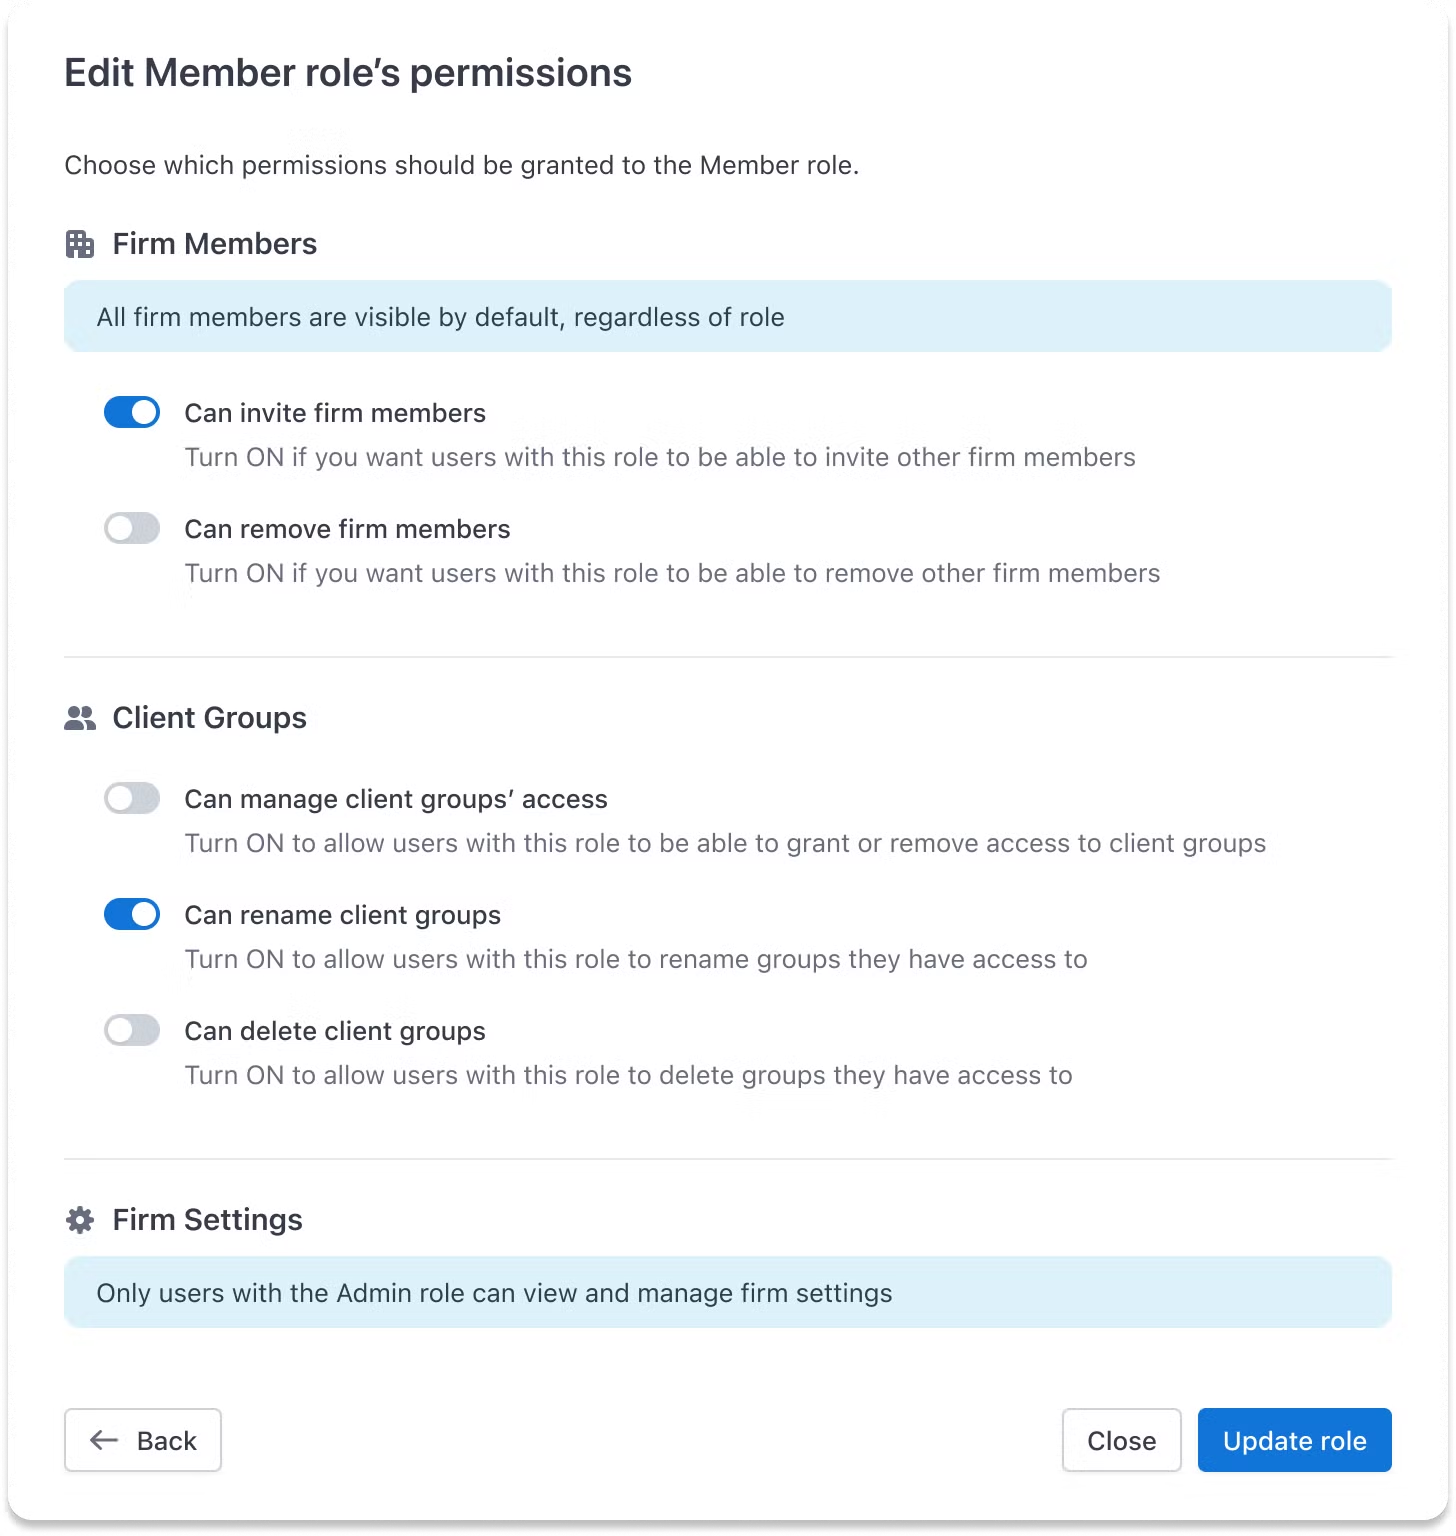
Step 3:
After the changes have been set, users can click the Update role button to execute it. Changes will take place immediately.
B. Client Group
1. Create a new client group
Step 1: Users can create a new Client group by clicking the + button on the left-hand side panel
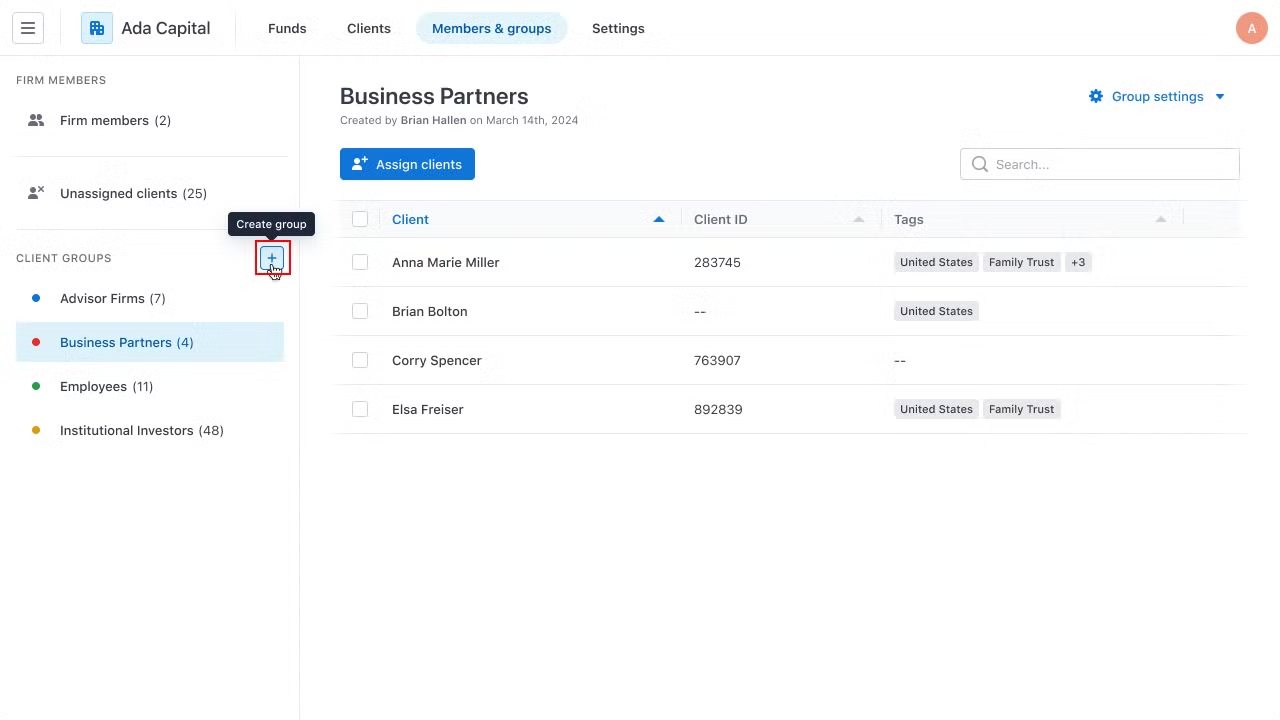
Step 2: Then, there will be a pop-up modal that allows users to enter Group name and perform initial setup for Group access
- Group name (required field): The group name has to be unique across a firm
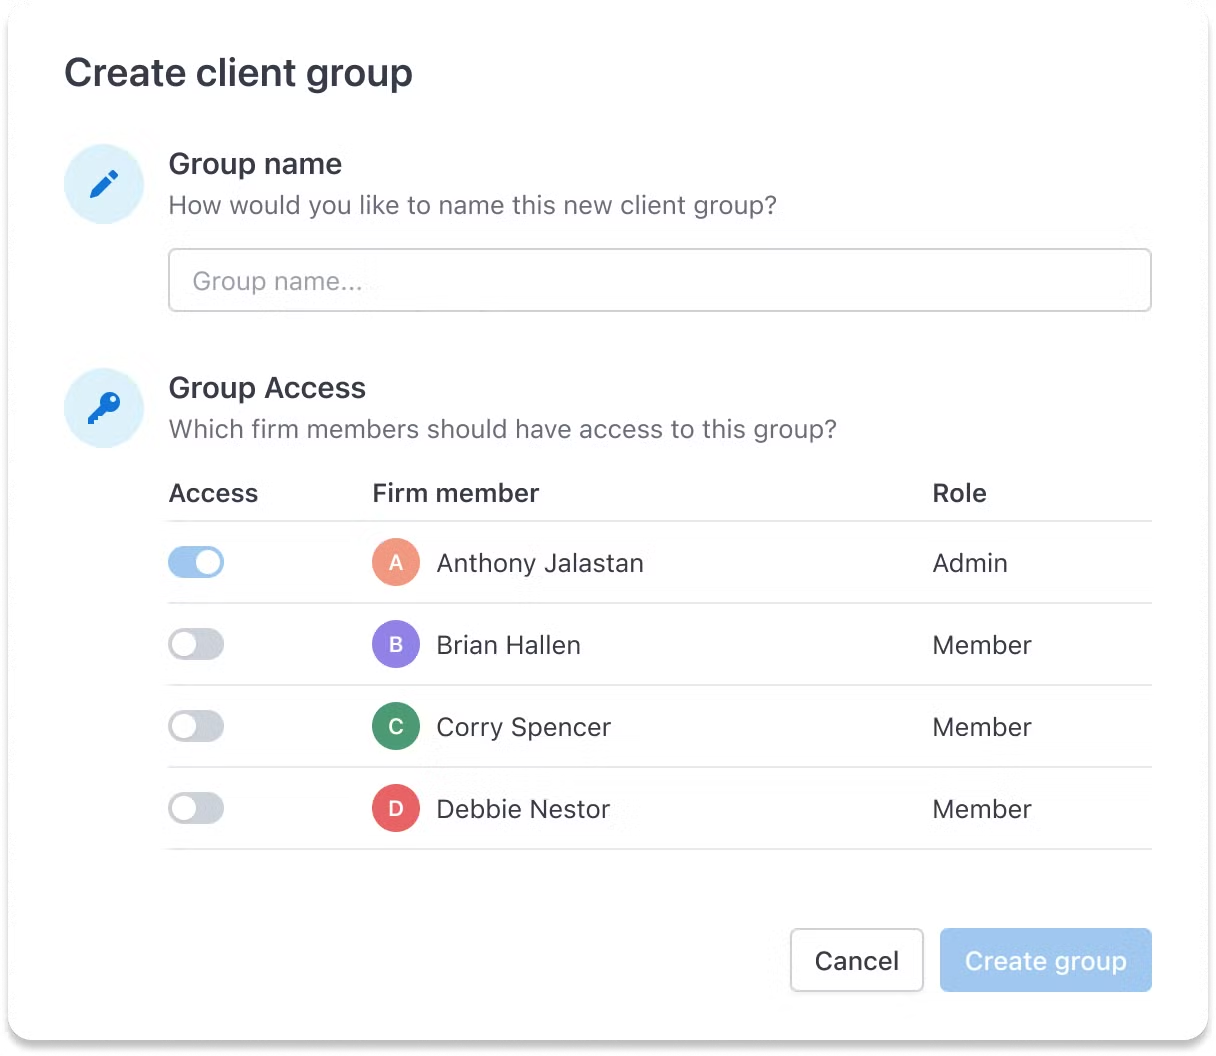
- Group Access (optional field):
– ***If role = admin: always has full access 
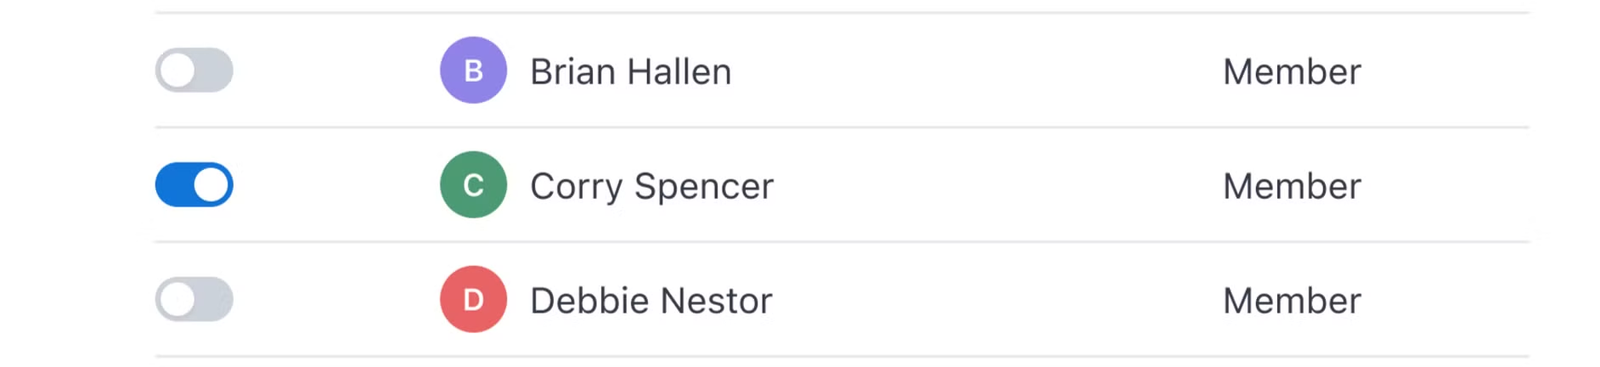
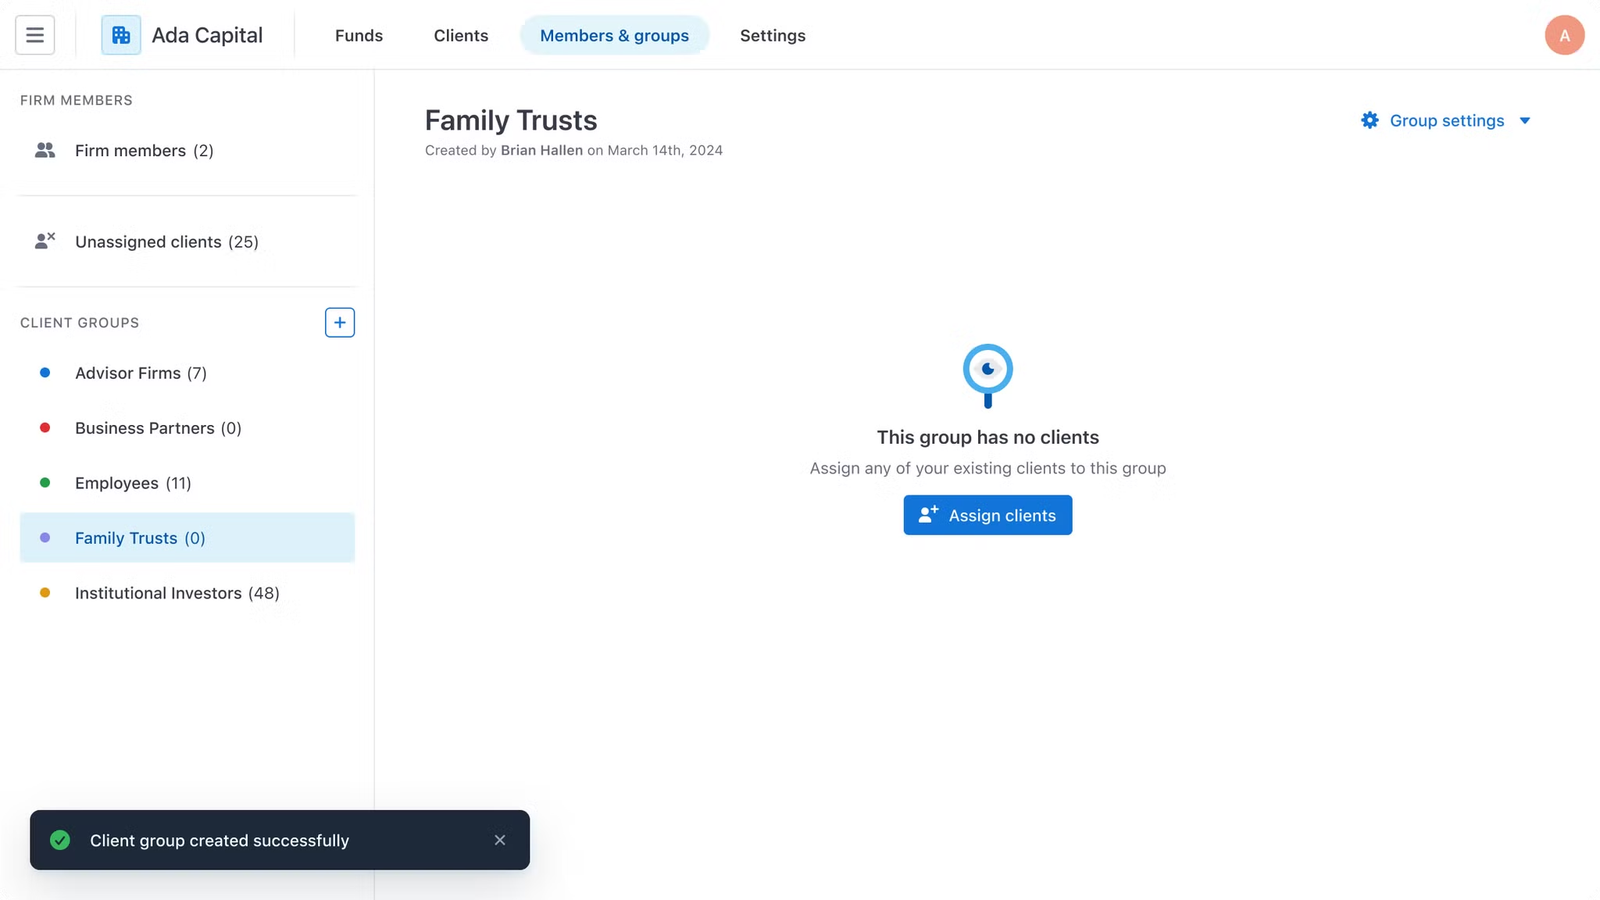
Step 3: After the required Group name has been set, users can click the Create group button to execute it. Client group will be created and will appear immediately on the left-hand side Client Group tab
2. Add unassigned clients to a Client group
Logic of client and client group: 1 client can belong to only 1 client group
There are 2 ways to add clients to a group:
a. Go to the “Unassigned clients” tab and assign clients individually to a group
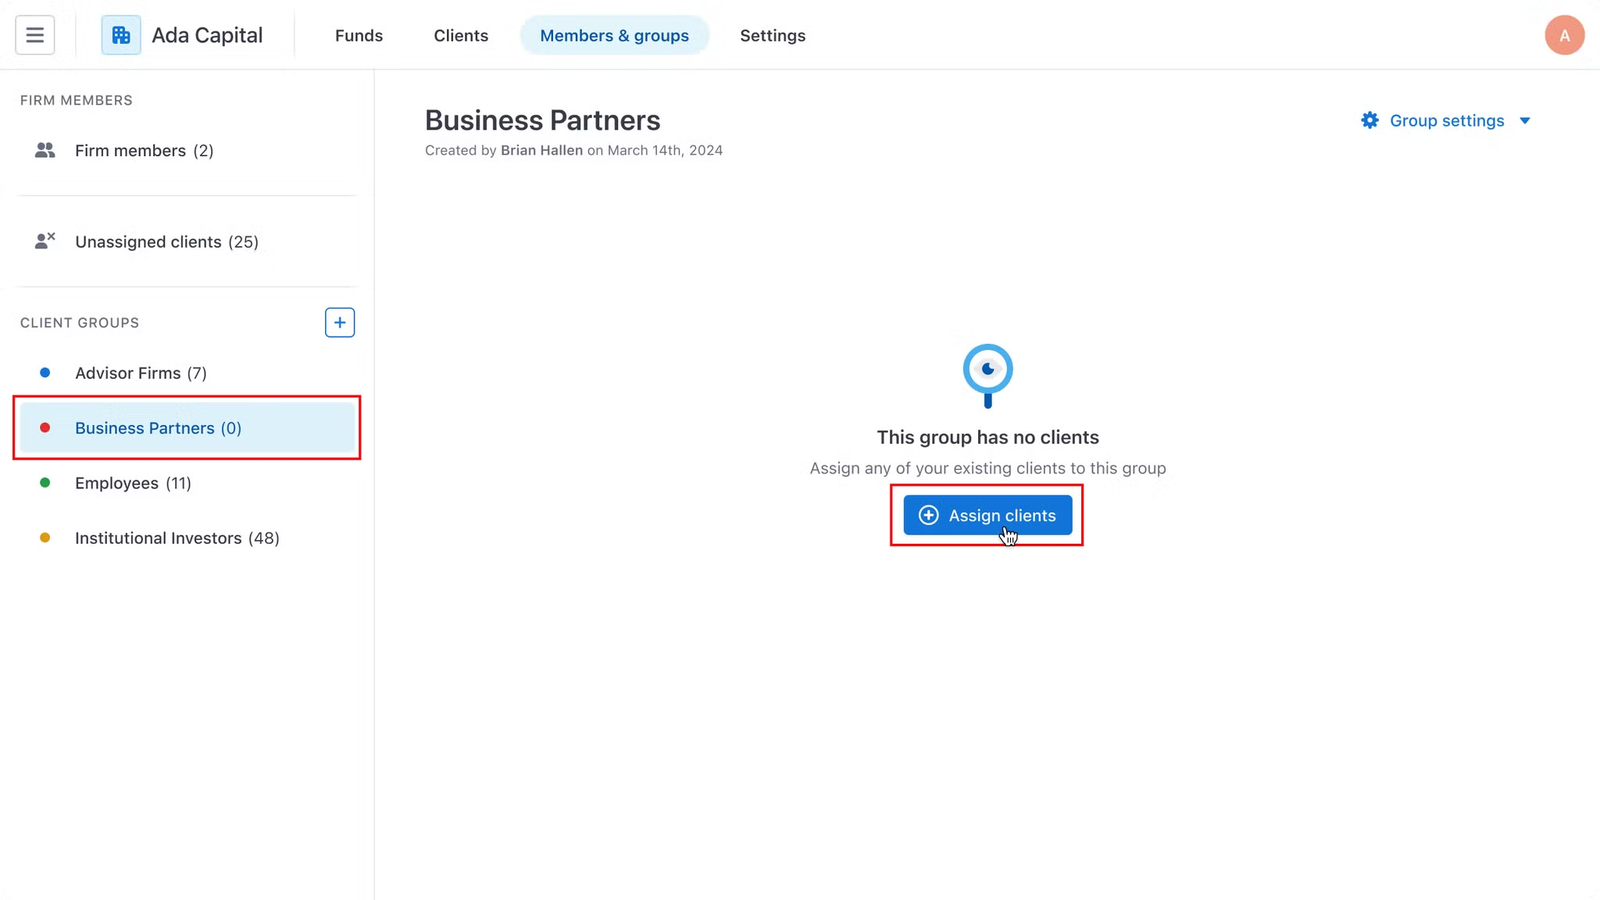
b. Go to the desired client group and assign multiple clients simultaneously to that group
a. Go to the “Unassigned clients” tab and assign clients individually to a group
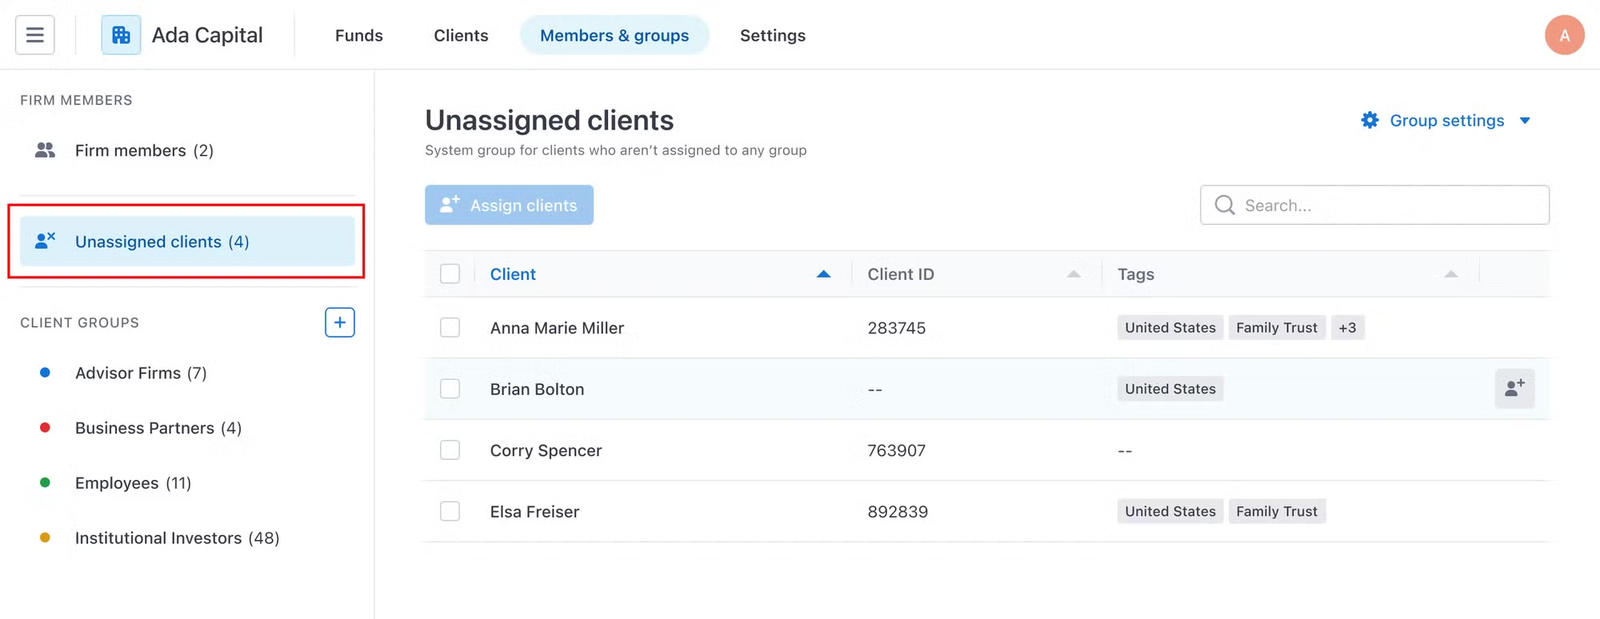
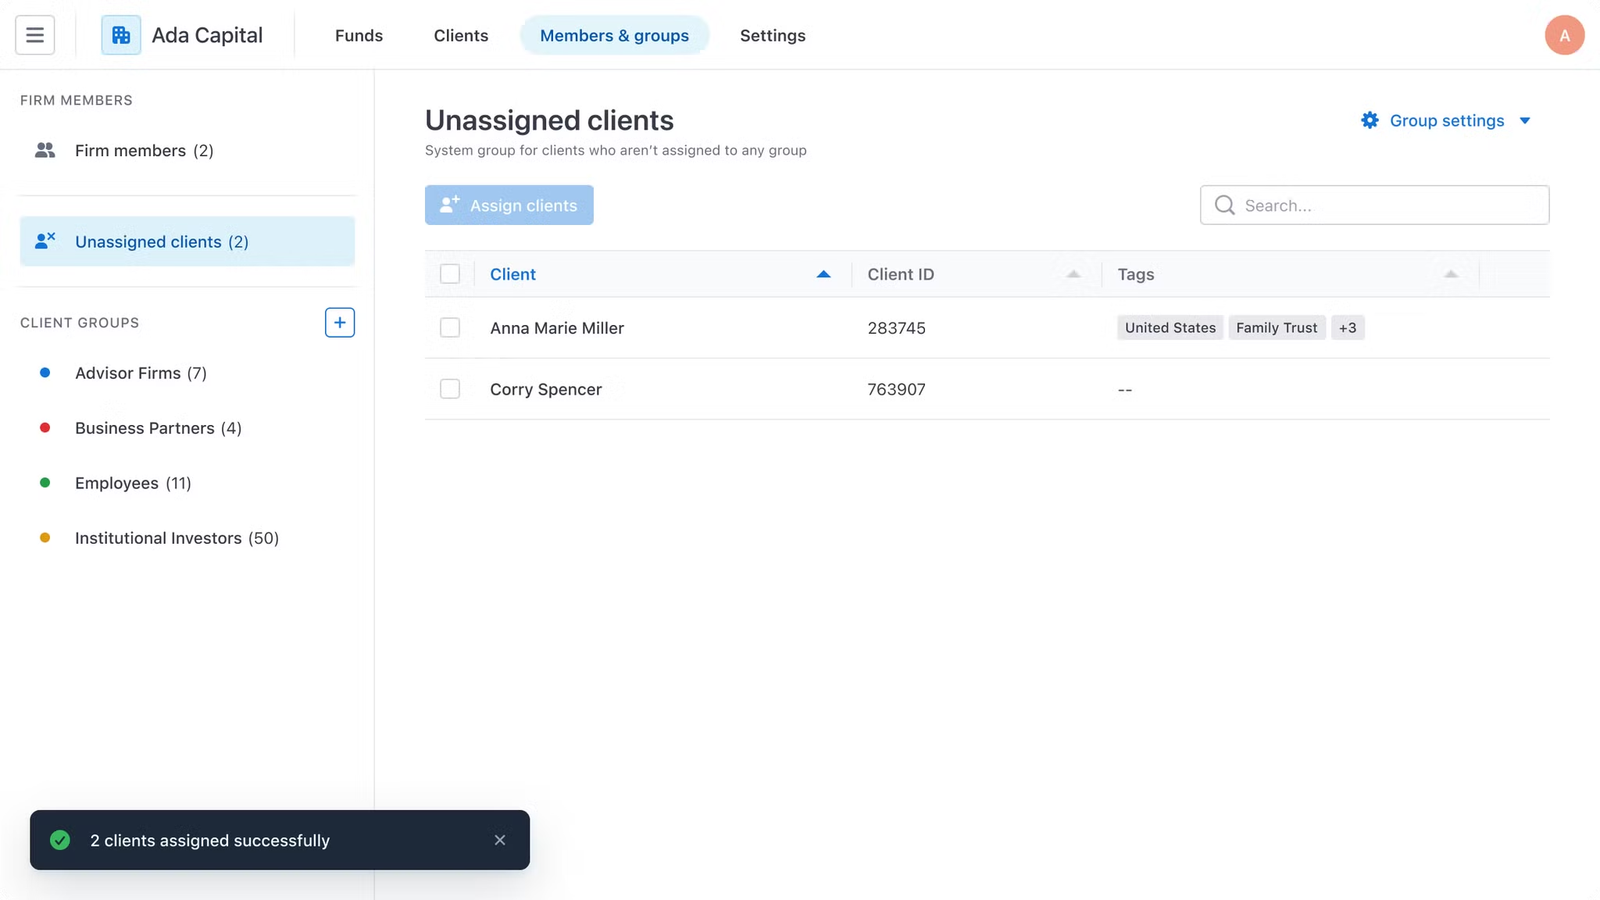
Step 1: Users can first visit the “Unassigned clients” tab and see the list of clients available for assigning groups
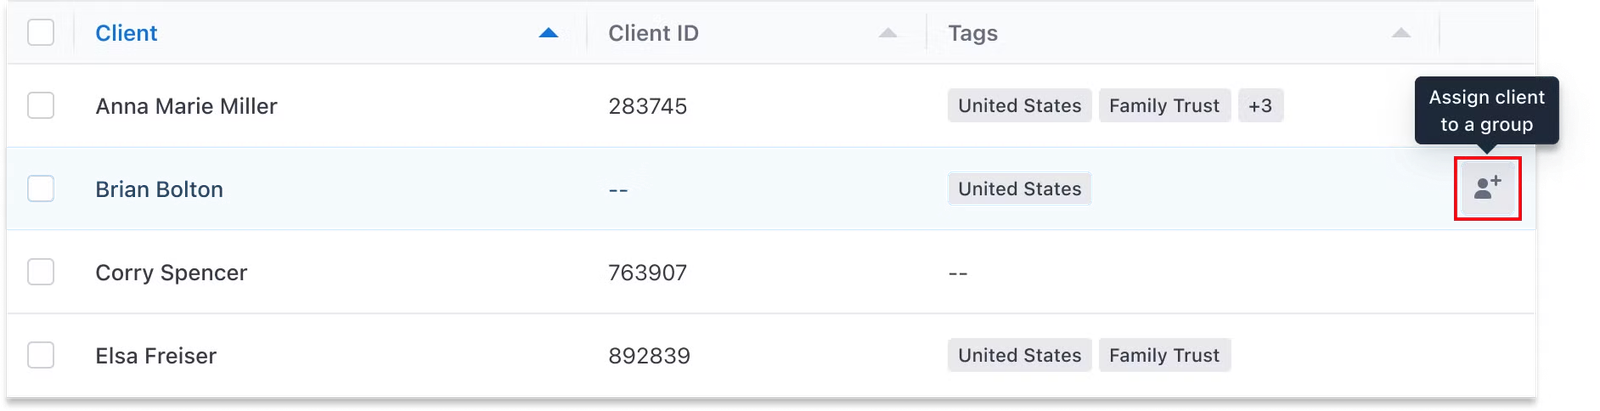
Step 2: Navigate to the individual row and click the pop-up button to assign that client to a group
Step 3: Then, a modal will appear allowing users to select the client group. Once it is done, users can click the Assign to group button to implement it.
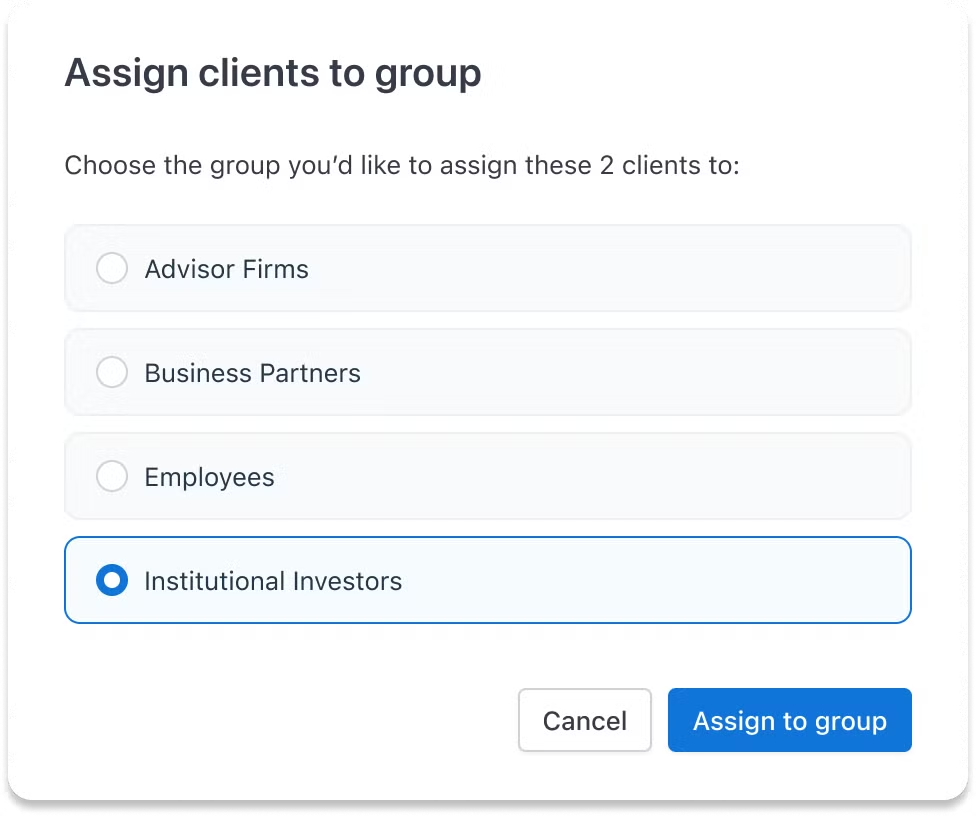
As a result, that client will be moved from the Unassigned clients tab to the chosen client group
b. Go to the desired client group and assign multiple clients simultaneously to that group
Step 1: Visit the desired client group available on the left-hand side. Click on the Assigned clients button.
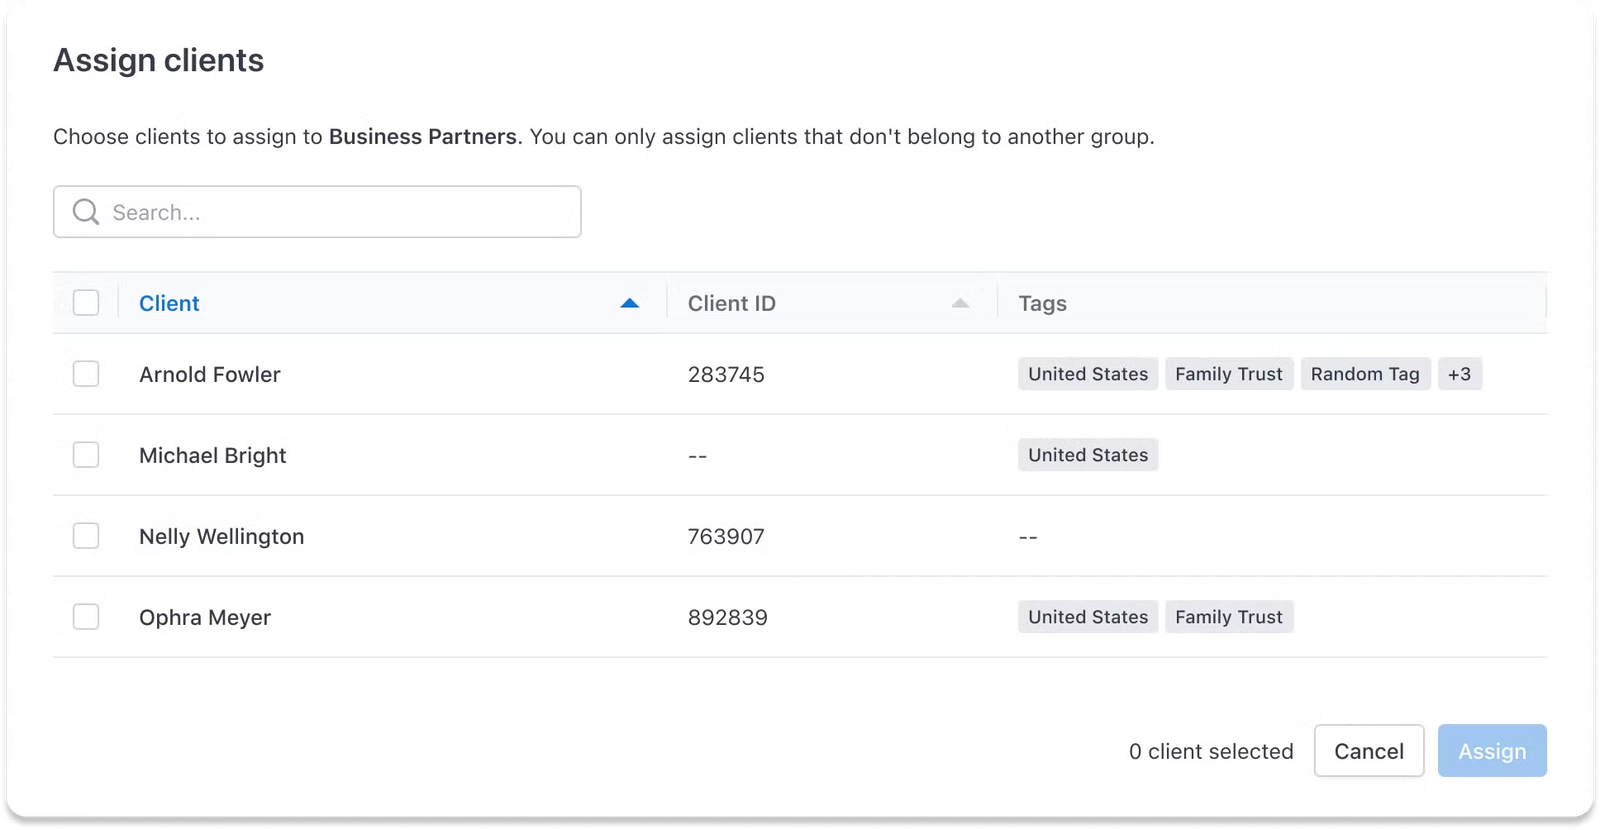
Step 2: Then, a modal will appear allowing users to select multiple clients at once
Note: Following the logic, the list of clients displayed here are unassigned clients only
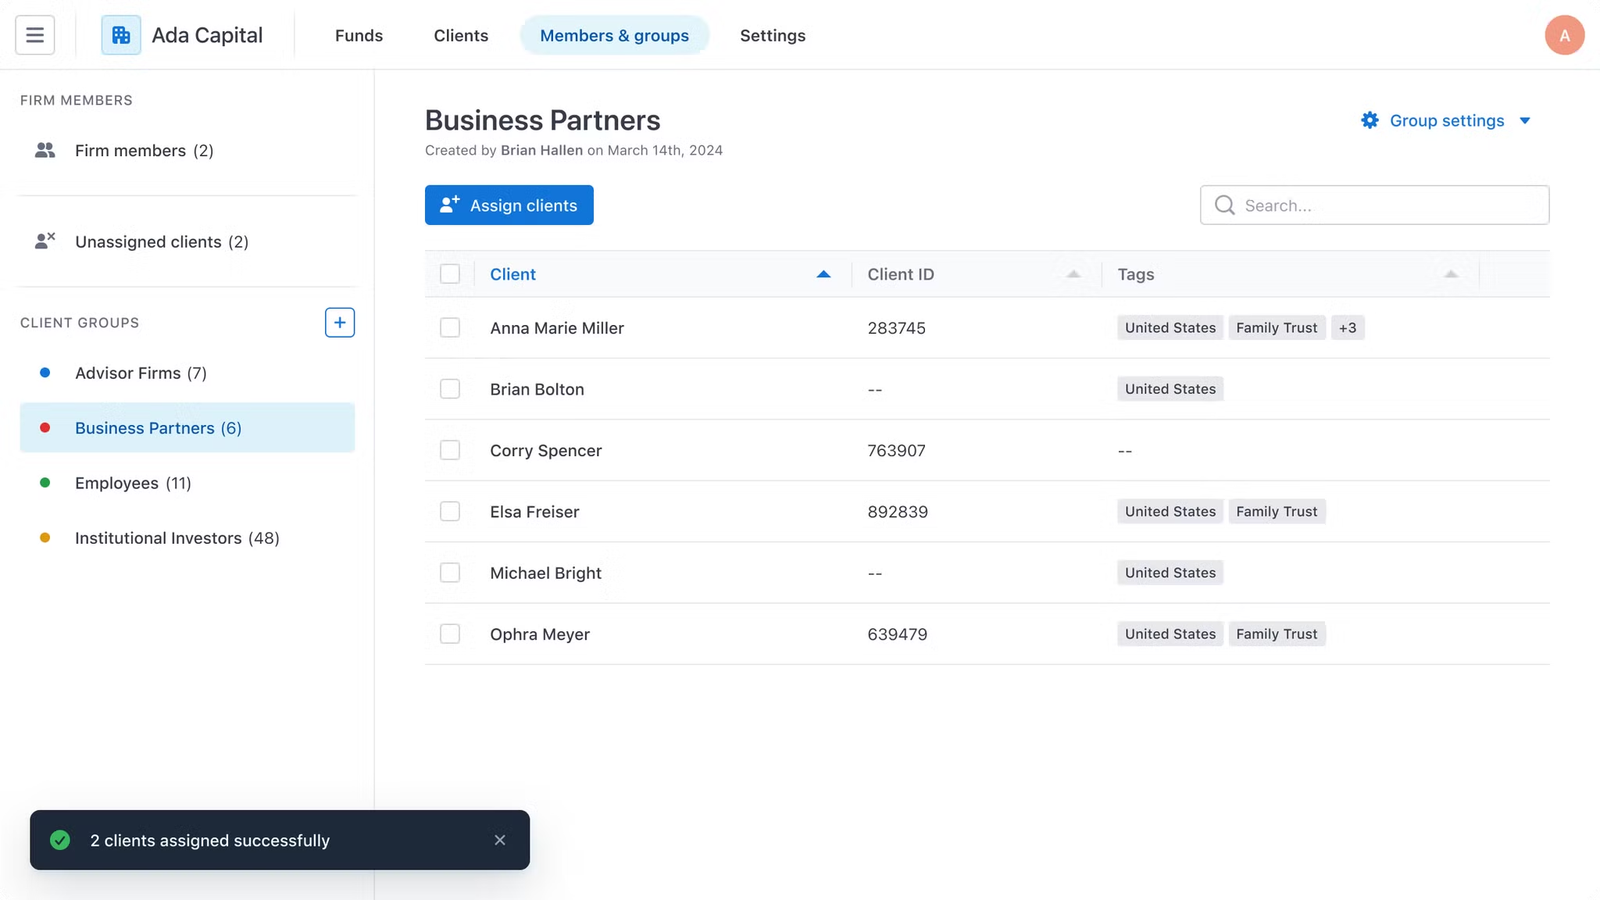
Once users already selected the desired clients, they can click the Assign button to implement it. As a result, changes will take place immediately.
3. Re-assign clients to a different group
Step 1: Users find the exact clients that users wish to re-assign to a different group. Click the … menu. There will be two options for re-assigning here.
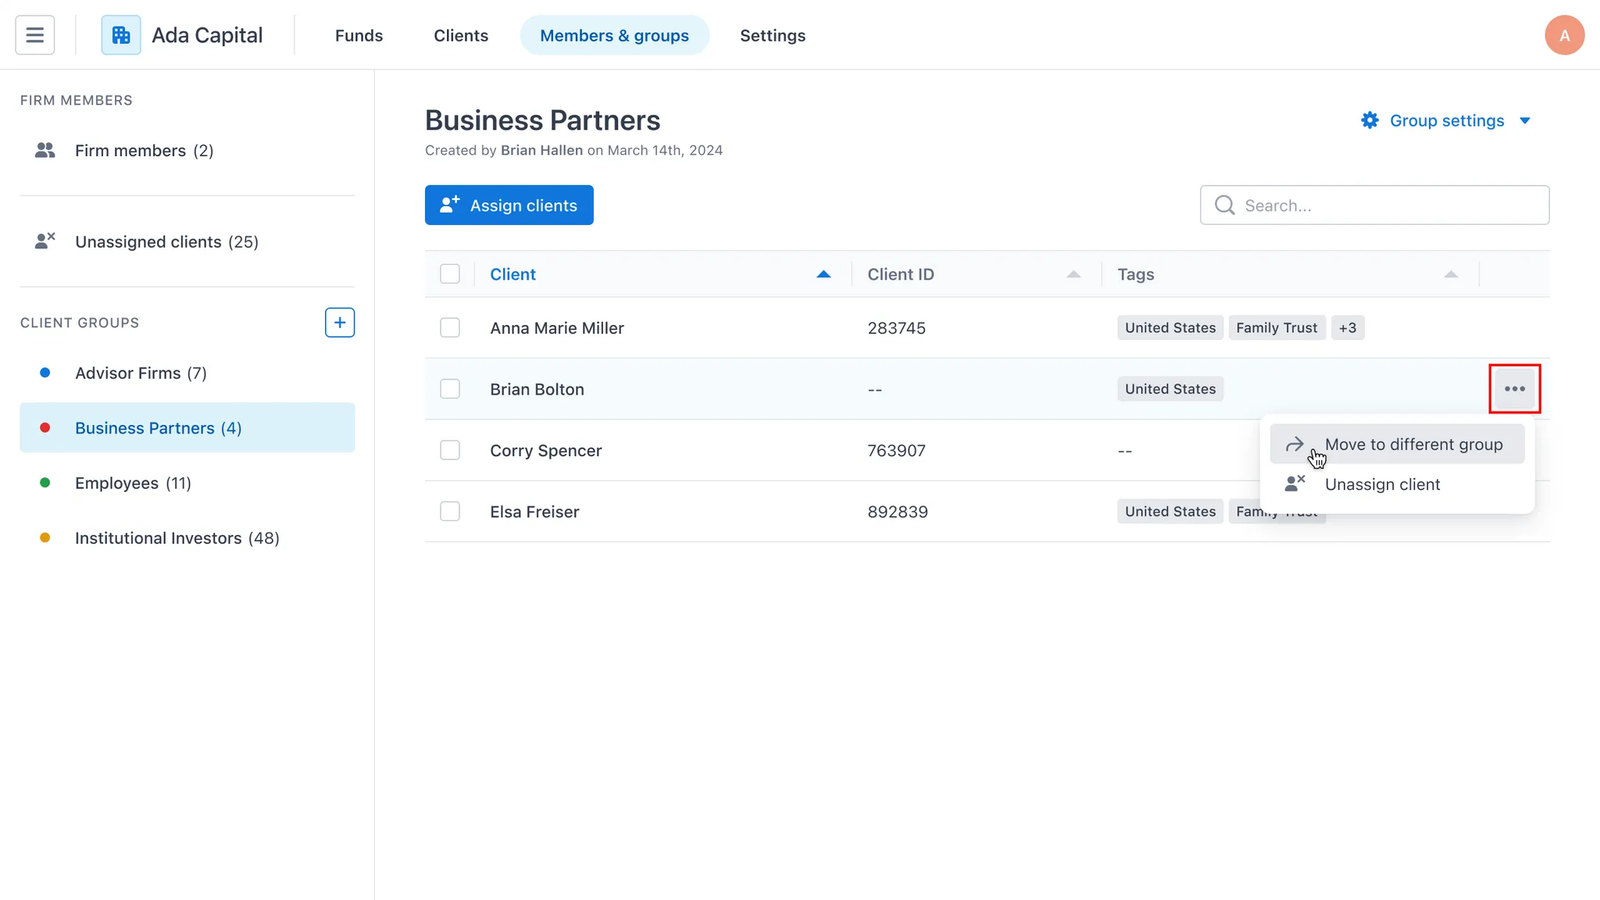
Case 1: If users wish to move this client to a different group
Step 2: Choose the Move to a different group button
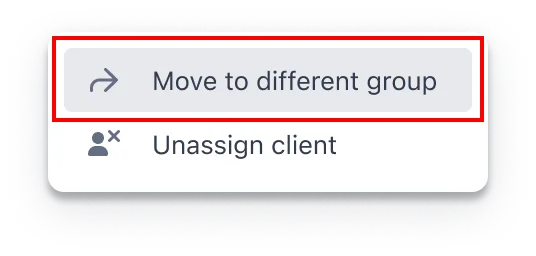
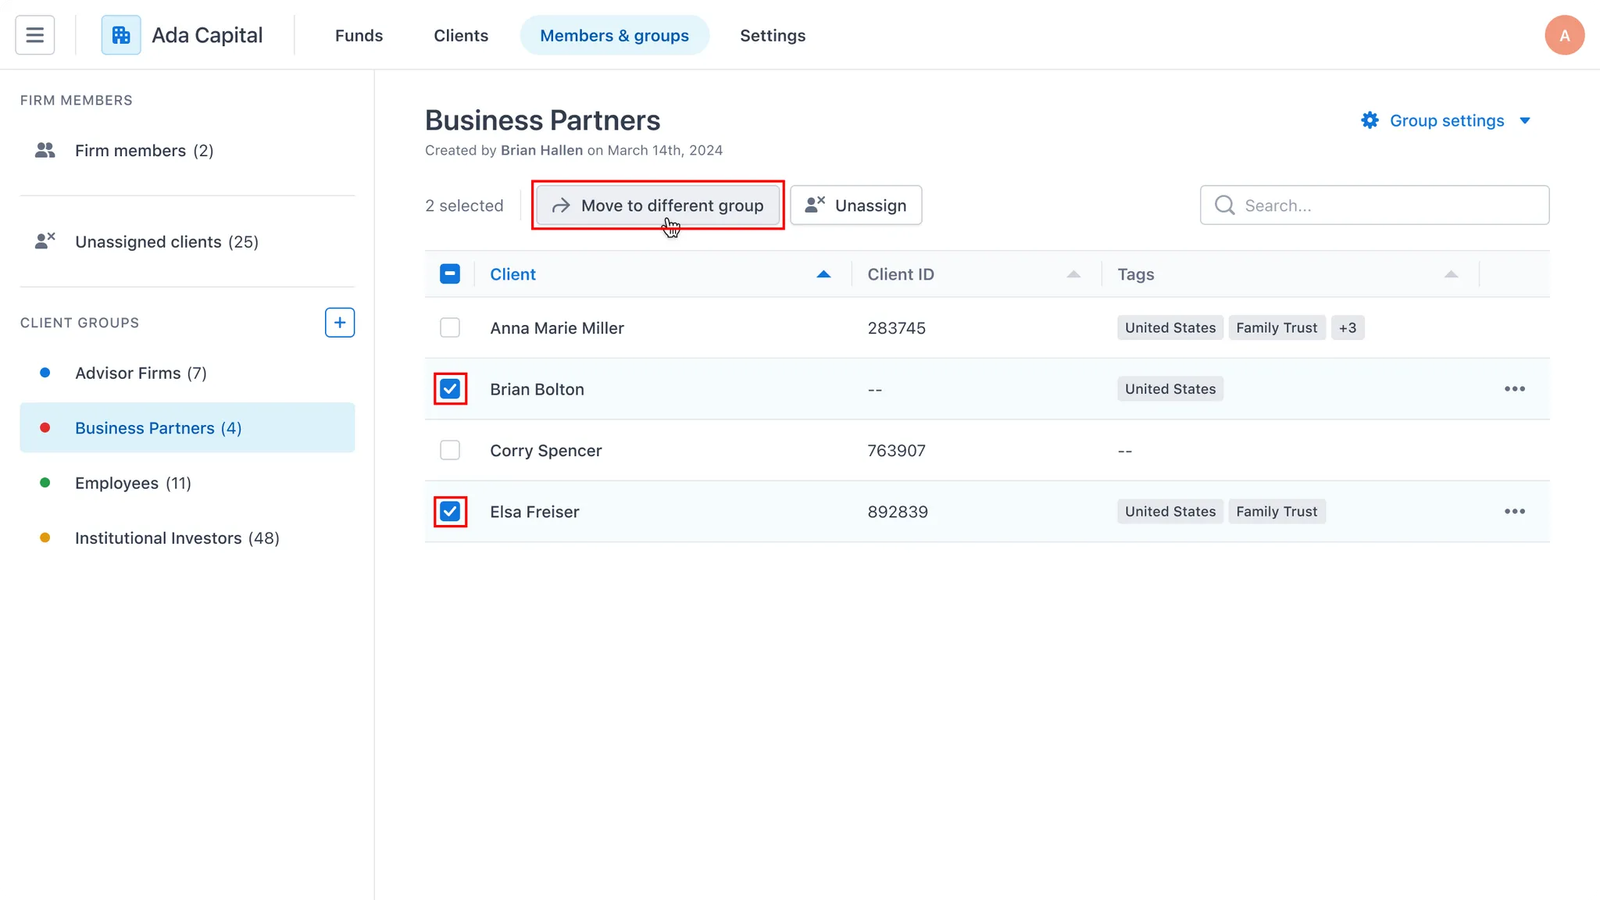
or if users wish to move clients in batch, they can select multiple clients and click the Move to a different group button at the top
Step 3: Then, a modal will appear allowing users to select a different group
NOTE: The client groups displayed do not include the client’s current group
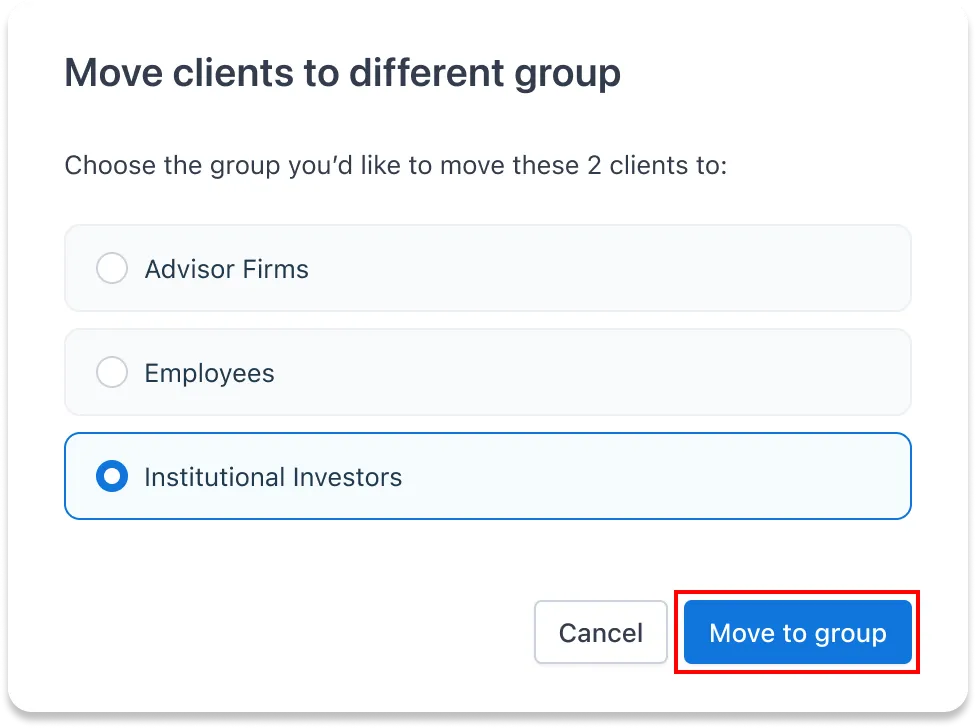
Once, the group is selected, users can click Move to group to execute. Changes will take place immediately
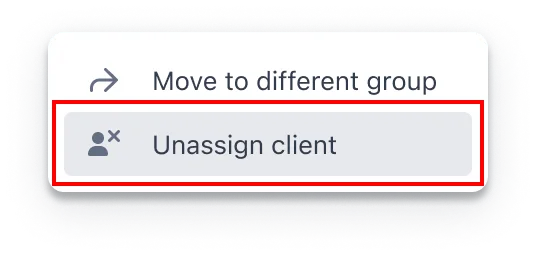
Case 2: If users wish to just unassign one client
Step 2: Choose the Unassign client button
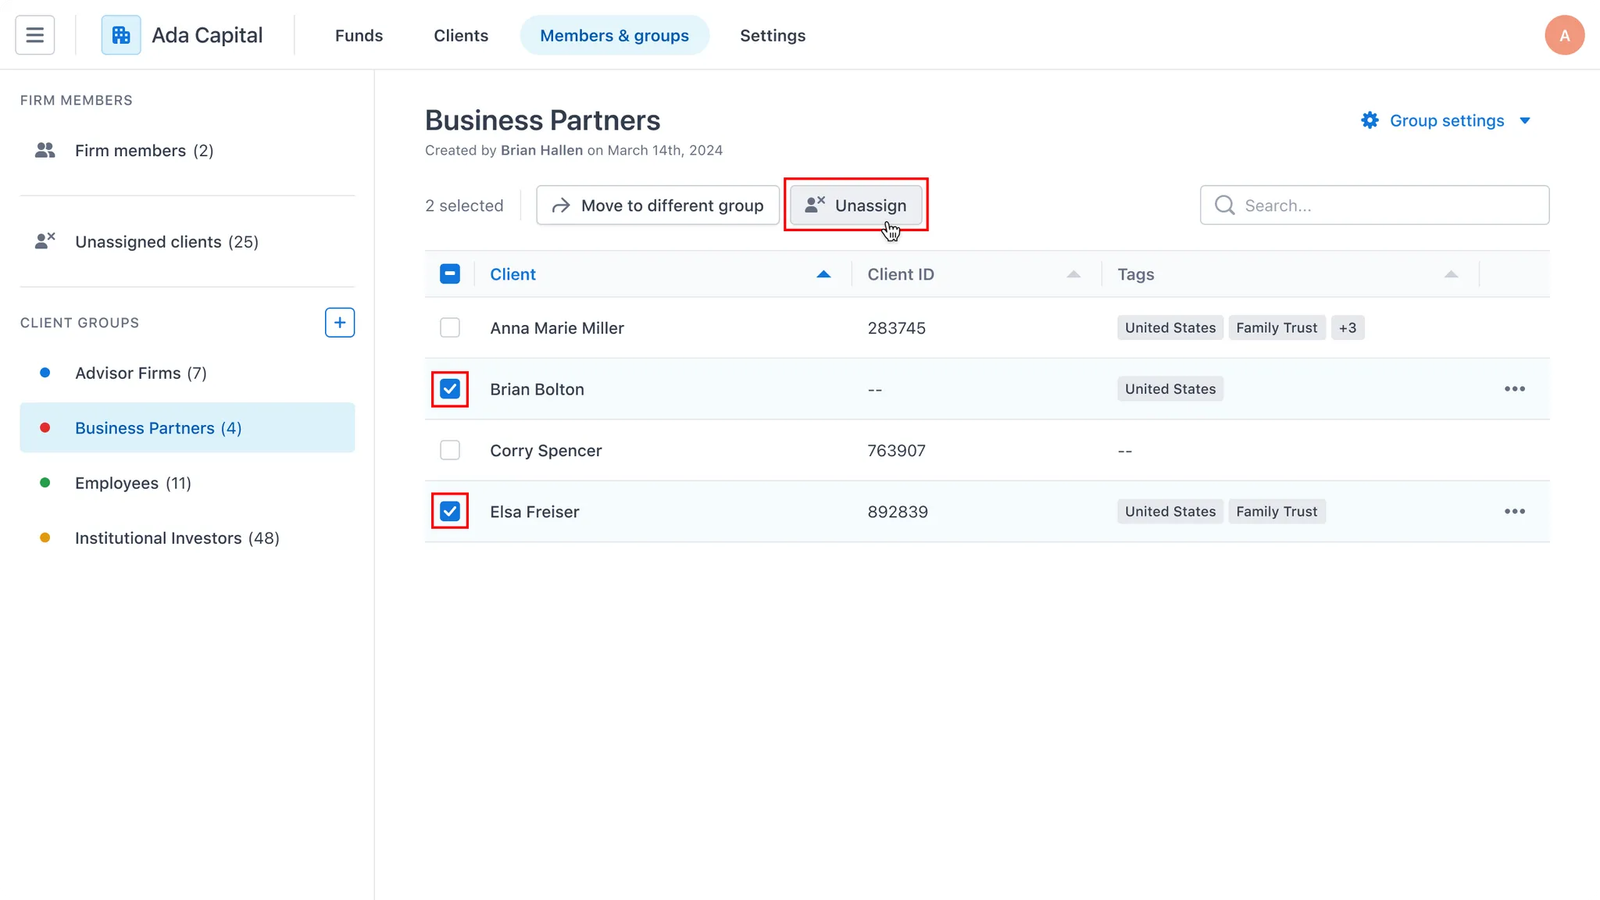
or if users wish to unassign clients in batch, they can select multiple clients and click the Unassign client button at the top
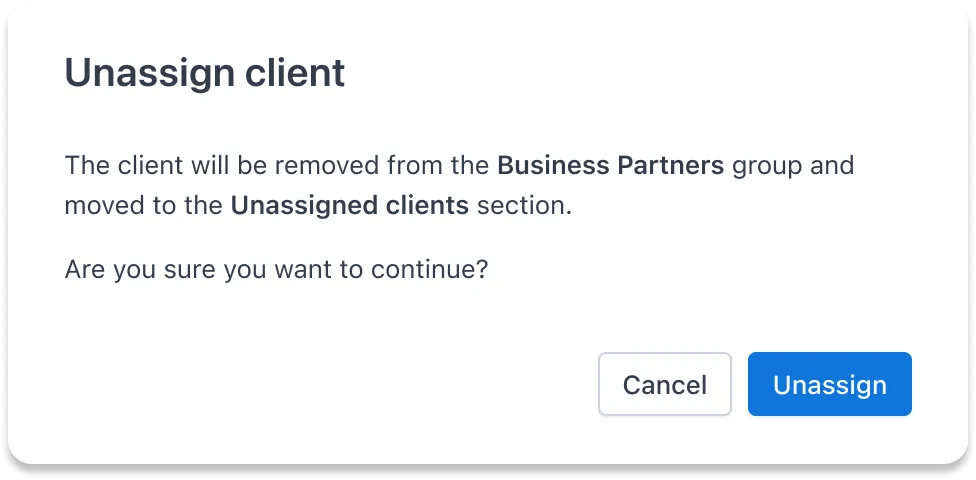
Step 3: Then, a modal will appear to confirm unassign action. Click the Unassign button to execute. Changes will take place immediately
4. Client group settings
NOTE:
- Admin can do all 3 actions in Client group settings, applied for all client groups
- Firm members can only do allowed actions (controlled by 4. Global role customization) for client groups that they have access to
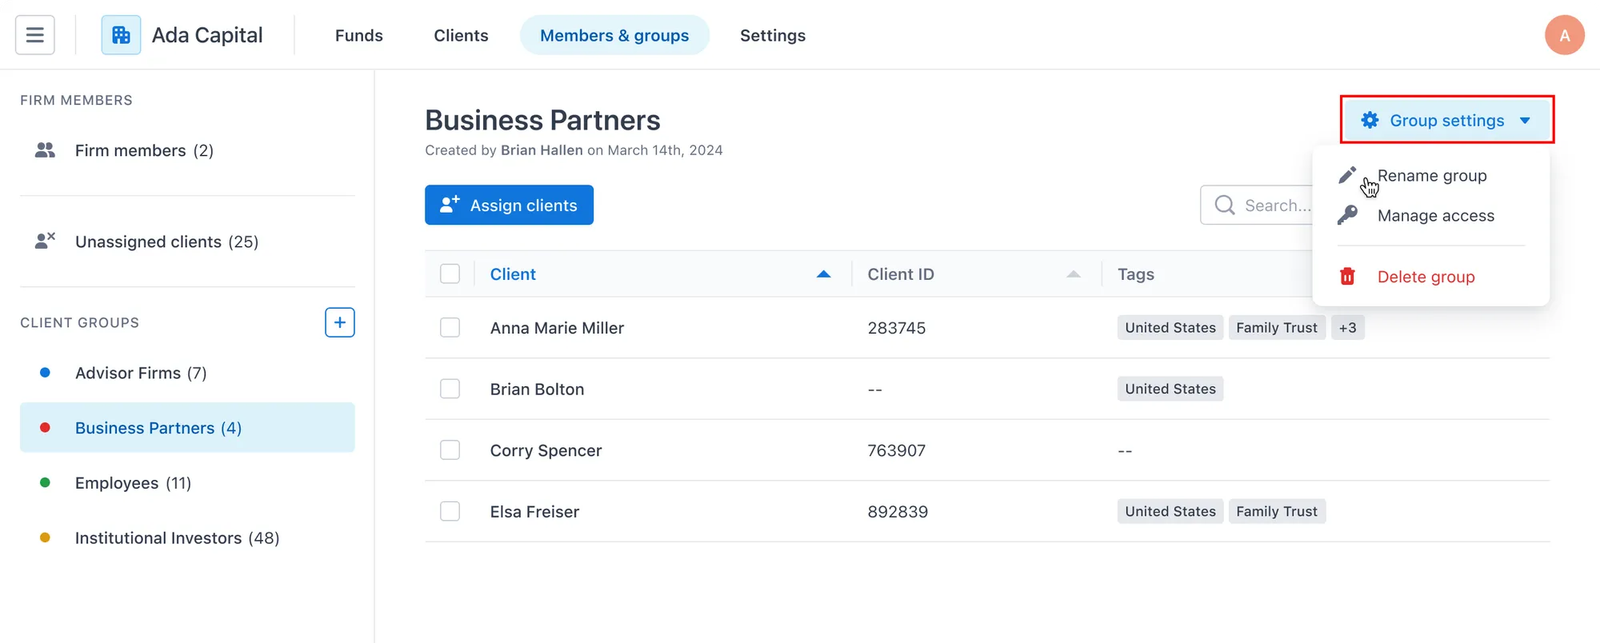
In order to change a client group settings, users can directly head to that client group and find the Group settings button on the right corner of the screen. There will be 3 settings options:
a. Rename a client group
When users choose the Rename group button, a modal will appear allowing users to enter new name for the client group
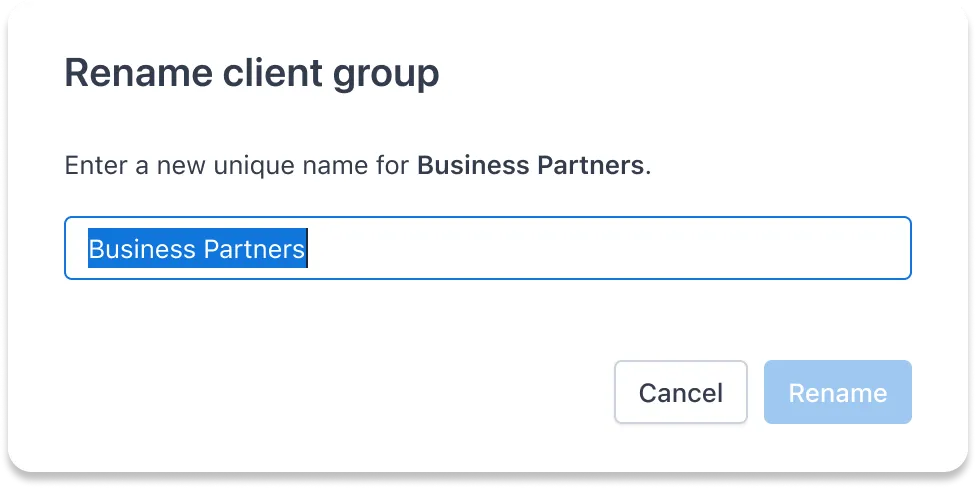
NOTE: In order to rename, users must enter a different value from the current name and also name of other existing client groups
b. Delete a client group
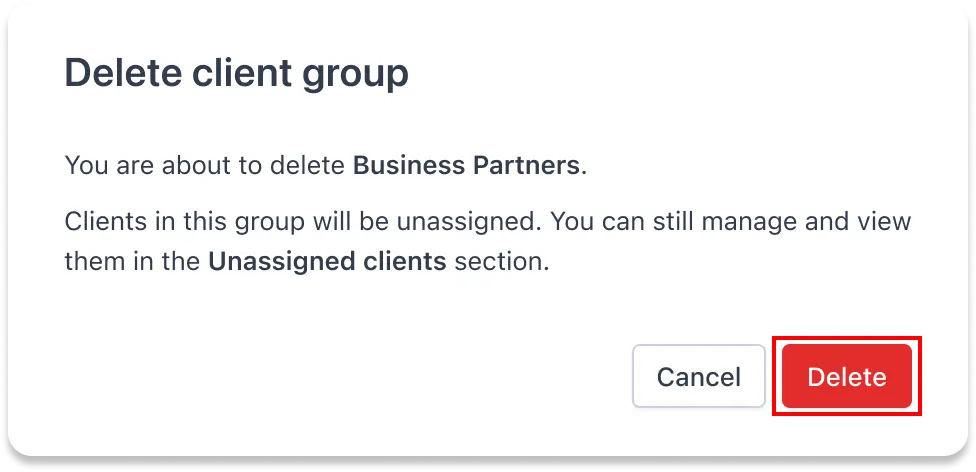
When users choose the Delete group button, a modal will appear for users to confirm the delete action. If users click the Delete button, the change will take place immediately.
c. Manage access to a client group
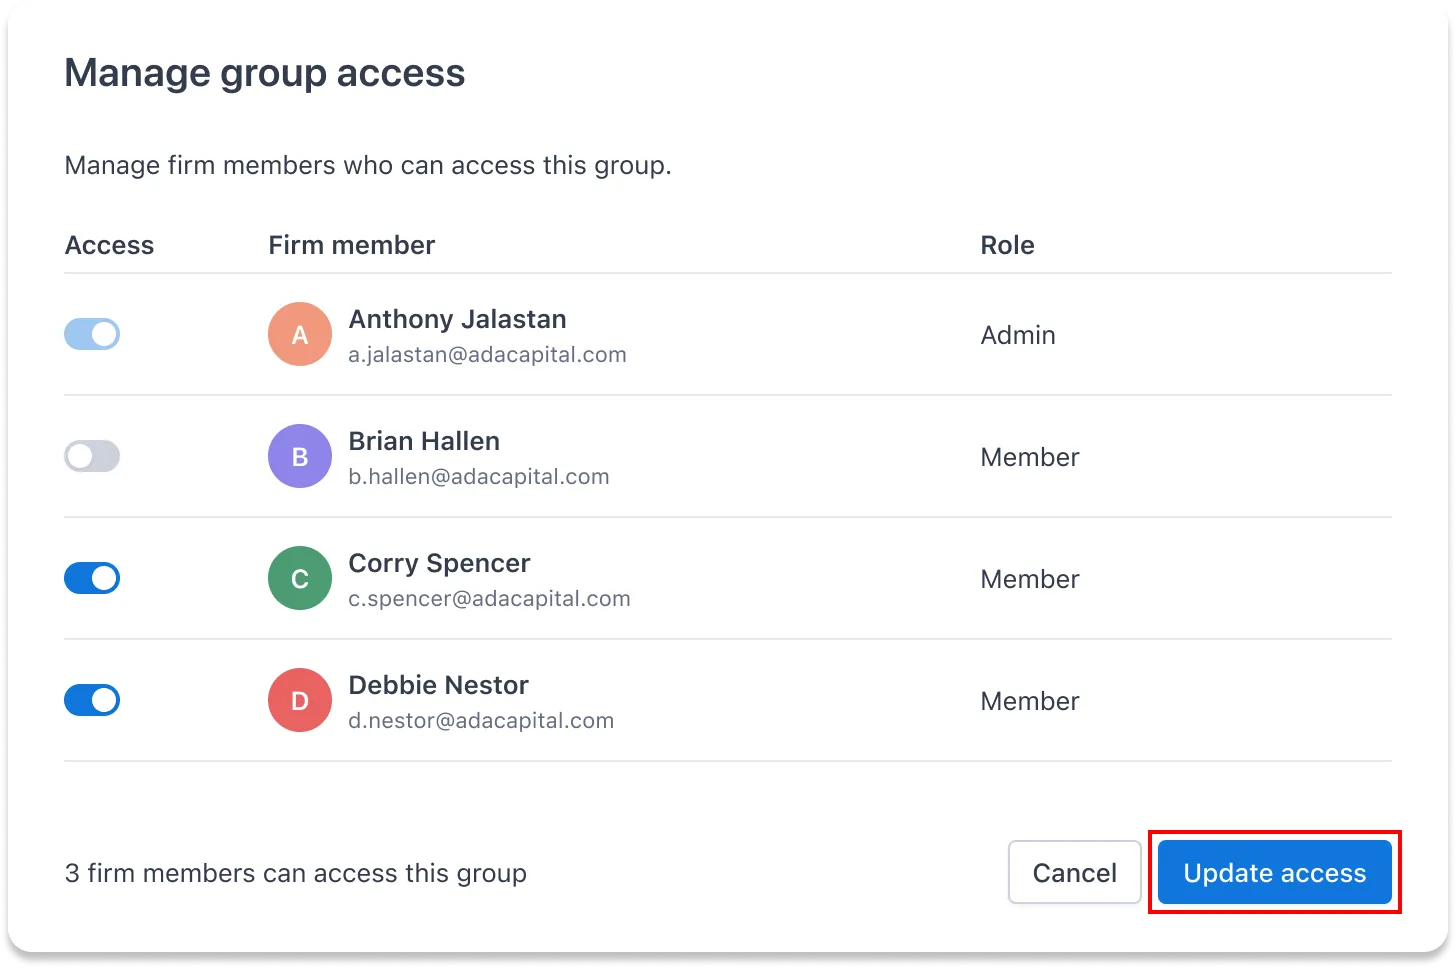
When the users choose the Manage access button, a modal will appear allowing users to manage the access of other firm members.
NOTE: The same permission rule applied as in Group Access (optional field):