

Create a new contact
Introduction Maintaining accurate and well-organized contact records is integral to effective investor relationship management. This guide walks through th
Introduction
Maintaining accurate and well-organized contact records is integral to effective investor relationship management. This guide walks through the workflow for adding and managing contacts in the investor portal, including role assignment and access management for information and documents shared across investor entities and vehicles.
Guideline
Where to find this feature?
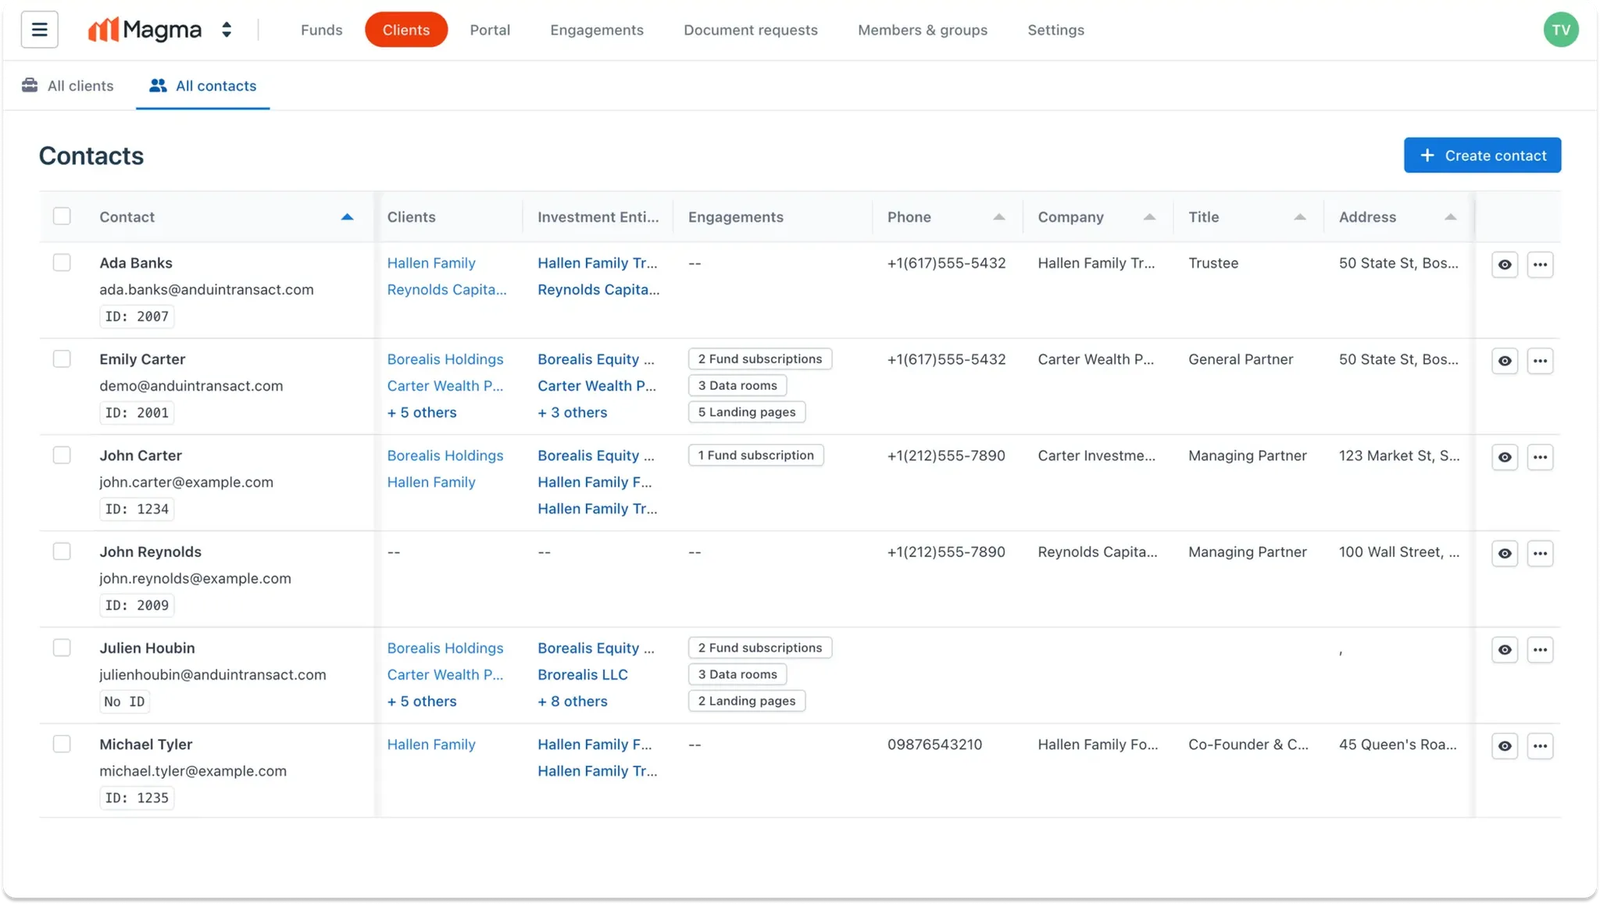
To get started, navigate to the Clients tab in IDM, then select the All contacts sub-tab. This will be the central view for managing all existing firm contacts.
Step 1: Initiate
From the All contacts dashboard, click on the Create contact button found on the top right corner
Step 2: Fill in the required info
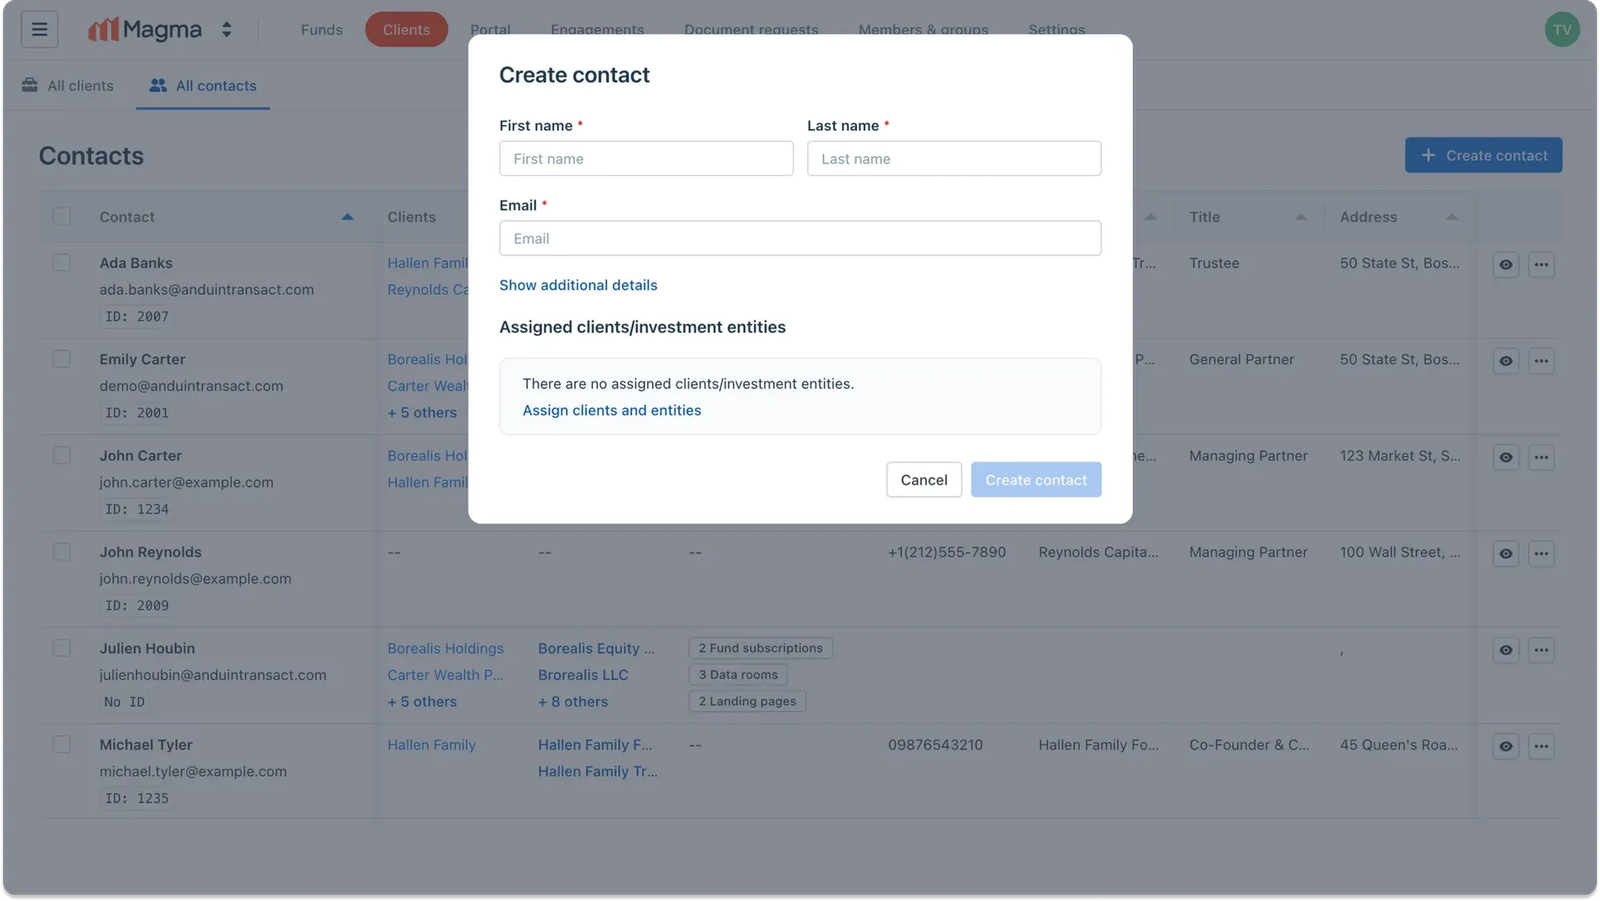
A pop-up modal will appear, allowing users to enter basic information for the new firm contact. First name, last name, and email are required fields to continue.
Note: The email address serves as the unique identifier for each contact. As a result, a new contact cannot be created if the email address is already present in the firm’s contact
Step 3: Provide additional details (Optional)
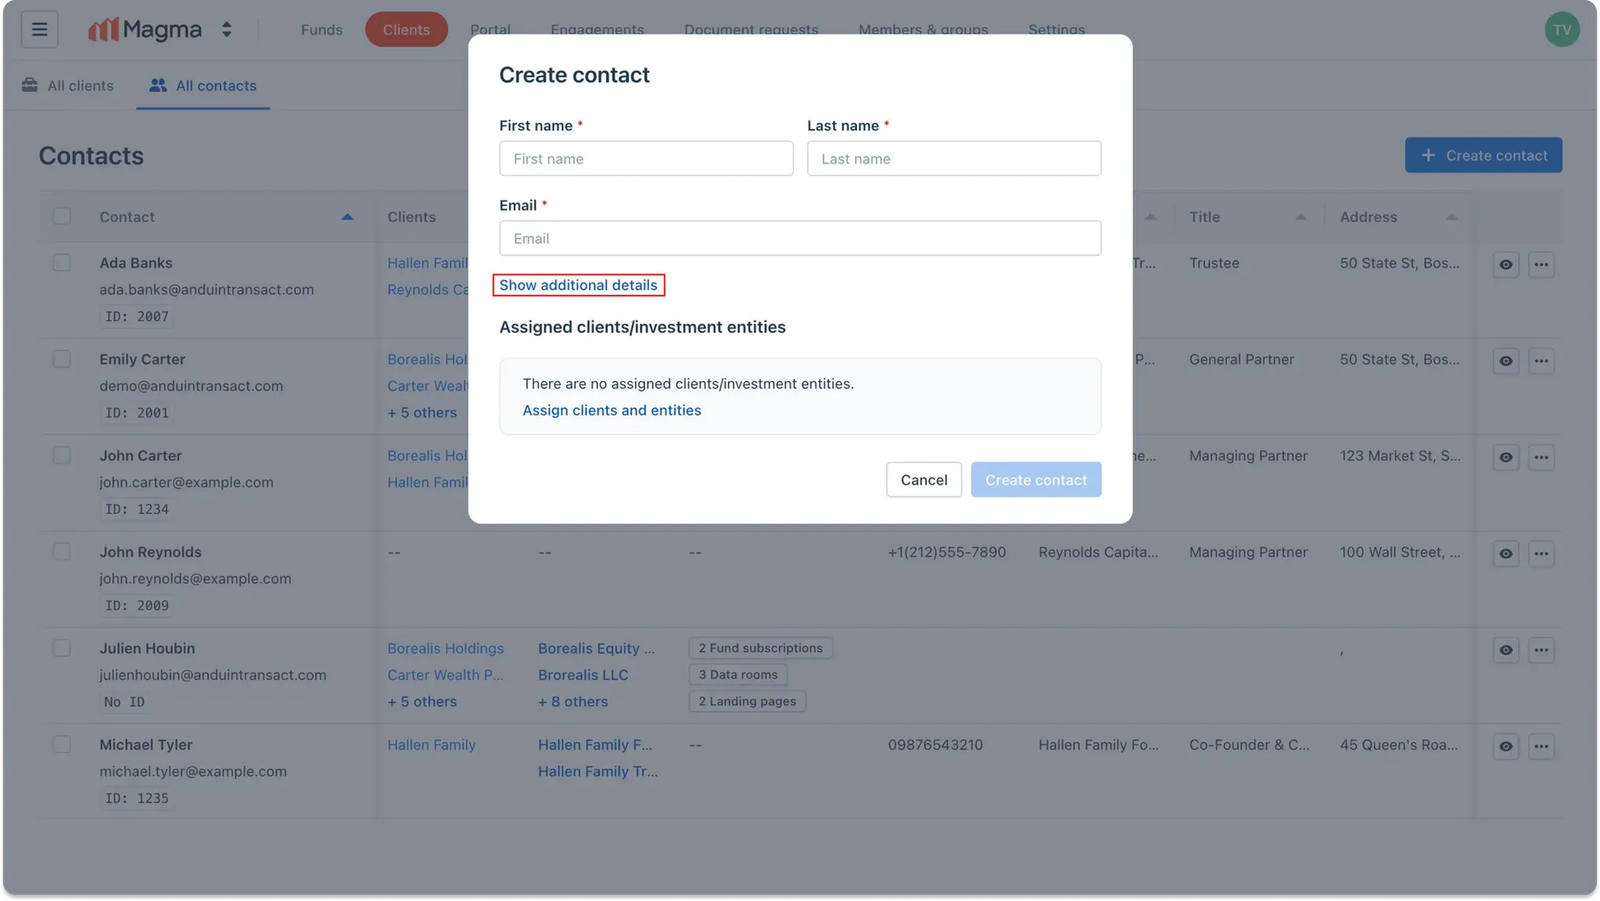
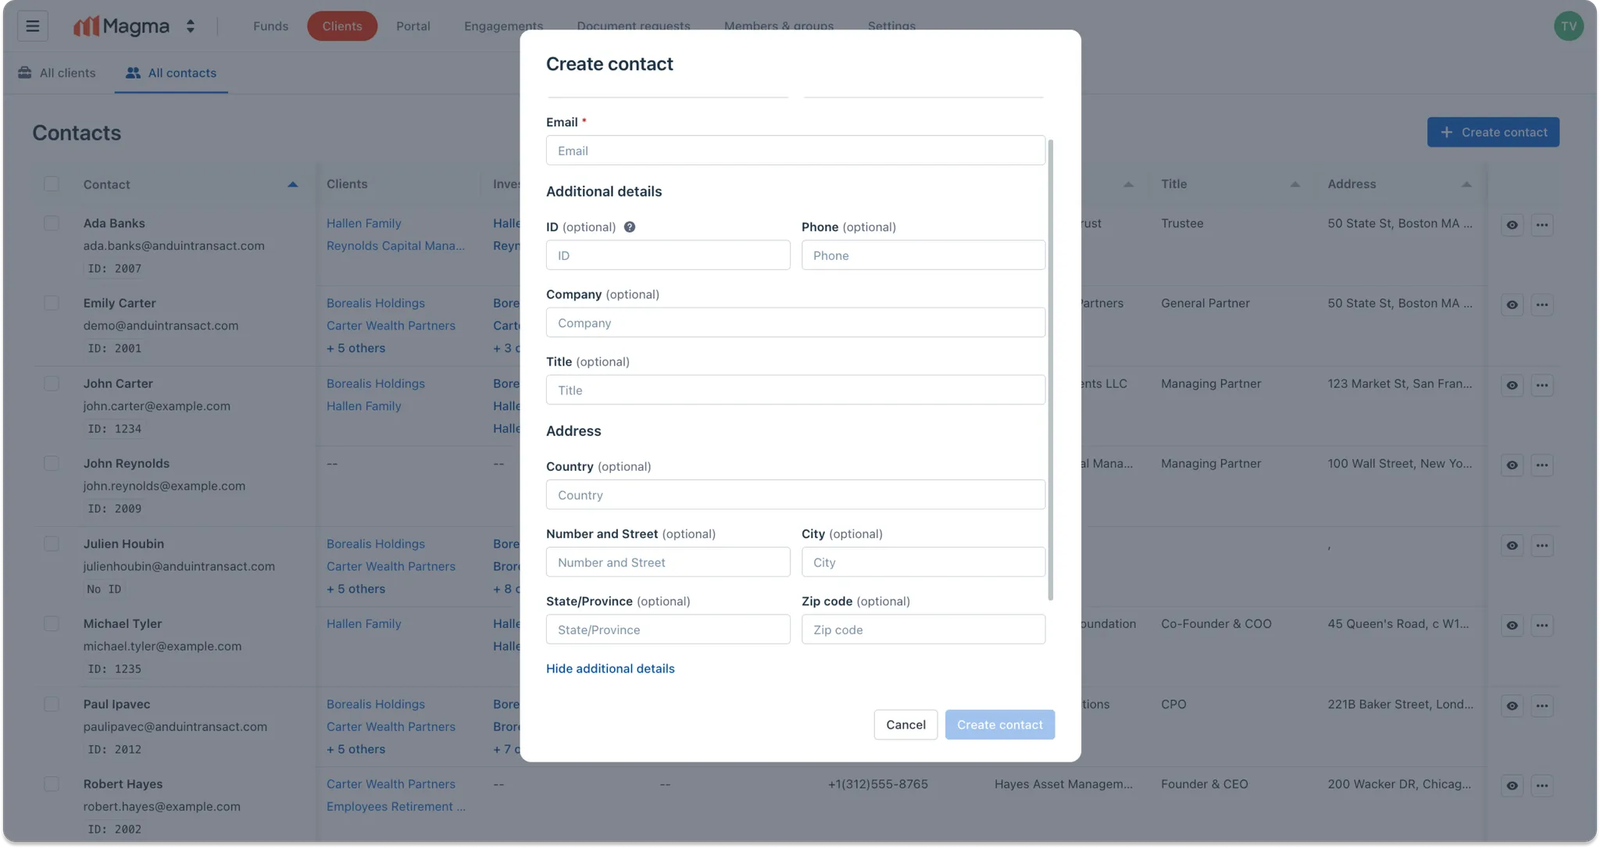
You can provide additional information about the contact, such as custom ID, phone number, address, company, and title, by selecting Show additional detail
Step 4: Assign the contact’s relationships (Optional)
By default, the new contact is not linked to any client or investment entity, which means it will exist independently in the firm.
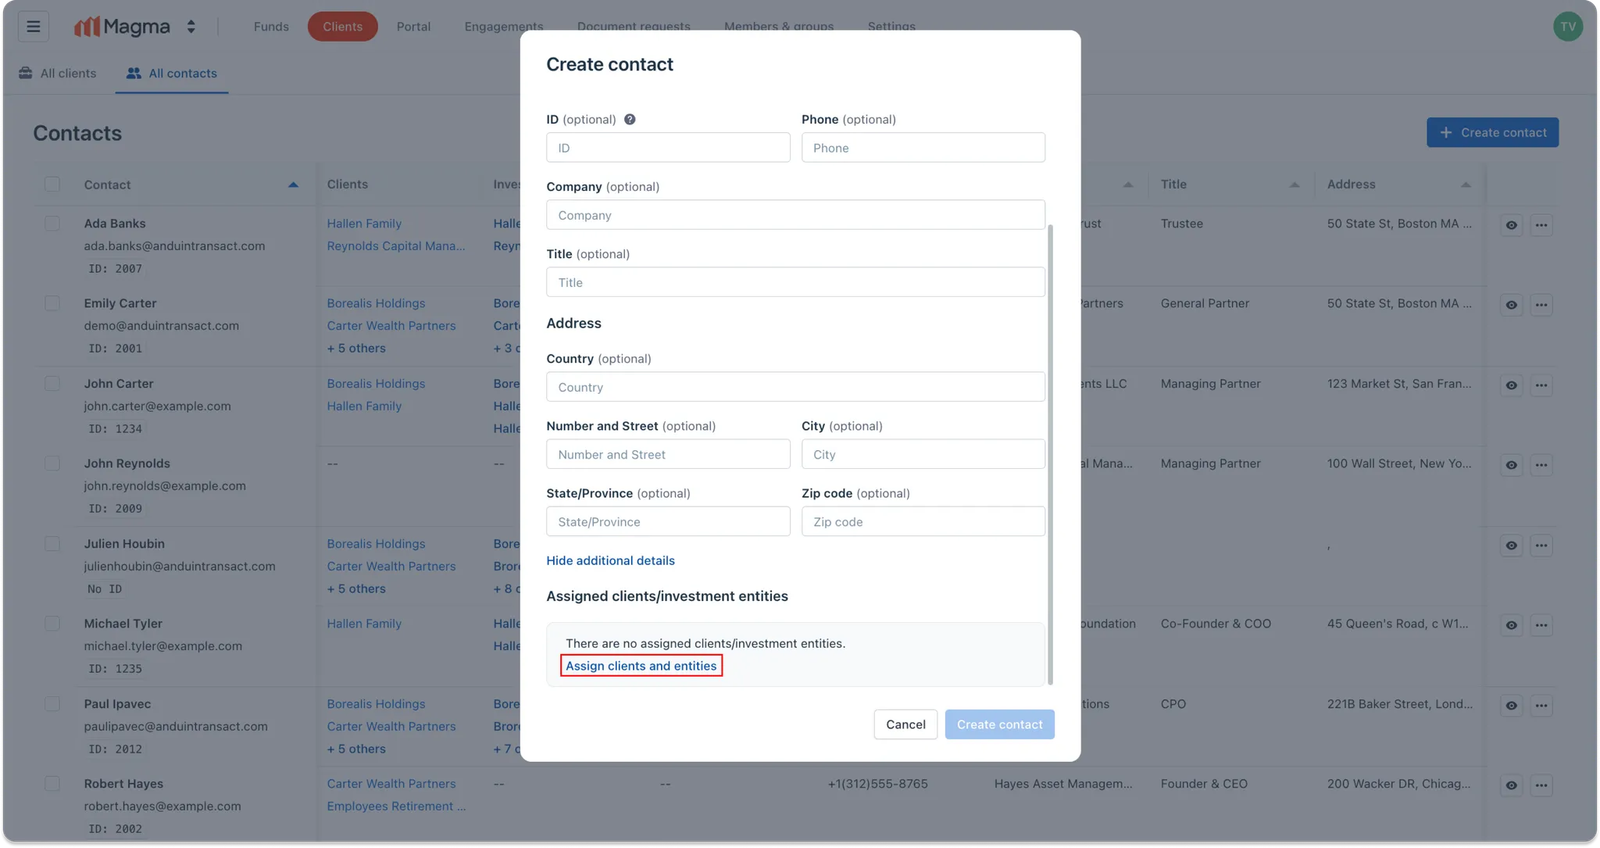
However, to assign this new contact to one or more clients or investment entities, click Assign clients and entities
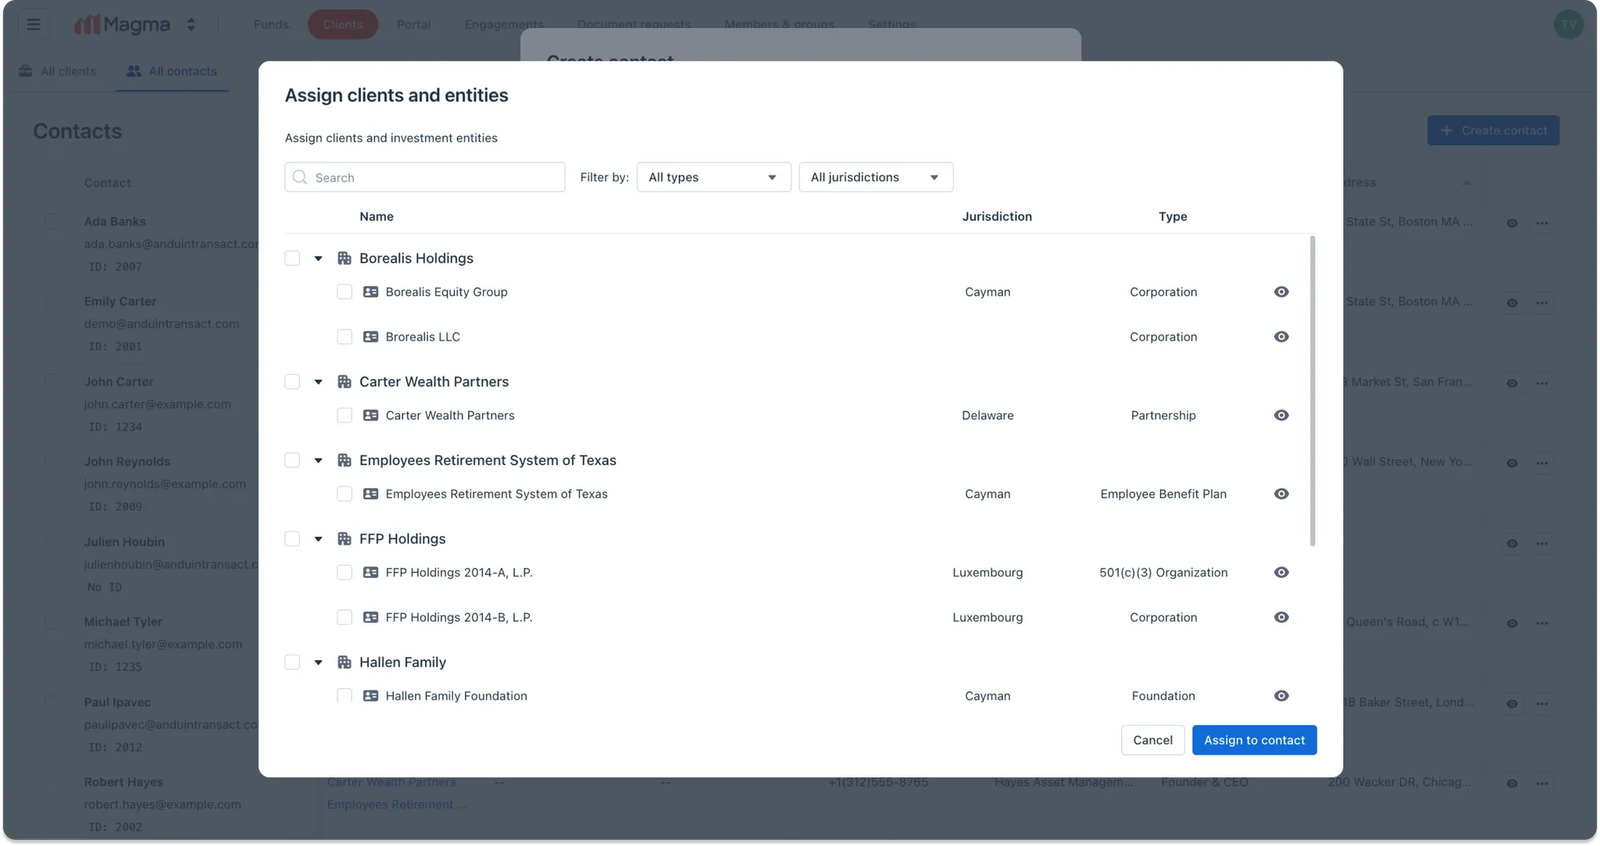
A pop-up modal will appear showing a list of all clients and investment entities you can access in the firm. You can use the search bar or apply filters to find the right one quickly.
Check the boxes next to the clients or entities you want to link.
You can link the contact directly at the client level or at the investment entity level (which will automatically link the associated client as well).
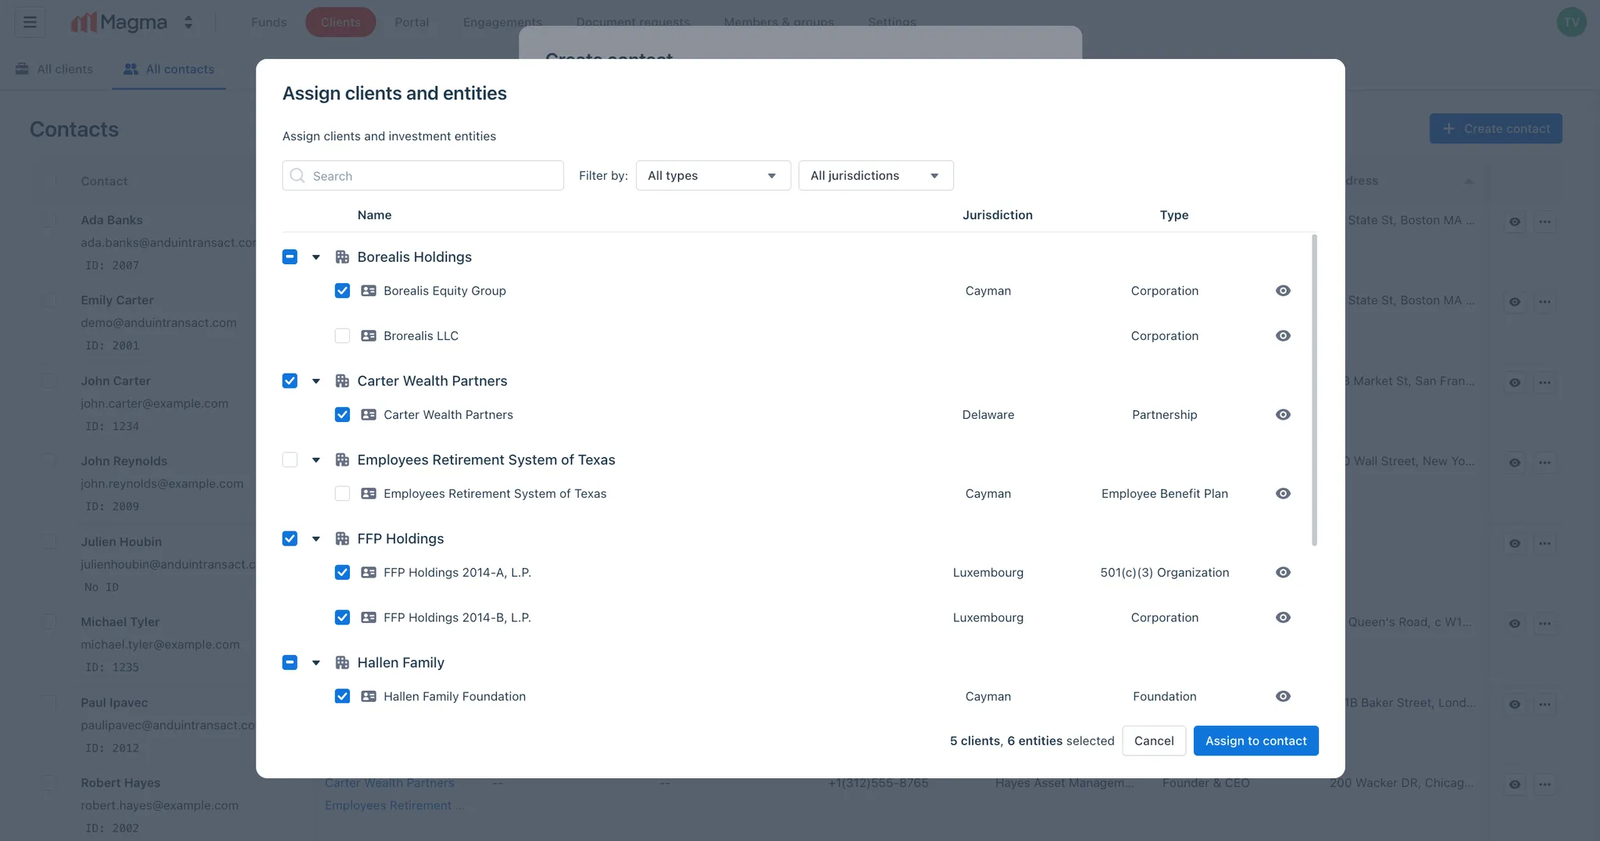
Your selections will be reflected dynamically in the footer. Once you’re done, click Assign to contact to confirm.
Step 5: Review and create contact
Review the contact’s information and any linked clients or entities. Once everything looks good, click Create contact to complete.
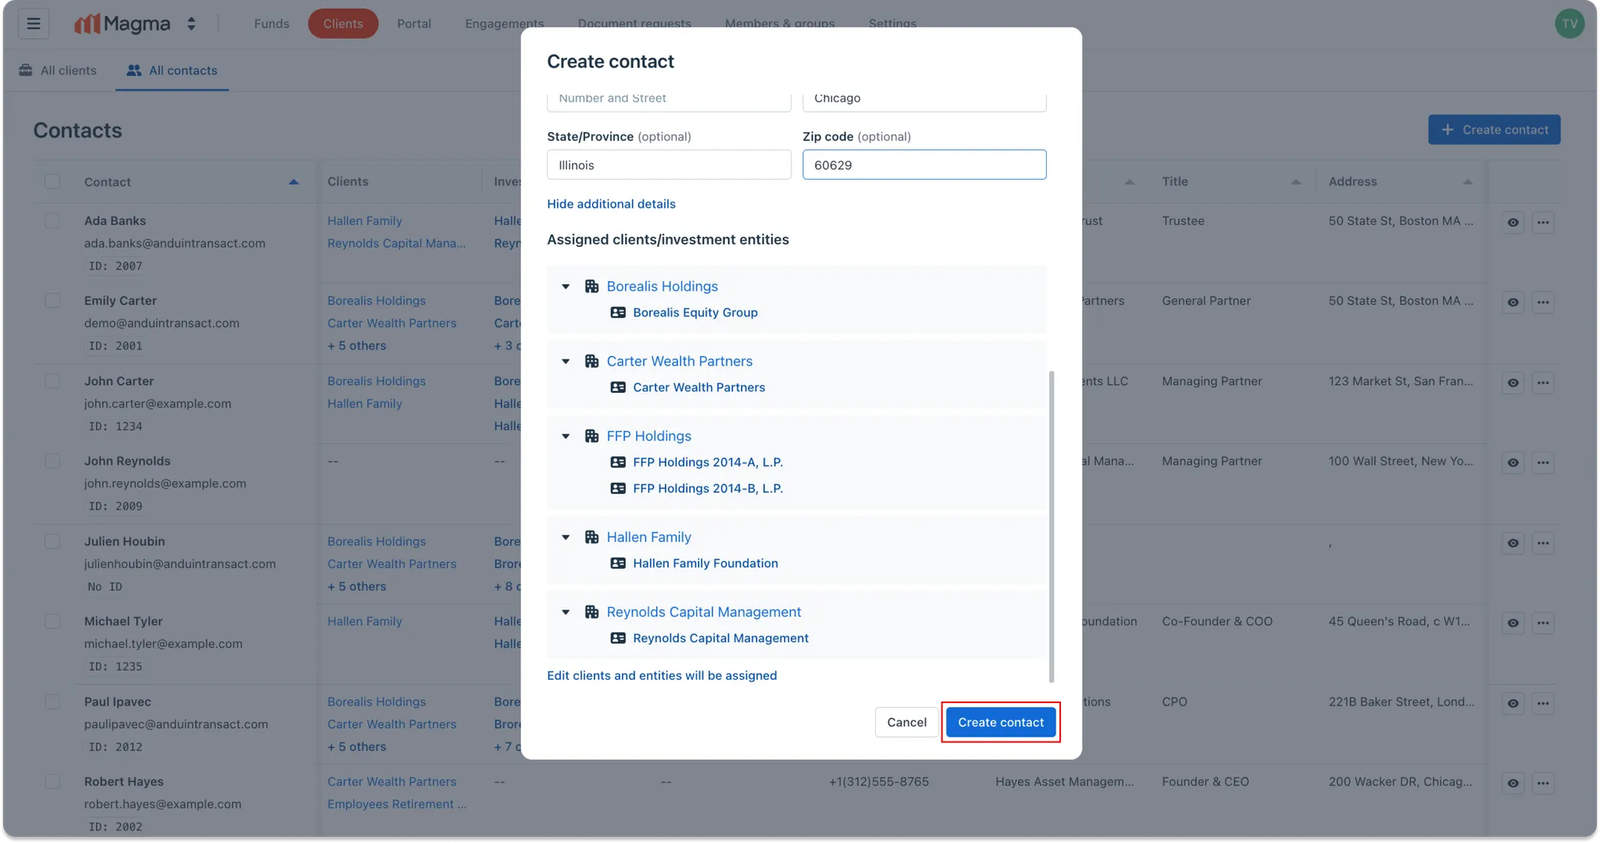
The new contact will be added to the firm and appear in the All contacts dashboard right away.