

Distribute documents to investors via private share method
Introduction Sharing sensitive documents with the right recipients is a key responsibility for fund managers. The Private Share workflow supports this by e
Introduction
Sharing sensitive documents with the right recipients is a key responsibility for fund managers. The Private Share workflow supports this by enabling users to distribute multiple documents, each matched with a specific investment entity (IE), in one streamlined batch.
Unlike Group Share, where the same documents are shared broadly, Private Share focuses on one-to-one sharing, backed by an AI-powered auto-matching system to minimize manual work and maximize accuracy. This guide walks through the end-to-end process, from uploading files to finalizing communication settings.
Guideline
Where to find this feature?
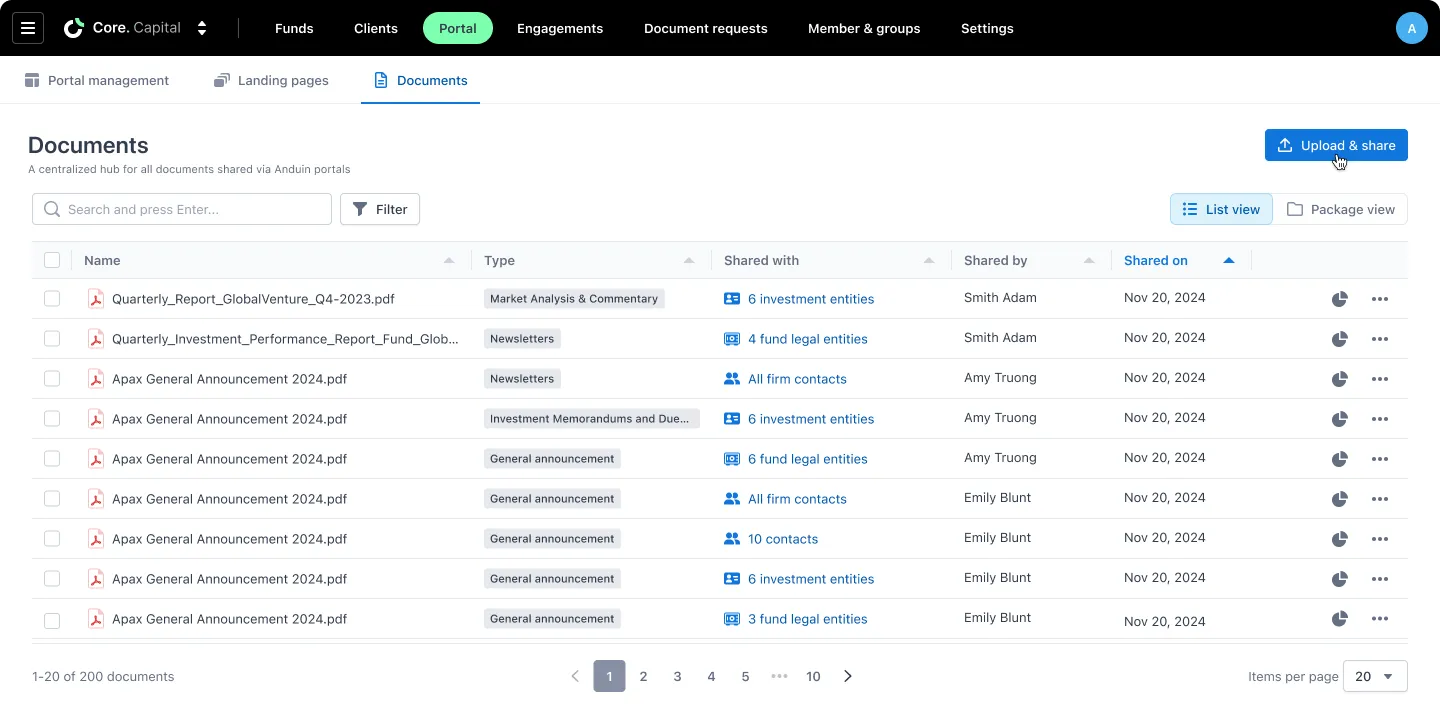
Go to the "Documents" tab under the main “Portals” tab in IDM. Then, in the document dashboard, click the
Upload & Sharebutton on the top right of the screen to get started.
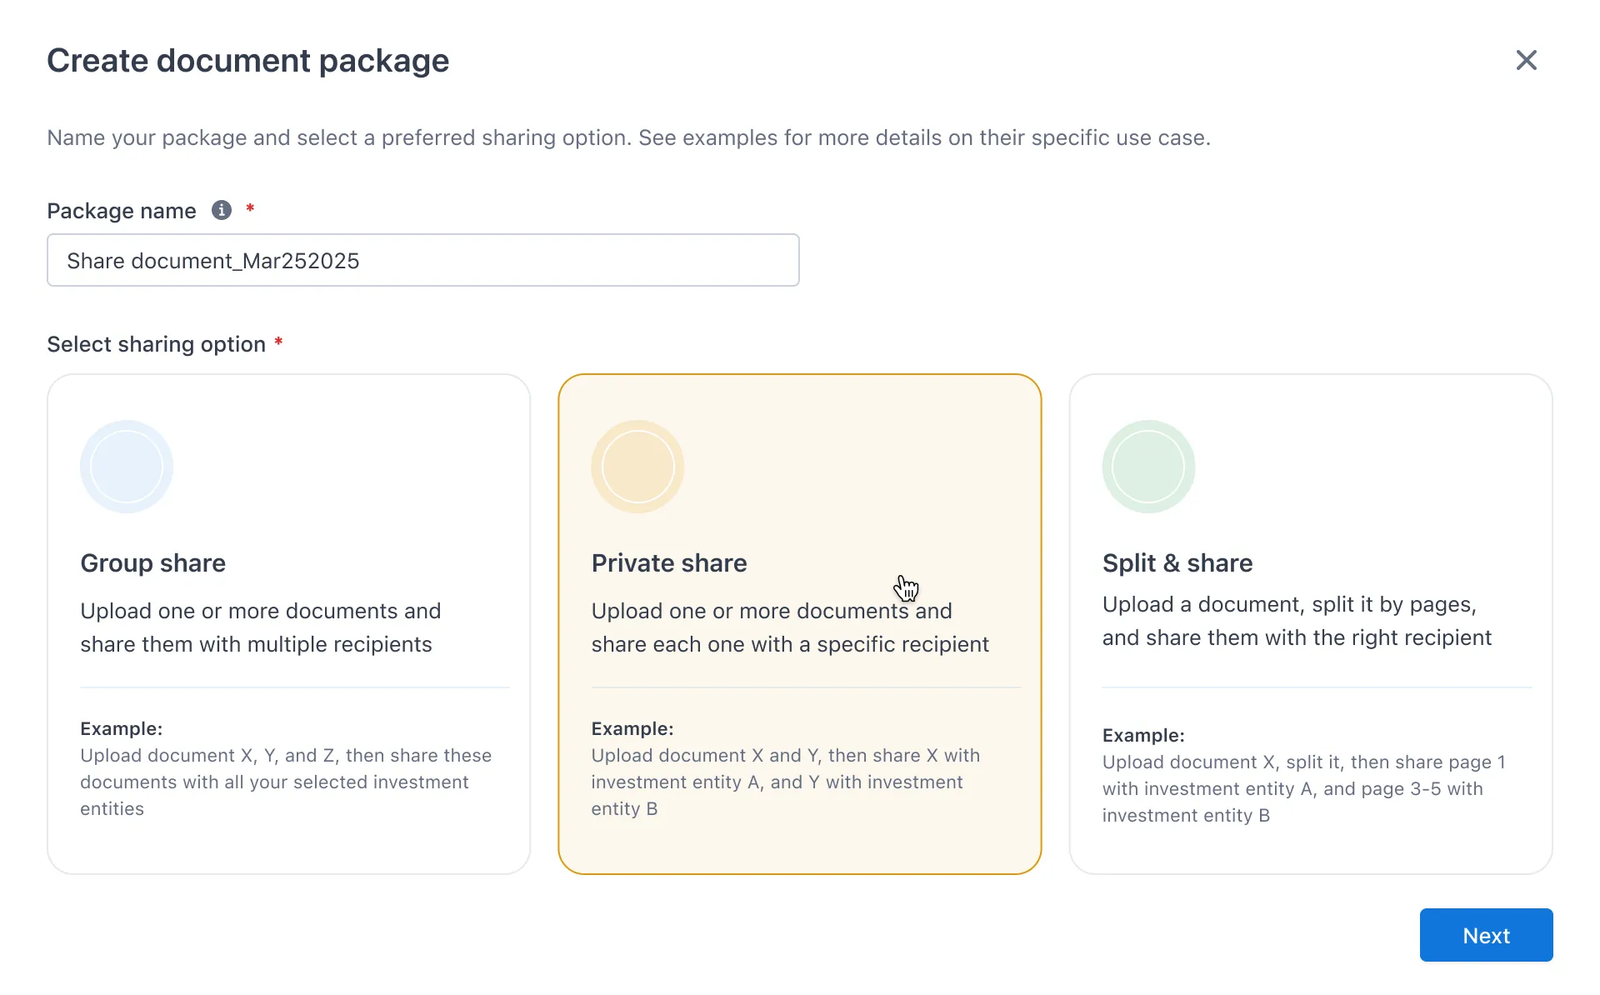
Step 1: Name your document package & choose a sharing method
Start by naming the document package. This name is internal and used for tracking only. The system will autofill it as “Share document_(MMM-d-yyyy),” but you can rename it for easier reference.
Next, choose your sharing method. For this workflow, select “Private share”, which allows you to send a customized file to each individual investment entity. (Group share and split-share are different methods not covered in this guide.)
After you confirm and click Next, the document package will be created, and you’ll move on to the next step.
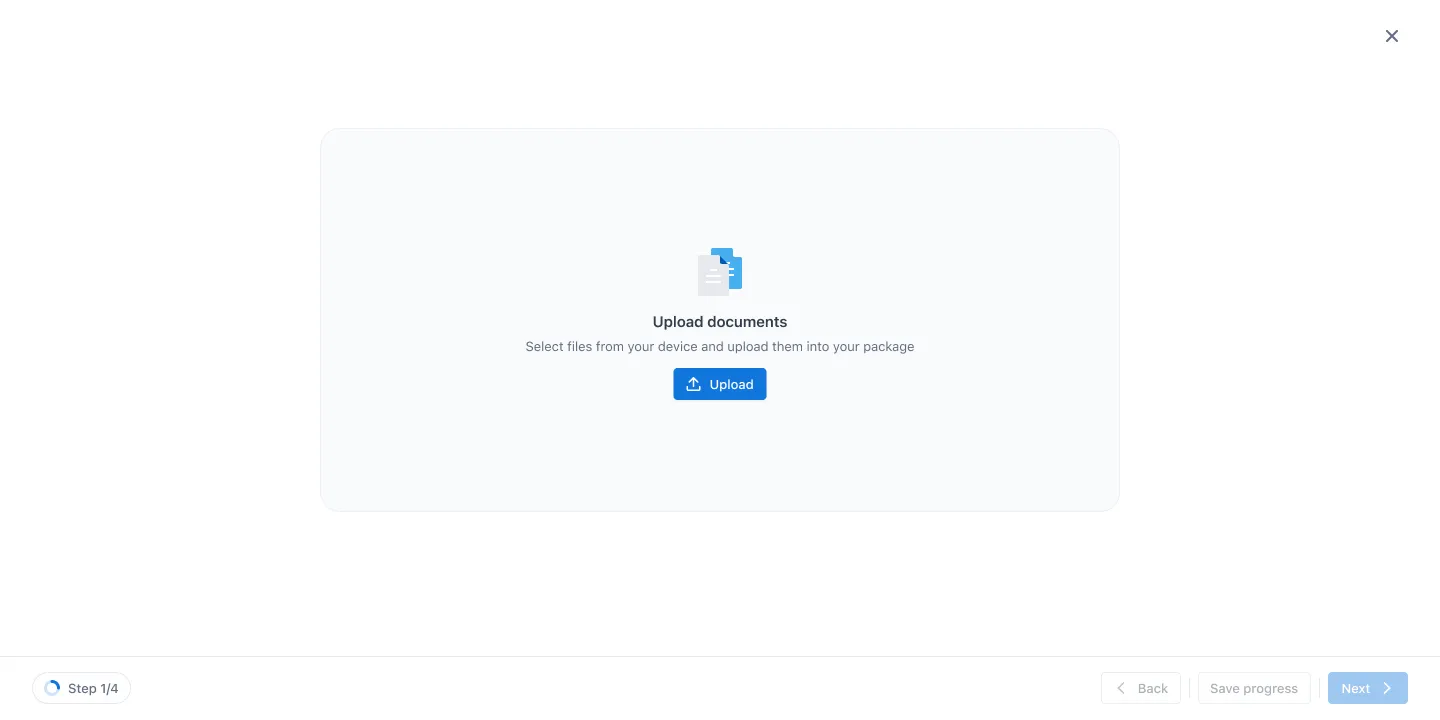
Step 2: Upload files & assign document types
You can upload one or more files in any format, up to a total of 1GB.
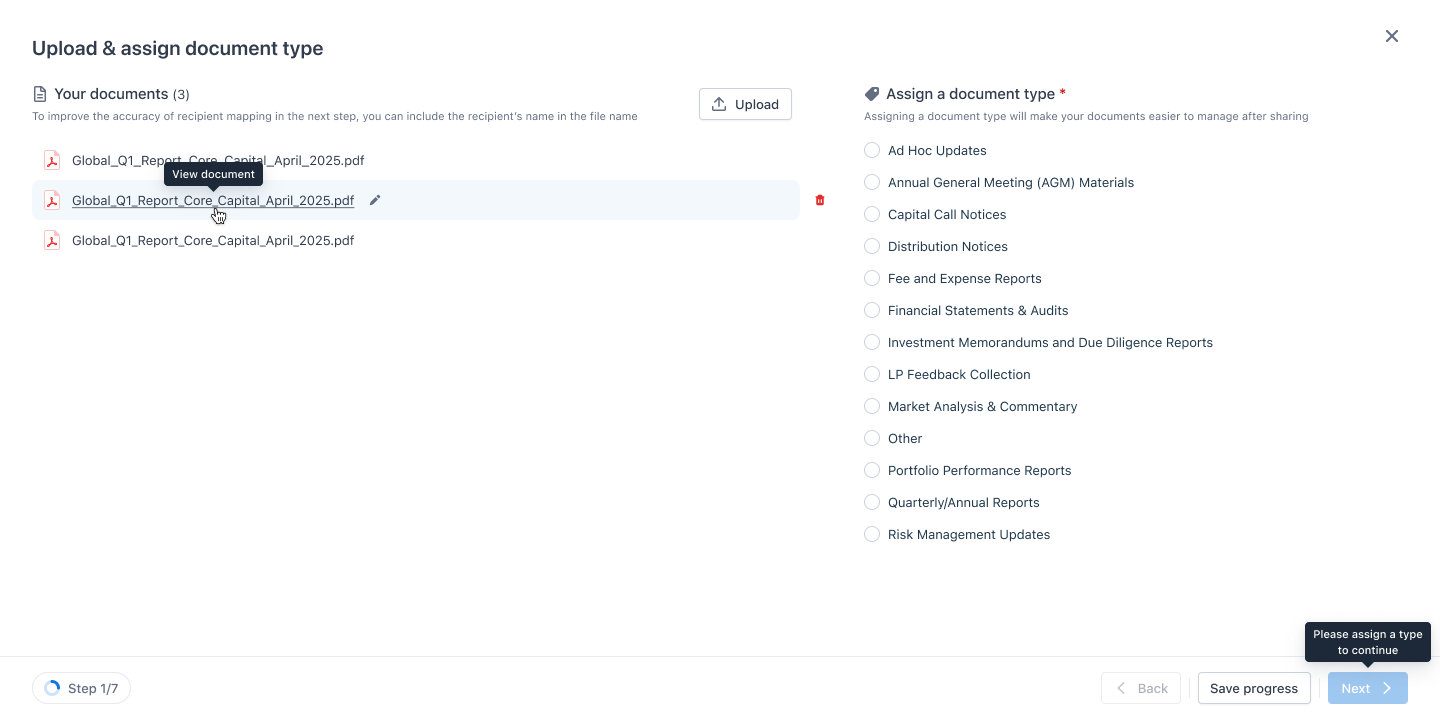
You can also rename the uploaded files if you want by click on the Edit icon appear when hovering on each file.
In this flow, only one document type can be assigned to all uploaded files.
Notes:
Even if you don’t finish this step, as you have a document package created in the previous step, you can now save your progress at any time with the
Save progressbutton as shown in the bottom right corner of the screen
Once everything is all set, you can click Next to proceed.
Step 3: Choose the recipient type & map recipients with AI
Now choose how you want to select recipients. You can either:
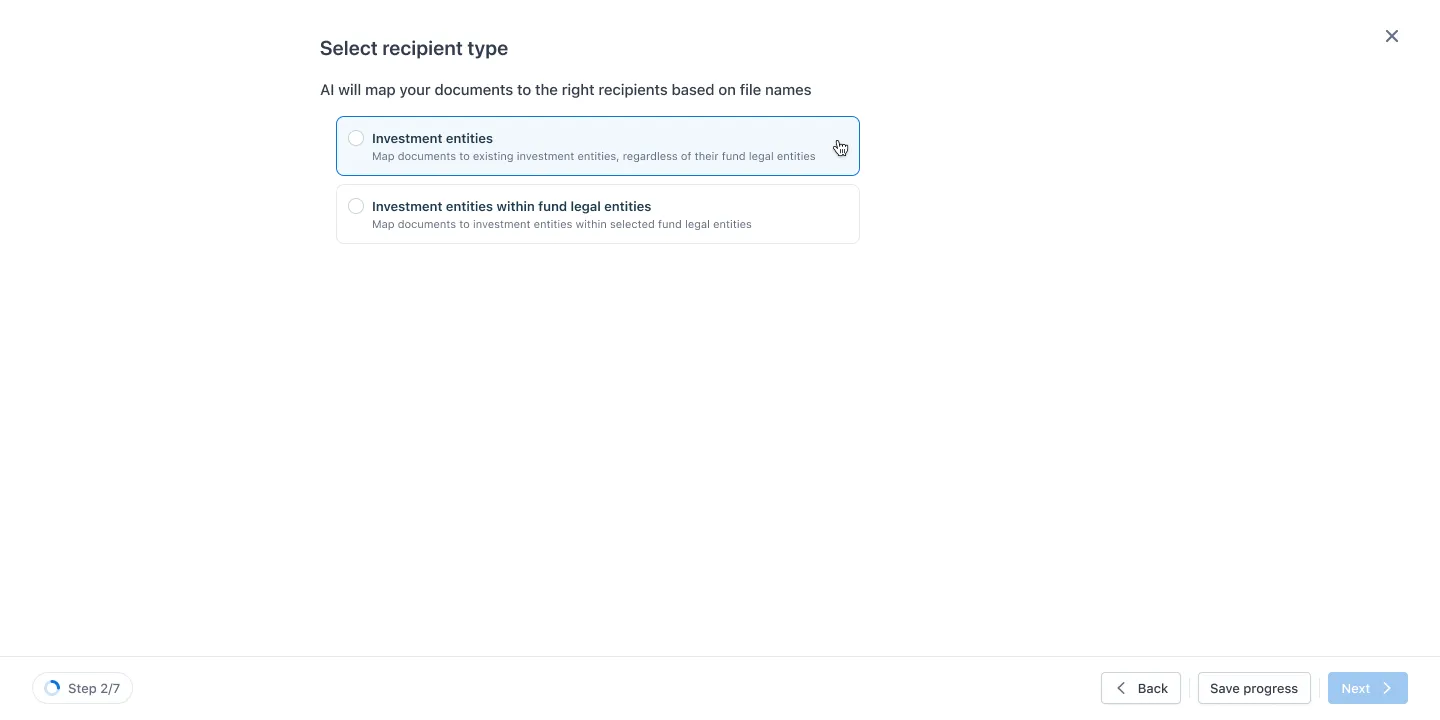
Option A: Share with Specific Investment Entities
This flow is ideal when the documents are not tied to a fund structure and you want direct control over who receives each file.
After selecting this option, you’ll proceed to the mapping table where each file is auto-matched to an investment entity (IE) using our AI-powered system. Here, the system scans filenames and file content to detect and assign the correct recipient.
- If successfully matched, the recipient IE name appears next to the file.
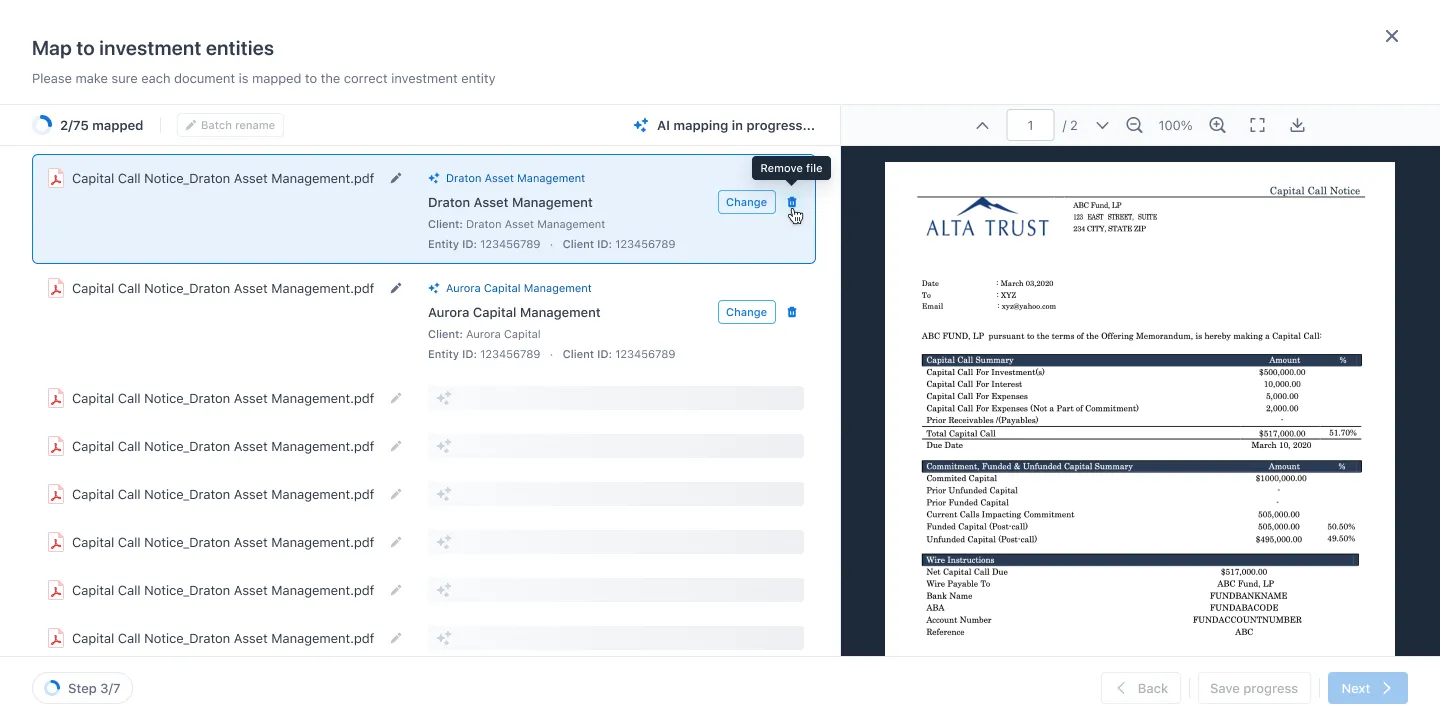
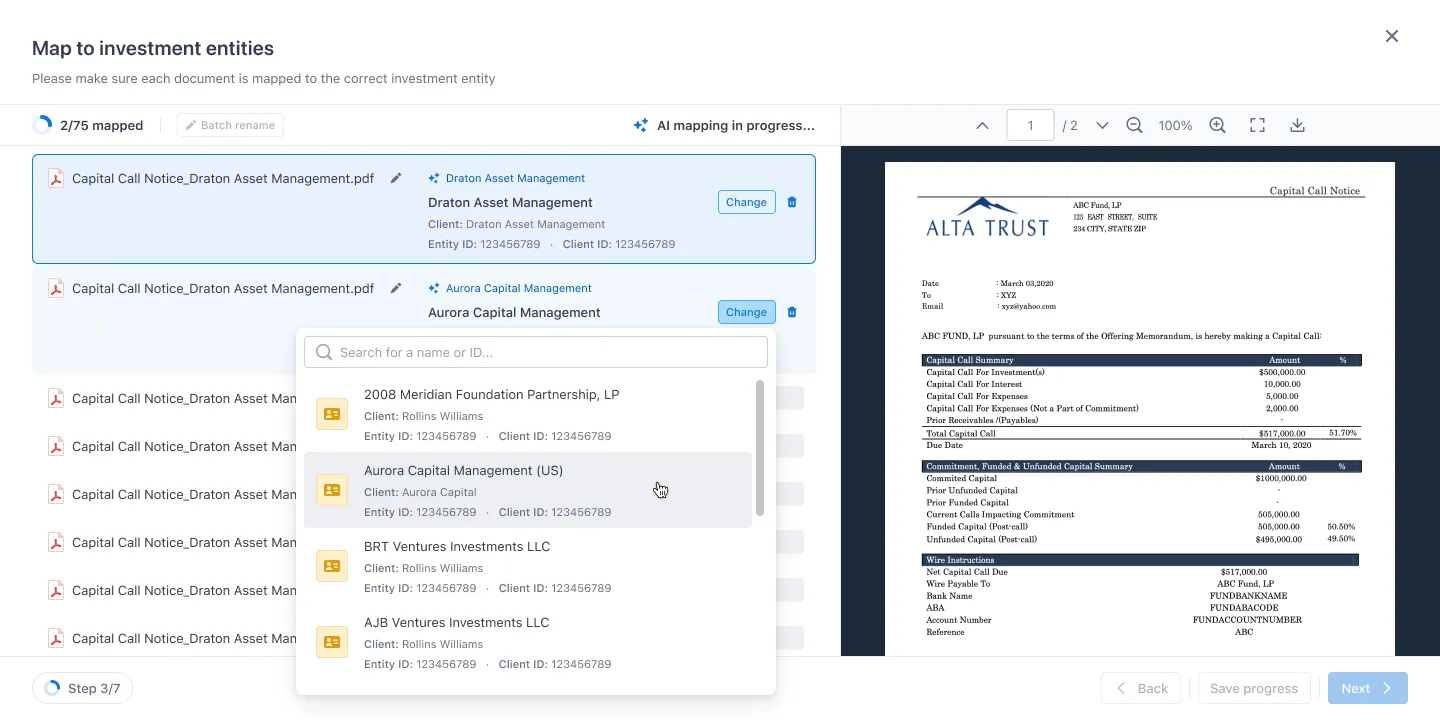
- You can override the match at any time by selecting a different IE from the dropdown.
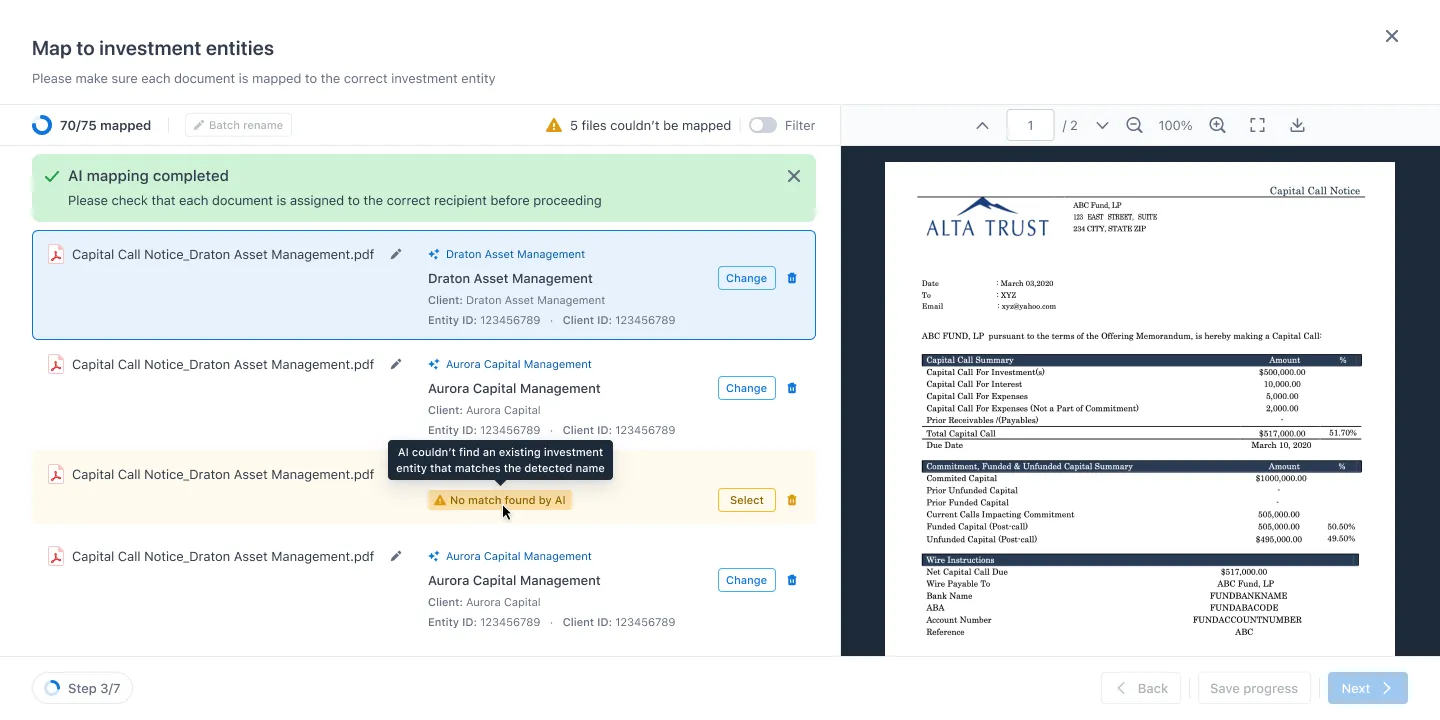
- If no match is found, a message appears: “Contacts / IEs not found.” Use the dropdown to manually assign the recipient.
- Once mapping is complete, you may optionally rename individual documents / rename in bulk documents using variable tags for standardization.
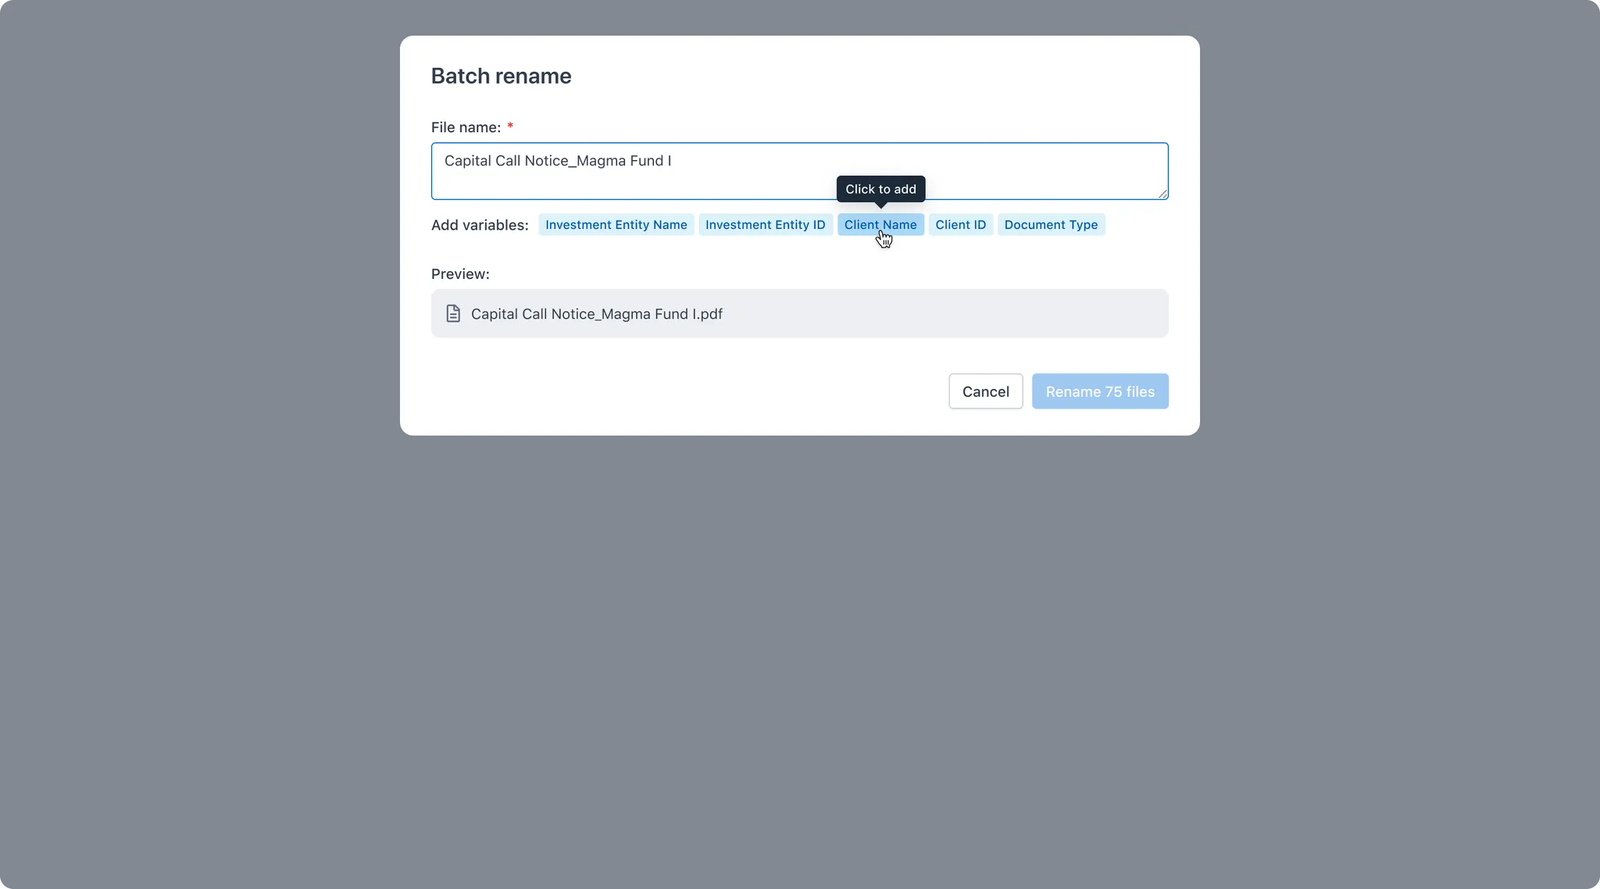
Notes: When you choose an IE, you’re giving all of its current and future contacts access to the shared documents.
Option B: Share with Investment Entities within Fund Legal Entities
Use this flow when documents relate to specific funds and must follow the fund’s legal structure.
You’ll begin by selecting one or more fund legal entities (FLEs).
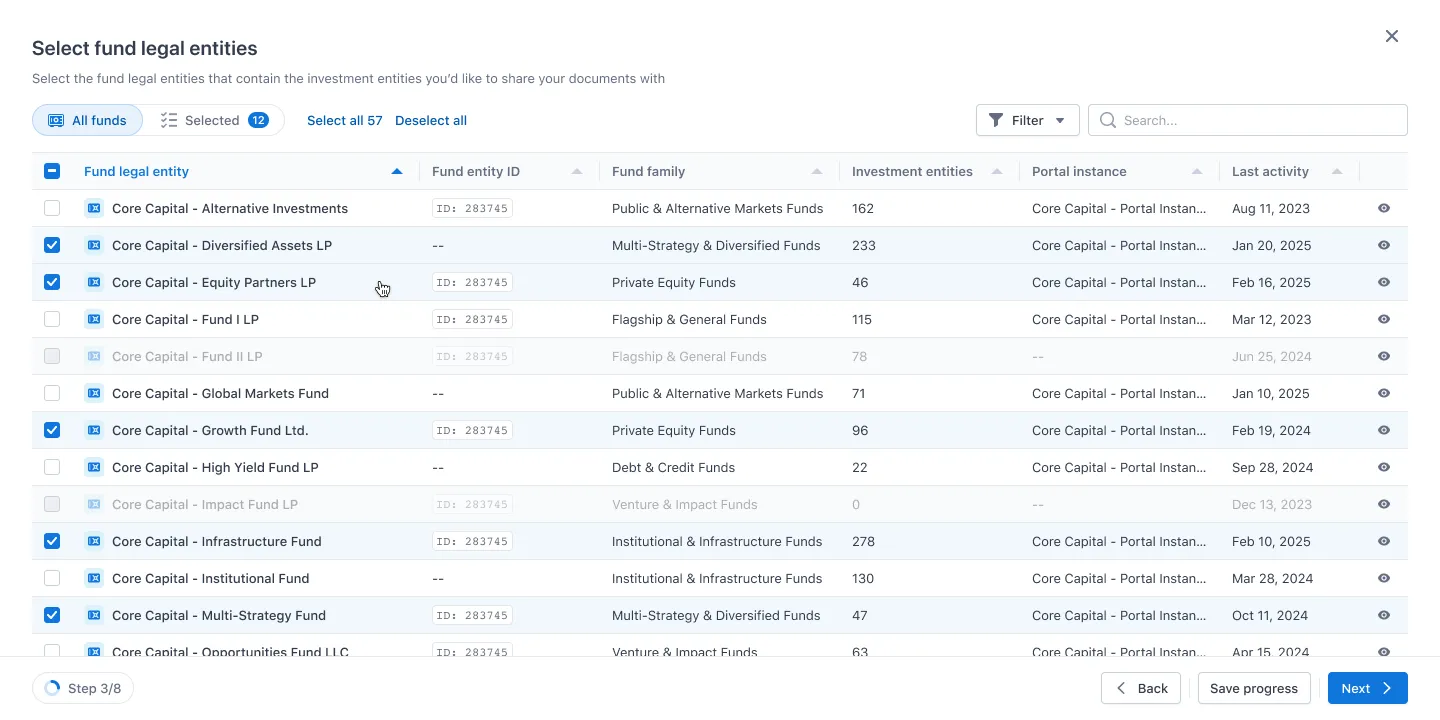
Once you’ve chosen the relevant FLEs, the system will pull in all IEs associated with your selected FLEs, then perform the same AI-based mapping logic as in Flow A.
What makes this flow particularly powerful is the additional step that allows you to refine contact access by communication type.
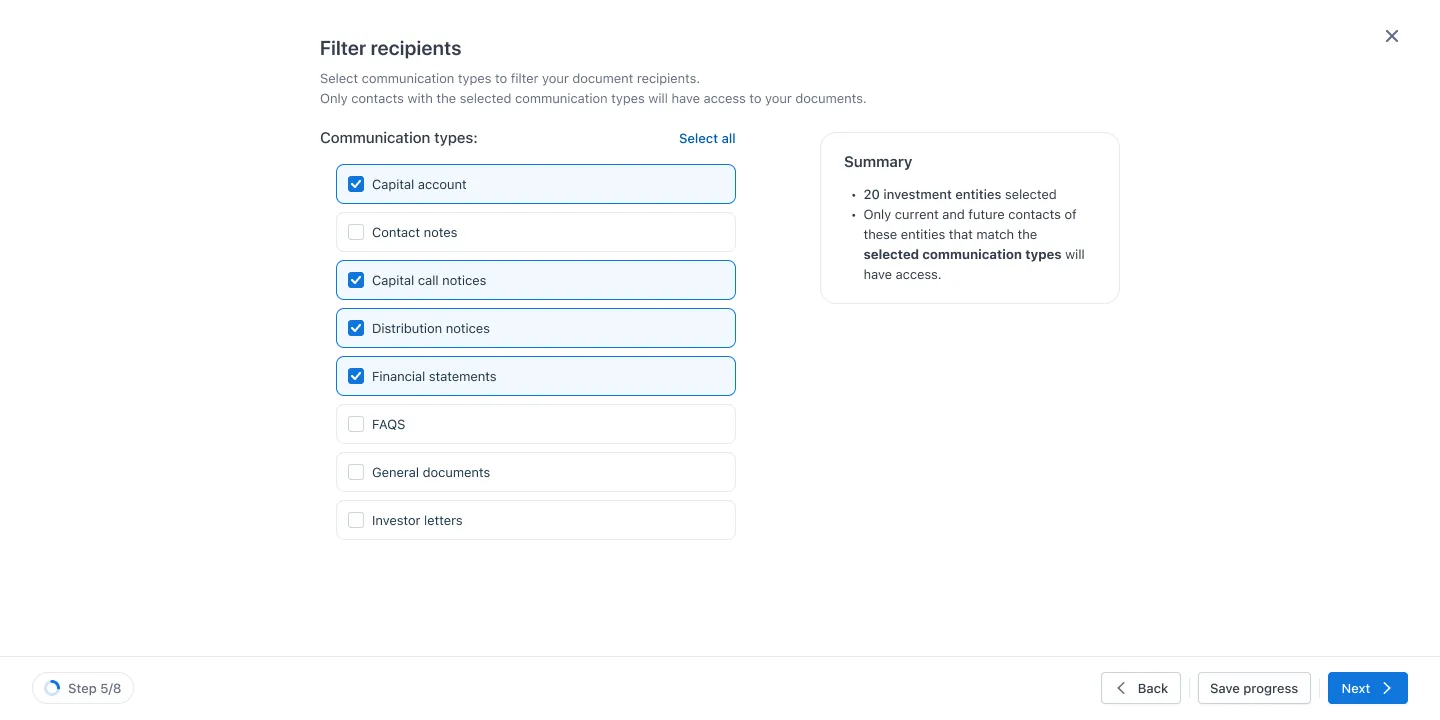
This helps ensure your documents are distributed with high precision, stick to the fund structure, and are supported by both entity-level and contact-level controls.
Notes: When you select a communication type, all current and future contacts matching your selection will receive access to the documents.
Step 4: Prepare message
Here, you’ll craft the email that goes out with your document share. You will need to fill in the Subject, Message, and the Call-to-action to proceed
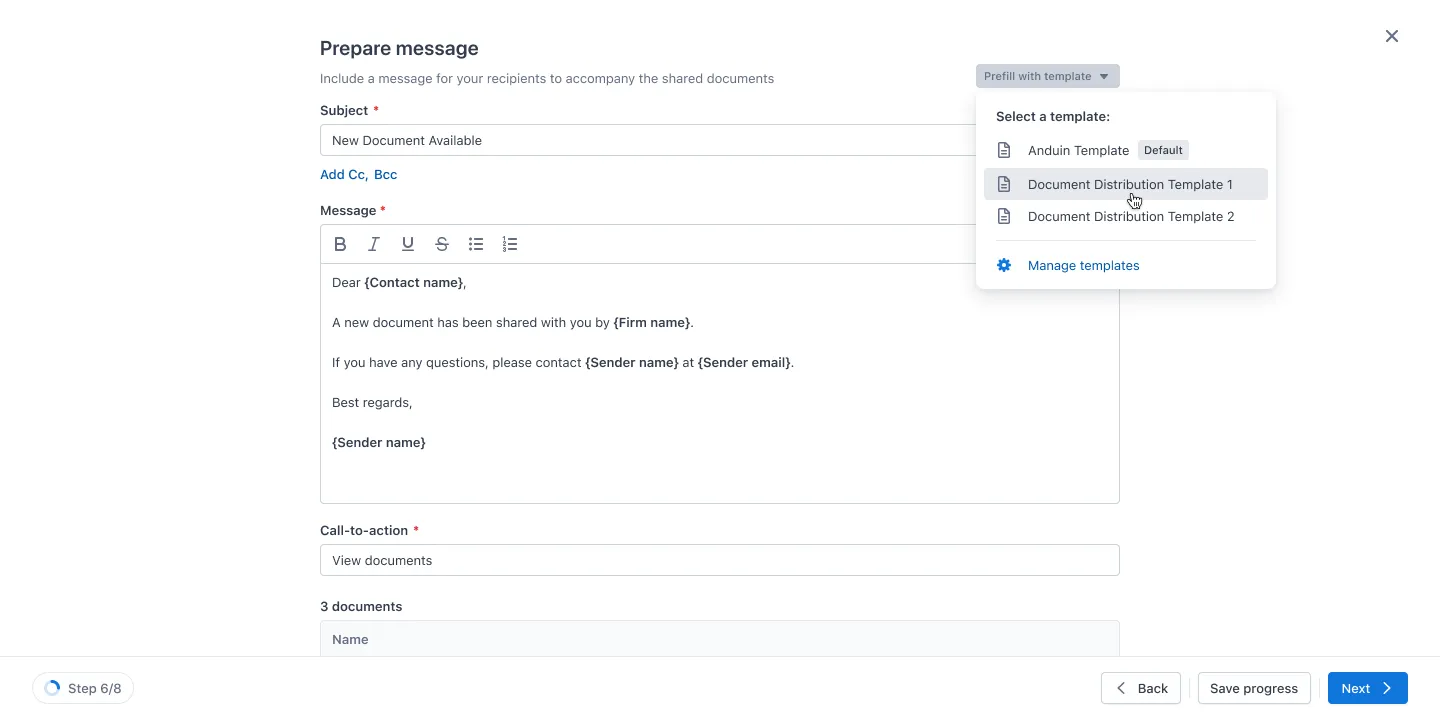
However, by default, the “Anduin template” for document distribution is used for prefill, but you can choose a different one if needed. A full list of the files you’re sharing will be shown at the bottom of this step so you can double-check if necessary.
Step 5: Review contacts
In this step, review the full document-to-recipient mapping. Each row can be expanded to show the list of contacts linked to each investment entity who is entitled to have permission.
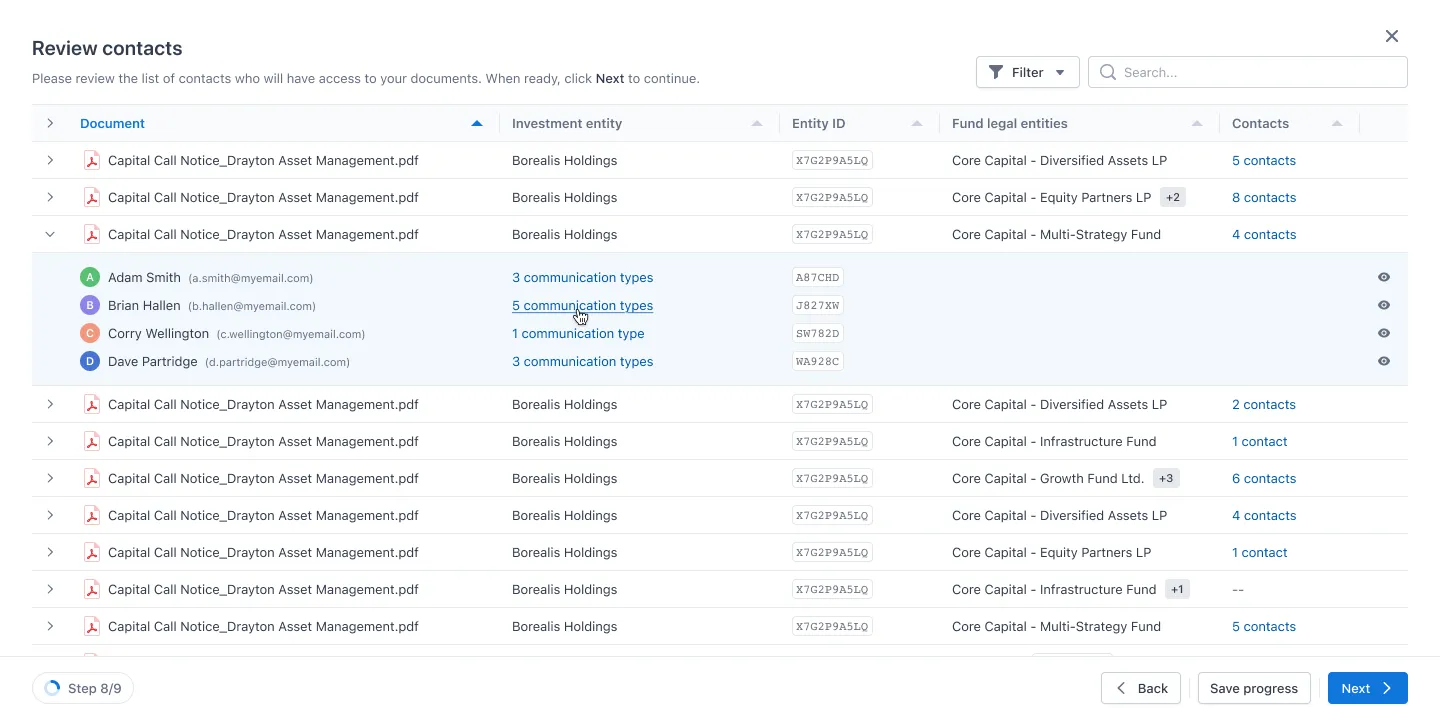
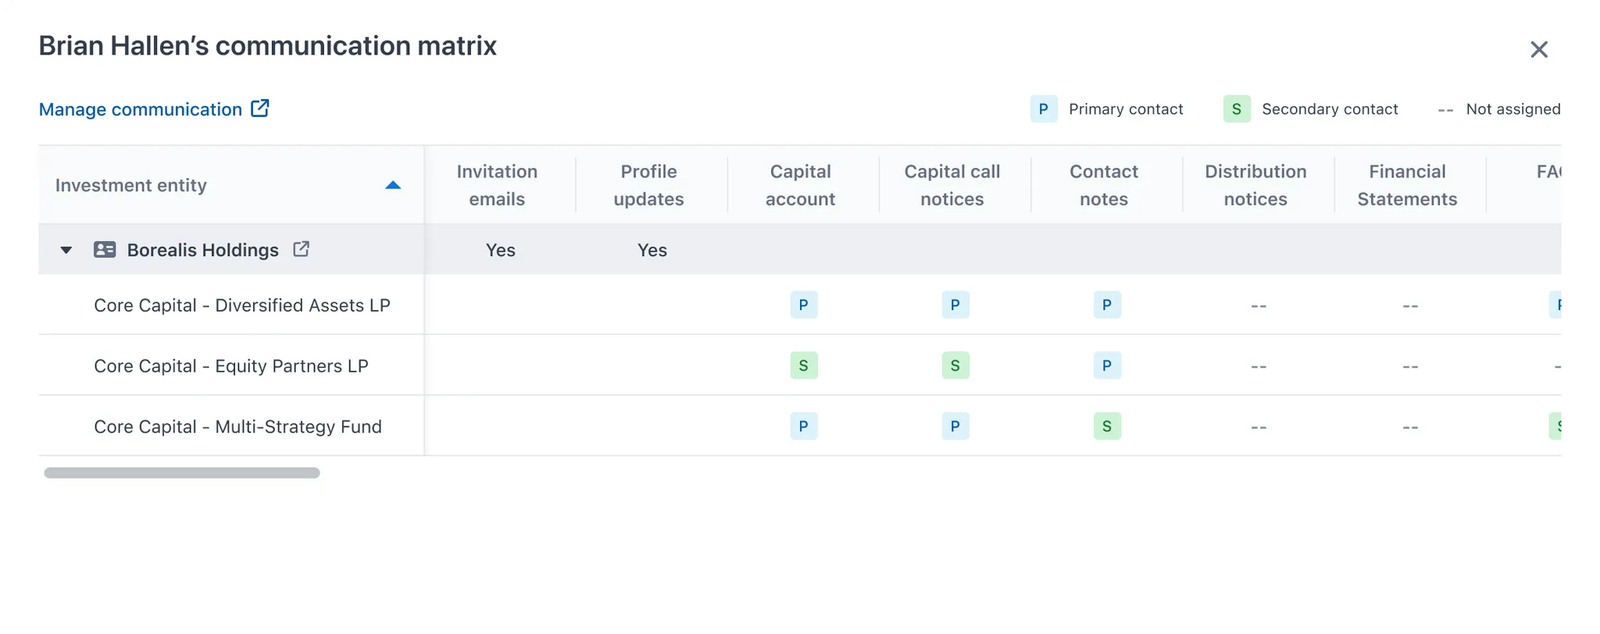
For each contact, the assigned communication type will also be visible. Use the "View communication types" option to open the contact matrix, which shows how each contact is connected to entities and the roles they play.
Step 6: Sharing settings
Before sending, you can adjust how and when the documents are delivered.
- By default, files will be shared right away, but you can schedule them to go out later if needed.
- Notifications can also be sent immediately or turned off completely.
- You can also choose whether recipients can download the files.
– If downloads are allowed, you’ll have the option to attach the documents directly in the notification email.
- There’s also a watermarking option to make your documents even more secure. By default, it uses your firm name, but you can change the text, pick a color, set transparency, and adjust the layout if needed
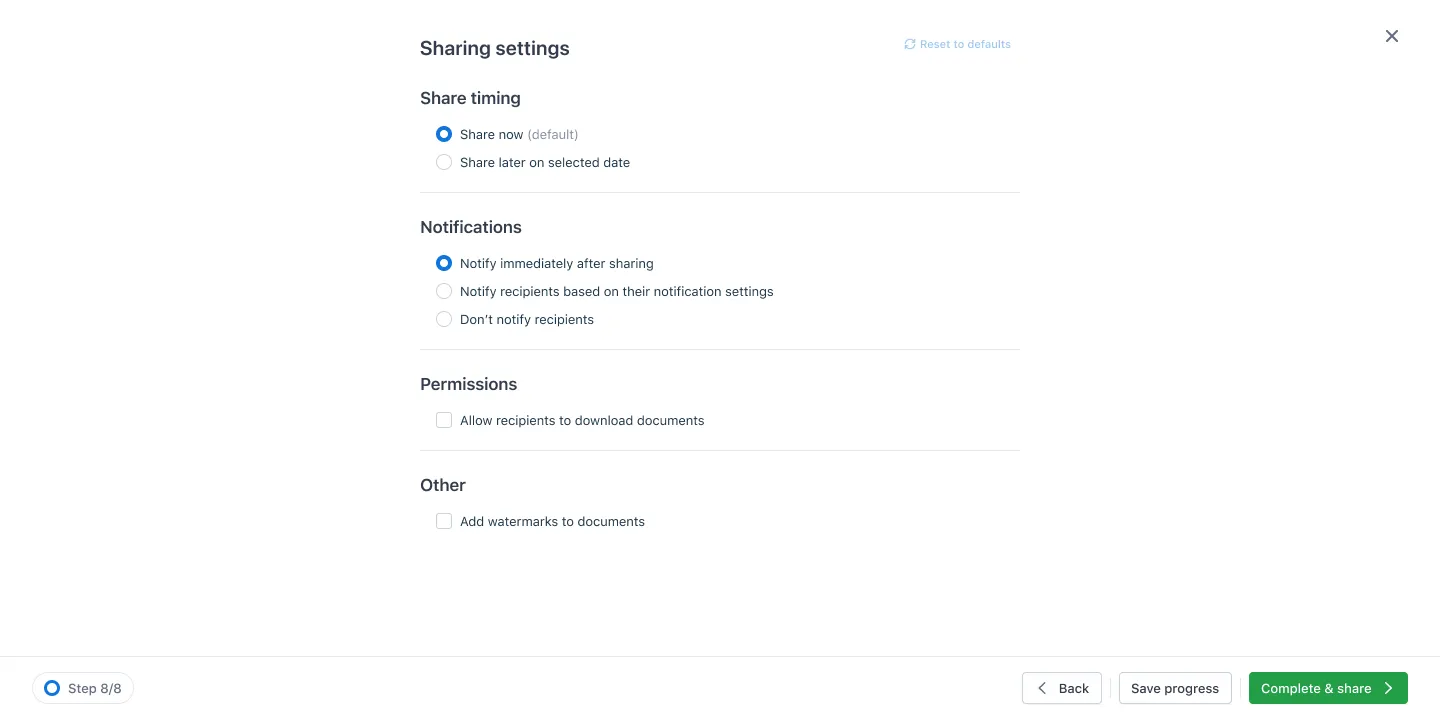
Once everything looks good, hit Complete & share to send out the documents to your selected recipients. That’s it!