

Manage individual permissions for data room participants
Who this is for: Data Room Admins (GPs, IR leads) managing participant access alongside permission groups. What you’ll do: View where each permission comes
Who this is for: Data Room Admins (GPs, IR leads) managing participant access alongside permission groups.
What you’ll do: View where each permission comes from, set permissions directly on individual participants, and manage how individual permissions interact with group membership changes.
How long: Under 2 minutes per participant; combined permissions are recomputed automatically.
When to use this
Use individual permissions when you need to:
- Grant one participant slightly more (or different) access than the rest of their group, without changing the group for everyone else.
- Give a participant access who doesn’t belong to any group.
- Preserve a participant’s custom access when adding them to a group or deleting a group they belonged to.
If every member of a group needs the same access, keep editing the group’s permissions — that’s still the fastest path.
Before you start
A few things to know up front:
- You need the admin role on the data room to edit any participant’s permissions.
- A participant can now belong to one or more permission groups and have individual permissions on top.
- Their combined access for every file is the highest level granted from any source (group or individual).
- The Role column on the All Users table reflects the highest combined role across all sources.
The three permission sources
| Source | What it is | Where you edit it |
|---|---|---|
| Group | Permissions inherited from any permission groups the participant belongs to | The group’s permission settings |
| Individual | Permissions assigned directly to this one participant | The participant’s Individual tab |
| Combined | The combined result — the highest level from group and individual, per file | Read-only (computed automatically) |
Example of highest-wins: If a participant has View on a file through their group and Edit through their individual permissions, their combined access is Edit.
How to view a participant’s permission sources
The Permission Detail View is a full-screen view with three tabs that shows you exactly where each permission comes from.
Step 1 — Open the participant’s row
- Open All Users in your data room.
- On the participant’s row, click the ⋯ menu.
- Click Edit permissions.
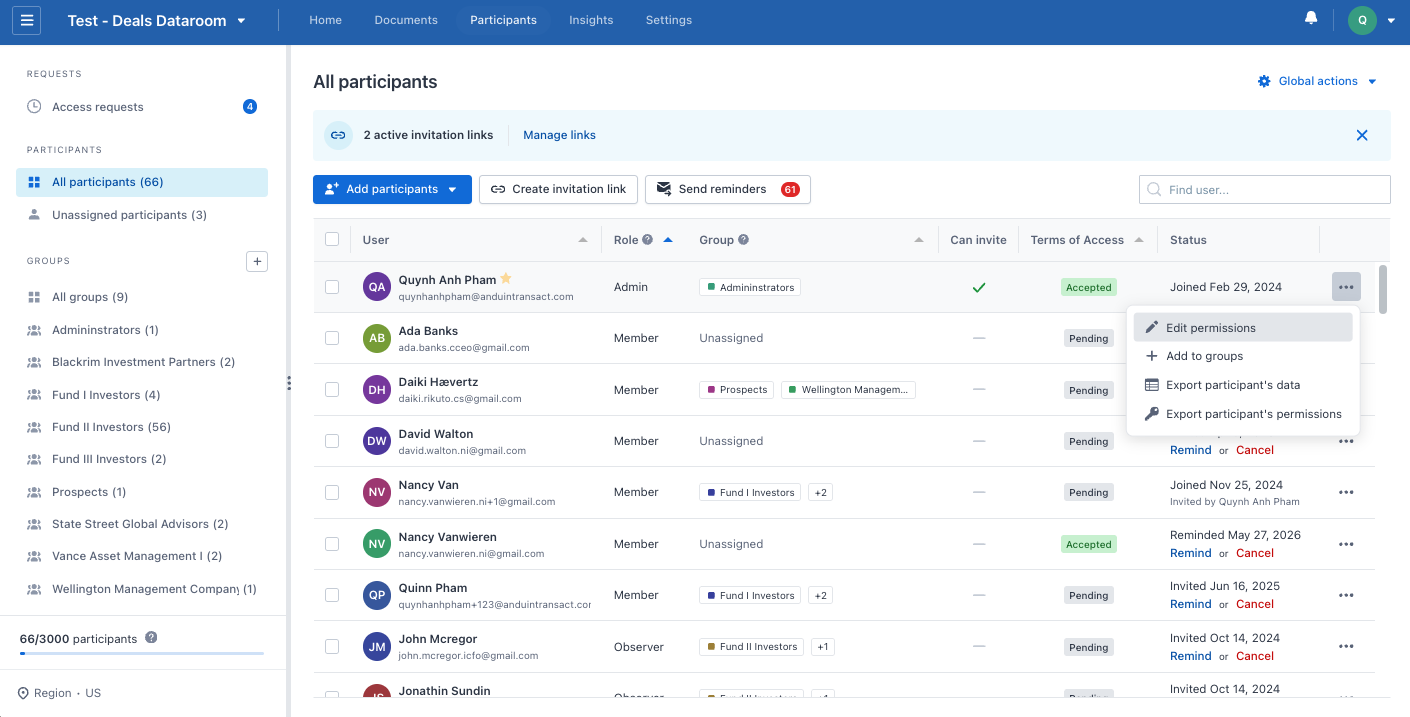
Step 2 — Read the Combined tab
The view opens on the Combined tab by default. It’s read-only and shows the combined access the participant actually has, per file.
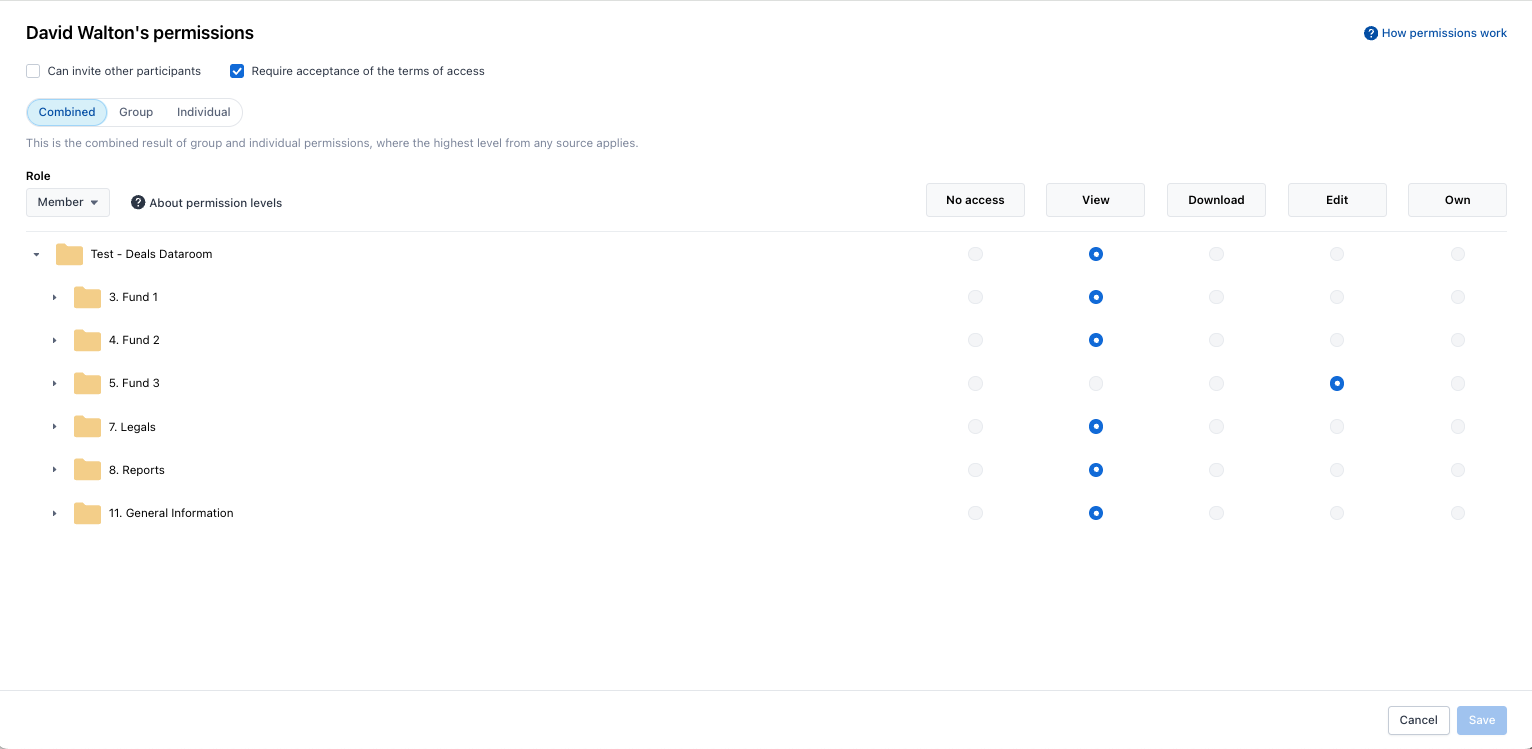
Step 3 — Check the Group tab
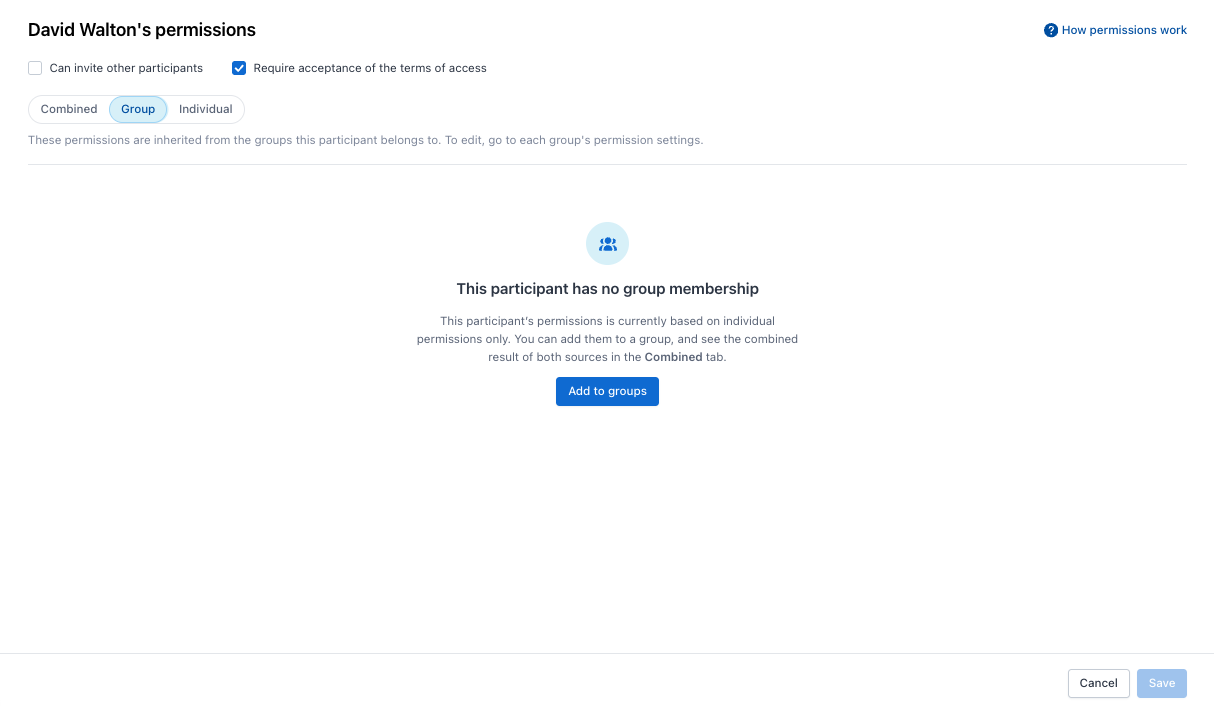
Click the Group tab to see what the participant inherits from their groups. The tab is read-only, but the group pills are clickable — click any pill to jump to that group’s permission settings.
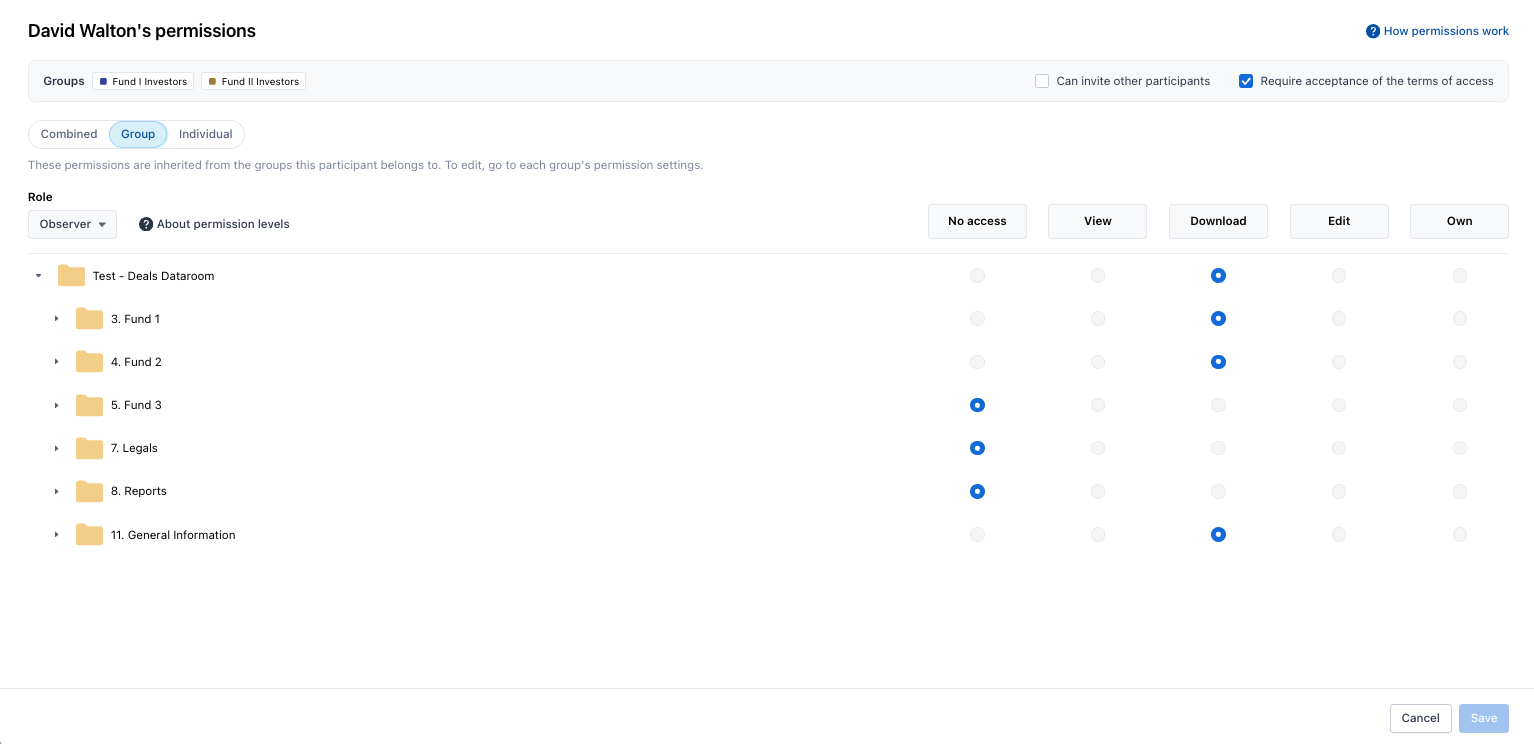
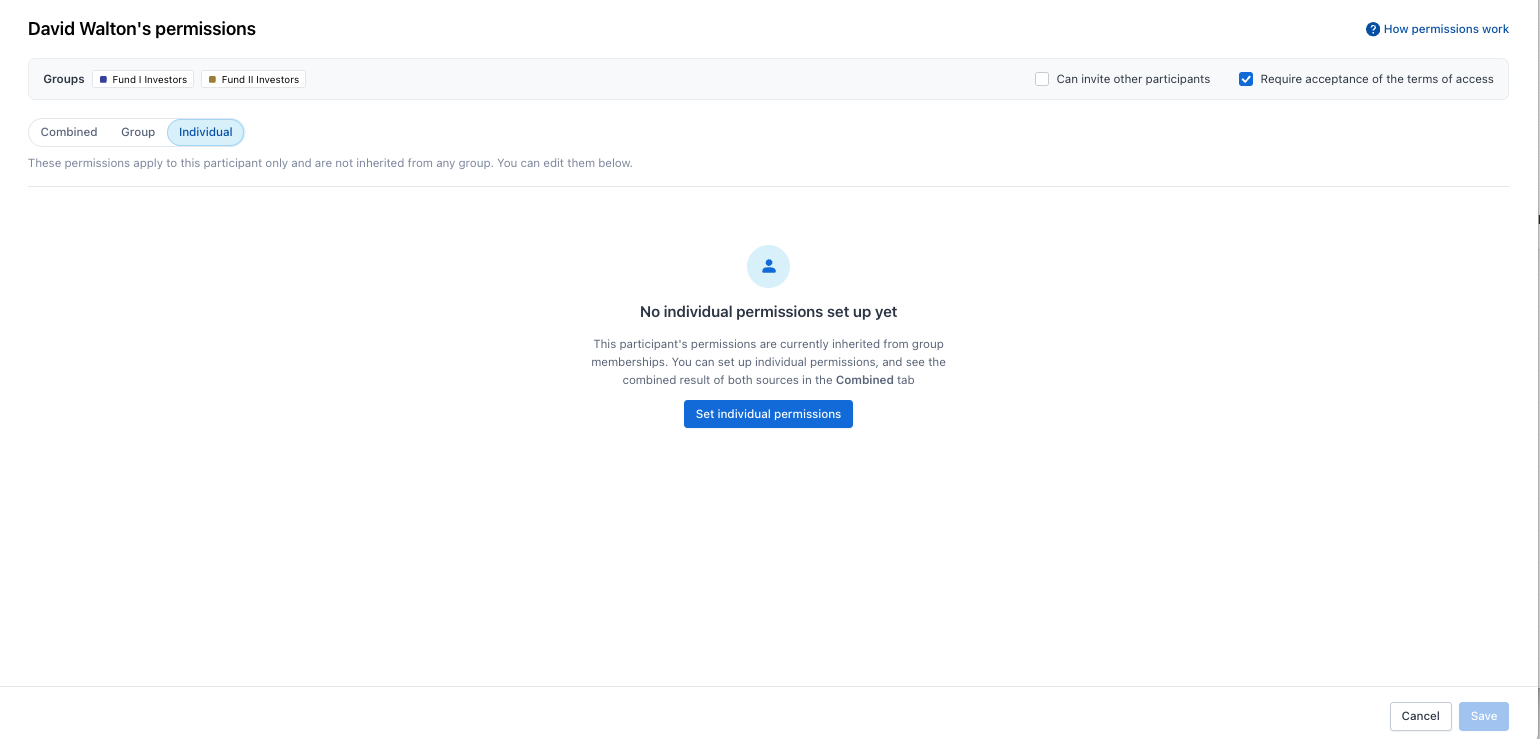
Step 4 — Check the Individual tab
Click the Individual tab to see what’s been set directly on this participant. This tab is editable.
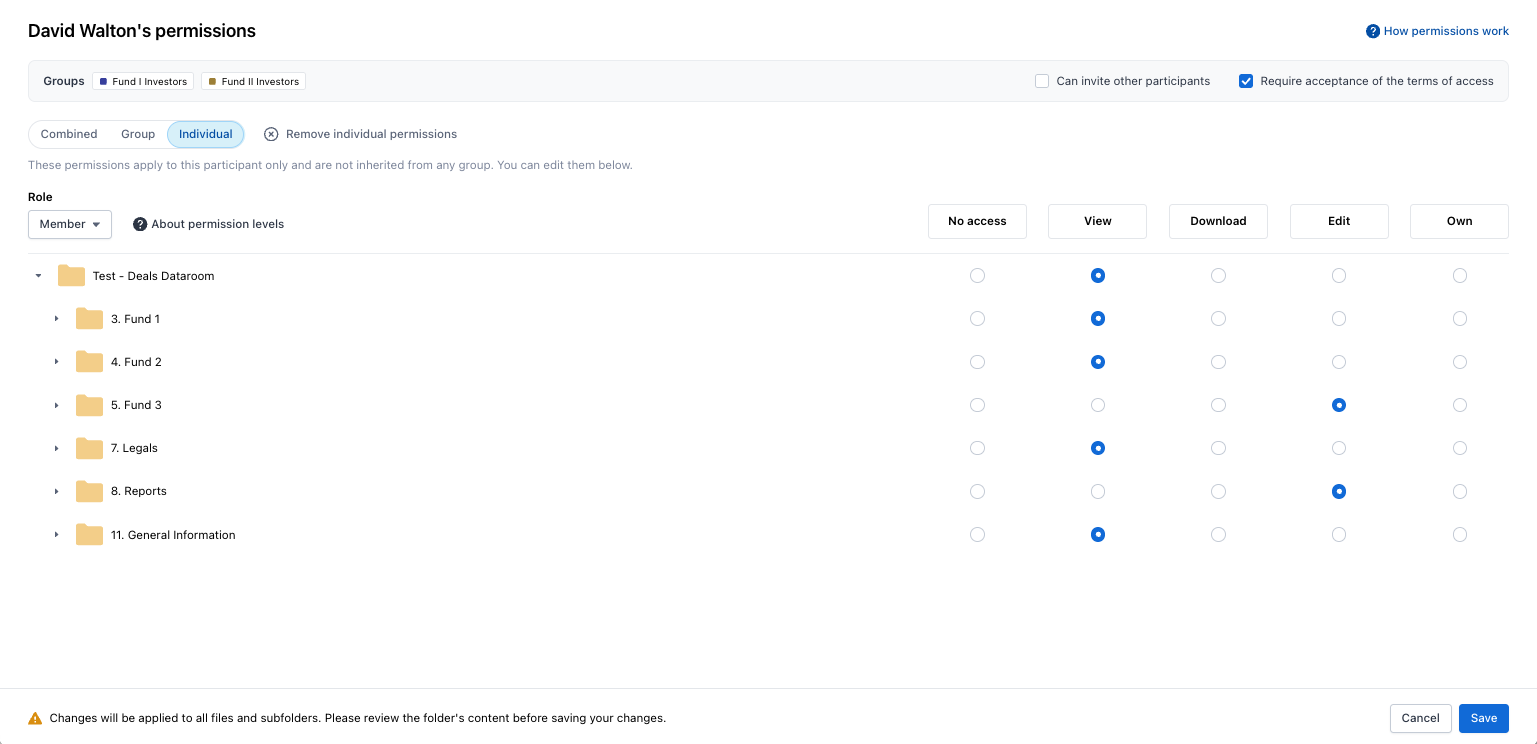
💡 Pro tip: The Role column on All Users reflects the combined role — the highest across all sources. If a participant looks like they have more access than their group should give them, check the Individual tab first.
How to set individual permissions for someone in a group
Use this when a participant should have extra access beyond what their group gives them — without changing the group for everyone else.
Step 1 — Open the Individual tab
- From the participant’s Permission Detail View, click the Individual tab.
- Click Set individual permissions.
Step 2 — Adjust the prefilled grid
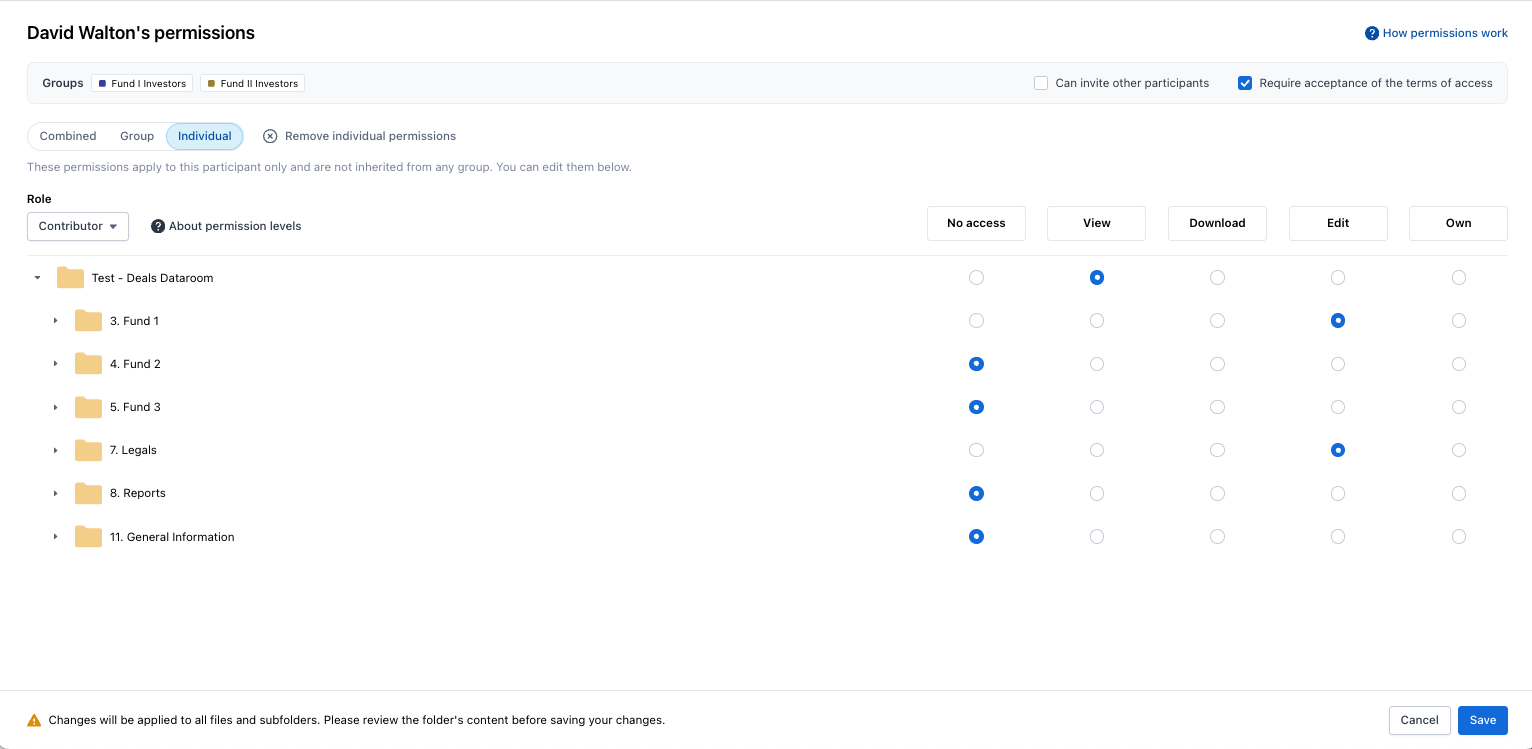
The grid prefills with the participant’s current group permissions as a starting baseline, so you only need to change the rows that should differ.
- Adjust the Role if needed.
- Adjust individual file-level permissions row by row.
- Review the warning banner — changes to a folder apply to all files and subfolders inside it.
Step 3 — Save
Click Save. The group’s permissions are untouched. Combined access is recomputed automatically as the highest of group and individual, per file.

Remove individual permissions
On the Individual tab, click ⊗ Remove individual permissions in the tab bar to clear all individual permissions and revert to group-based access only.

The Remove button is hidden if the participant has no group memberships — removing their only access source isn’t allowed from this view.
How to add participants (with individual permissions) to a group
When you add someone who already has individual permissions to a group, you now choose what happens to those individual permissions.
- On All Users, select one or more participants.
- From the ⋯ menu, click Add to groups.
- In the Add to group modal, decide:
– Keep participant’s individual permissions (checked by default) — individual permissions are preserved and combined with the new group permissions. – Unchecked — individual permissions are discarded; the participant gets group permissions only.
- Pick the target group(s) and click Next: Review changes.
- Review each participant’s resulting group memberships. Click the 👁 icon on any row to preview their resulting permissions.
- Click Update group membership to confirm.
💡 Pro tip: If you uncheck Keep participant’s individual permissions and later change your mind, you can re-add individual permissions through the Individual tab — but the previous values won’t be restored automatically.
How to remove participants from a group
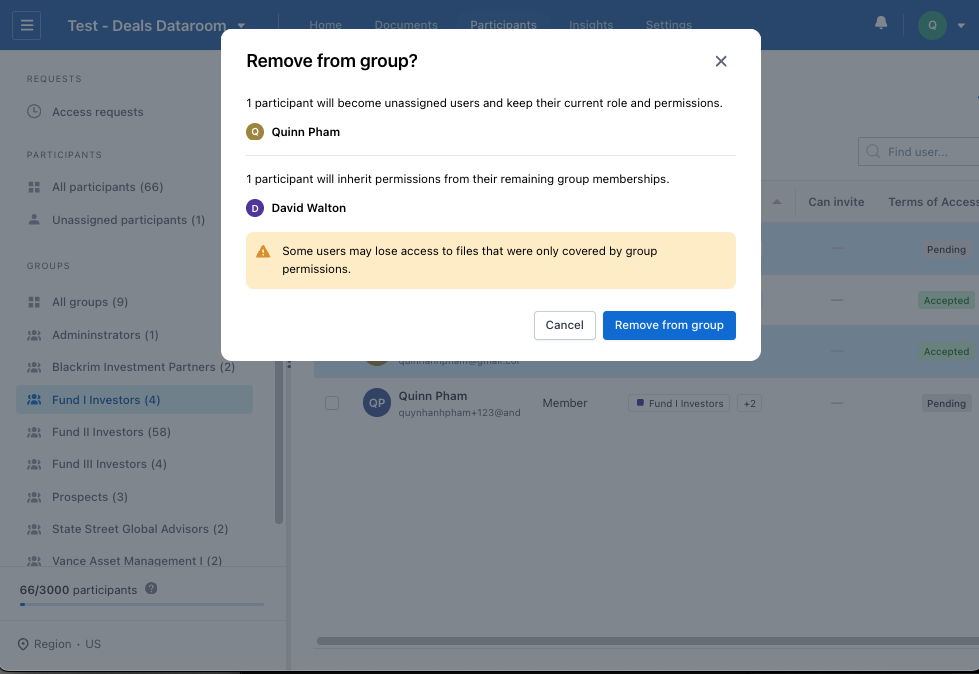
The Remove from group confirmation spells out three possible outcomes for the participants being removed. The modal shows each outcome with the affected participant count so you can review before confirming.
| Member state | Outcome |
|---|---|
| Still in other groups | Becomes unassigned from this group but keeps current role and permissions from remaining groups. No combined change. |
| No other groups, no individual permissions | Inherits the permissions from the last group as their new individual permissions. No loss of access. |
| Has individual permissions | Keeps individual permissions only. Role and access may change because group permissions will no longer apply. |
How to delete a group
When you delete a permission group with Keep participants in the data room selected, here’s what happens to each member:
| Member state | Outcome |
|---|---|
| Belongs to other groups | Keeps access from remaining groups. Individual permissions (if any) are also kept. No combined change. |
| Only in this group, has individual permissions | Group permissions removed. Keeps individual permissions only. Role and access may change. |
| Only in this group, no individual permissions | Group permissions are transferred to individual permissions. Role and access unchanged. |
The Delete group dialog copy reflects all three outcomes — read it before confirming.
Edge cases and guardrails
Sole-admin protection
If a participant is the only Admin in the data room and their Admin role comes from individual permissions:
- The Role dropdown on the Individual tab is disabled.
- The ⊗ Remove individual permissions button is disabled.
- Tooltip on both: "This participant is the only admin in this data room. Assign another admin before changing their role."
This mirrors the existing sole-admin guard in the group demotion flow.
Admin role auto-fills permissions
Whenever you set a participant’s Role to Admin on the Individual tab:
- Can invite is forced on and disabled.
- All file-level permissions are forced to Own and disabled.
This matches Anduin’s standing rule that Admins always have Own permission and can always invite other participants.
Partial Admin conflict on Add to Group
If one of the participants you’re adding is the only Admin in the data room and isn’t in any group, the Review changes screen shows an amber warning. That participant is excluded from the add operation; the rest proceed.
If all selected participants are sole Admins with no fallback, the Update group membership CTA is disabled. Go back, enable Keep participant’s individual permissions, or remove the conflicting users from your selection.
Common errors and what they mean
| What you’ll see | What it means | What to do |
|---|---|---|
| ⊗ Remove individual permissions button is hidden | The participant has no group memberships, so individual permissions are their only access source. | Add them to a group first, then remove individual permissions. |
| Role dropdown disabled with tooltip about "only admin" | This participant is the sole Admin in the data room. | Promote another participant to Admin first, then change this one’s role. |
| Amber warning on Add to Group review screen | One of the selected participants is the only Admin and isn’t in any group — they’d lose Admin access. | That participant is excluded automatically; the rest are added. Resolve their Admin status separately. |
| Update group membership CTA disabled | All selected participants are sole Admins with no fallback. | Go back and enable Keep participant’s individual permissions, or remove the conflicting users from your selection. |
| Permission radios are greyed out on the file Participants tab | The participant is a group member — their permissions aren’t editable from the file view. | Open the participant’s Permission Detail View and edit on the Individual tab. |